
Red Hat Satellite is a powerful content management and provisioning tool that you can add to any Red Hat Enterprise Linux (RHEL) subscription with the addition of a Satellite subscription. With Red Hat Satellite you can curate specific content across multiple lifecycle environments throughout your entire RHEL environment whether it is on-prem, in the cloud or hybrid. In fact you can use Red Hat Satellite with your market-place instances of RHEL.
In this multi-part tutorial we will cover how to provision RHEL VMs to a vSphere environment from Red Hat Satellite. We will focus on provisioning RHEL 8.3 VMs in one lifecycle environment, but you can easily adapt what you learn here to provision other RHEL versions.
In part 1, I'm documenting the steps for a simple "lab" install of Satellite 6.9. The purpose of this setup is to give you a quick hands-on experience with Satellite. The lab infrastructure is deployed to a small vSphere 6.7 lab environment with three EXSi servers that have internet access for the installation.
For this lab, Satellite will provide DNS and DHCP services for the network that is hosting the vSphere environment. Note: Satellite can be configured to work with ISC compliant DNS and DHCP services. Also, in a production environment you would also want to configure Satellite to interact with your directory/security services.
I would recommend creating a local time server and configuring all systems in this lab environment to use the same local time source.
Pre-Reqs
Create a VM for Satellite and install RHEL 7.9. The VM was sized with 4 vCPUS, 20GB RAM and 400GB "local" drive. Note: For this example I have enabled Simple Content Access (SCA) on the Red Hat Customer portal and do not need to attach a subscription to the RHEL or Satellite repositories. After you have created and started the RHEL 7.9 VM, we will ssh to the RHEL VM and work from the command line.
For this lab environment I chose sat01.example.com for the hostname of the server hosting Satellite.
You will need a DNS server running to support the installation of Satellite. After installing Satellite, we will use the DNS service on Satellite.
Check hostname and local DNS resolution. Use dig to test forward and reverse lookup of the server hosting Satellite. If the Satellite hostname is not available from DNS, the initial installation will fail.
# ping -c3 localhost
# ping -c3 `hostname -f`
# dig sat01.example.com +short
# dig -x 10.1.10.253 +short
Register Satellite Server to Red Hat Subscription Management service.
# sudo subscription-manager register --org=<org id> --activationkey=<activation key>
You can verify the registration with the following command.
# sudo subscription-manager status
Configure and enable repositories
With SCA, we still need to enable relevant repositories for our RHEL instances. Following steps will walk you through enabling repos.
Disable all repos.
# sudo subscription-manager repos --disable "*"
Enable the following repositories.
# sudo subscription-manager repos --enable=rhel-7-server-rpms \
--enable=rhel-7-server-satellite-6.9-rpms \
--enable=rhel-7-server-satellite-maintenance-6-rpms \
--enable=rhel-server-rhscl-7-rpms \
--enable=rhel-7-server-ansible-2.9-rpms
Clear any meta-data.
# sudo yum clean all
Verify that repositories are enabled.
# sudo yum repolist enabled
# sudo subscription-manager repos --list-enabled
Update the RHEL 7.9 instance and finish server setup
Install all patches on your RHEL 7.9 instance.
# sudo yum -y update
I would also recommend registering this server to Insights.
# yum -y install insights-client
# insights-client --enable
Install SOS package on base OS for initial systems analysis in case you need to collect problem determination for any system related issues.
# sudo yum install sos
Update the firewall rules for Satellite.
# sudo firewall-cmd \
--add-port="80/tcp" --add-port="443/tcp" \
--add-port="5647/tcp" --add-port="8000/tcp" \
--add-port="8140/tcp" --add-port="9090/tcp" \
--add-port="53/udp" --add-port="53/tcp" \
--add-port="67/udp" --add-port="69/udp" \
--add-port="5000/tcp"
Make the firewall changes permanent
# sudo firewall-cmd --runtime-to-permanent
Verify the firewall changes
# sudo firewall-cmd --list-all
Setup system Clock with chrony. I have a local time server that my systems use for synching time. Type the following command to check the the time synch status.
# chronyc sources -v
Satellite Installation
Install Satellite Server packages and then install Satellite.
# sudo yum install satellite
We will run satellite-installer to create a userid and password along with the information to configure the DNS, DHCP and TFTP services. This will take several minutes to complete.
# satellite-installer --scenario satellite \
--foreman-initial-admin-username admin \
--foreman-initial-admin-password Passw0rd! \
--foreman-proxy-dhcp true \
--foreman-proxy-dhcp-managed true \
--foreman-proxy-dhcp-gateway "10.1.10.1" \
--foreman-proxy-dhcp-interface "ens192" \
--foreman-proxy-dhcp-nameservers "10.1.10.254" \
--foreman-proxy-dhcp-range "10.1.10.149 10.1.10.199" \
--foreman-proxy-dhcp-server "10.1.10.254" \
--foreman-proxy-dns true \
--foreman-proxy-dns-managed true \
--foreman-proxy-dns-forwarders "10.1.1.254" \
--foreman-proxy-dns-interface "ens192" \
--foreman-proxy-dns-reverse "10.1.10.in-addr.arpa" \
--foreman-proxy-dns-server "127.0.0.1" \
--foreman-proxy-dns-zone "example.com" \
--foreman-proxy-tftp true \
--foreman-proxy-tftp-managed true
If the installation is progressing successfully, your screen output will look similar to the following example.
2021-11-03 15:48:05 [NOTICE] [root] Loading default values from puppet modules...
2021-11-03 15:48:08 [NOTICE] [root] ... finished
2021-11-03 15:48:09 [NOTICE] [root] Running validation checks
2021-11-03 15:50:50 [NOTICE] [configure] Starting system configuration.
  The total number of configuration tasks may increase during the run.
  Observe logs or specify --verbose-log-level to see individual configuration tasks.
2021-11-03 15:51:01 [NOTICE] [configure] 100 out of 2460 done.
2021-11-03 15:51:01 [NOTICE] [configure] 200 out of 2460 done.
2021-11-03 15:51:22 [NOTICE] [configure] 300 out of 2460 done.
2021-11-03 15:52:12 [NOTICE] [configure] 400 out of 2460 done.
...
2021-11-03 16:06:20 [NOTICE] [configure] 3000 out of 3300 done.
2021-11-03 16:06:31 [NOTICE] [configure] 3100 out of 3300 done.
2021-11-03 16:08:06 [NOTICE] [configure] 3200 out of 3300 done.
2021-11-03 16:08:31 [NOTICE] [configure] System configuration has finished.
  Success!
  * Satellite is running at https://sat01.example.com
      Initial credentials are admin / Passw0rd!

  * To install an additional Capsule on separate machine continue by running:

      capsule-certs-generate --foreman-proxy-fqdn "$CAPSULE" --certs-tar "/root/$CAPSULE-certs.tar"
  * Capsule is running at https://sat01.example.com:9090

  The full log is at /var/log/foreman-installer/satellite.log
Package versions are being locked.
Remember that early I said that we will use Satellite for DNS services. After completing the install above, I change the IP address of my server hosting Satellite and rerun the satellite-installer to update the ip address for the --foreman-proxy-dns-server option.
# satellite-installer --scenario satellite \
--foreman-proxy-dns-server "10.1.10.254"
Use the following command to find the name of the Satellite server you just updated.
# hammer proxy list
See which services are configured on your Satellite server. We want to verify that the DNS and DHCP services are enabled.
# hammer proxy info --name sat01.example.com
If services such as DNS or DHCP are not part of the output from the previous command, try refreshing the Satellite features.
# hammer proxy refresh-features --name sat01.example.com
Log in to the Satellite console
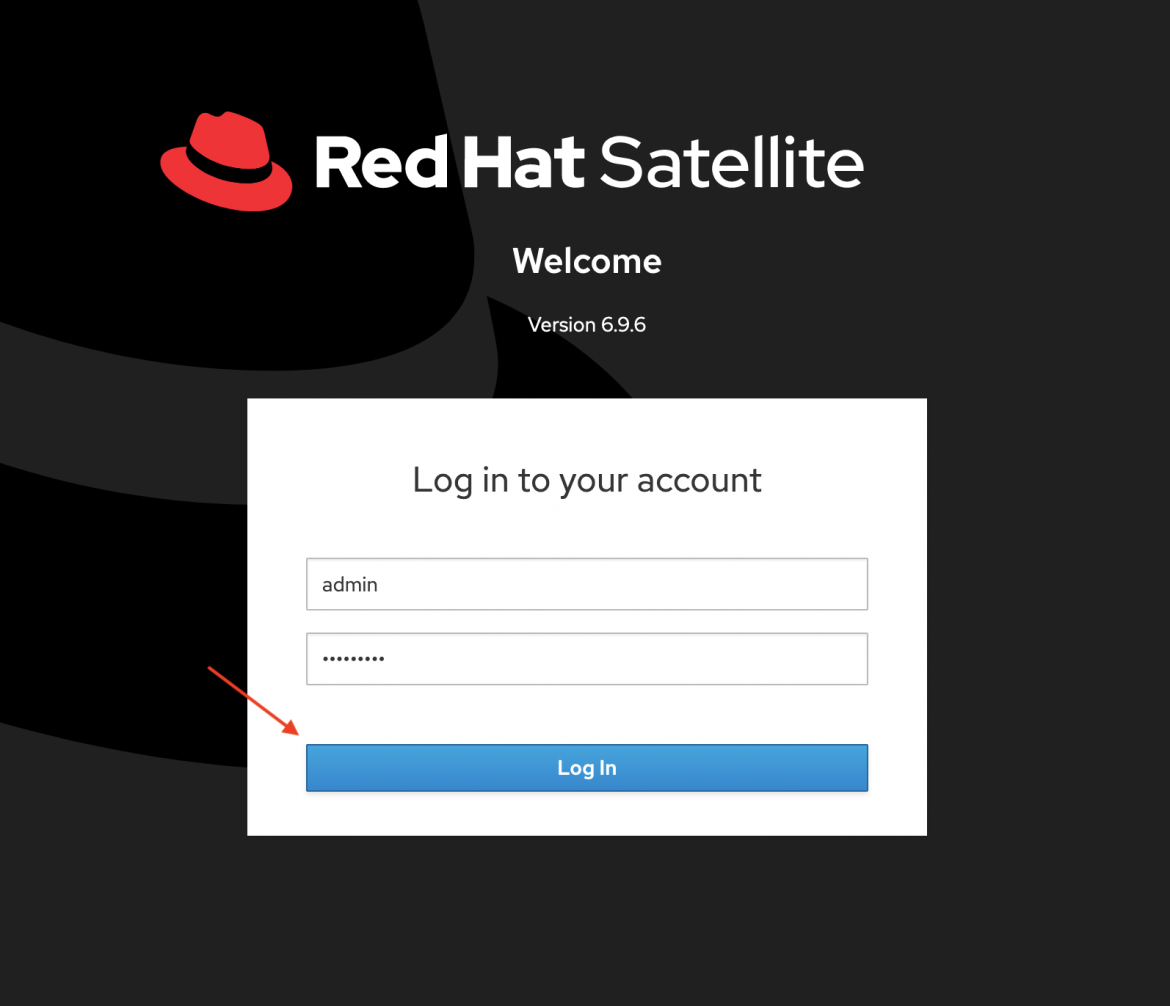
We can now launch and login to the Satellite console by entering http://sat01.example.com for the Satellite url. Satellite will redirect the browser to Satellite's secure login page. You will need to accept Satellite's certificate for your browser.
For this example we are using a local login. For production work you will want to integrate your directory service with Satellite. Enter the user id and password and click the Login button.
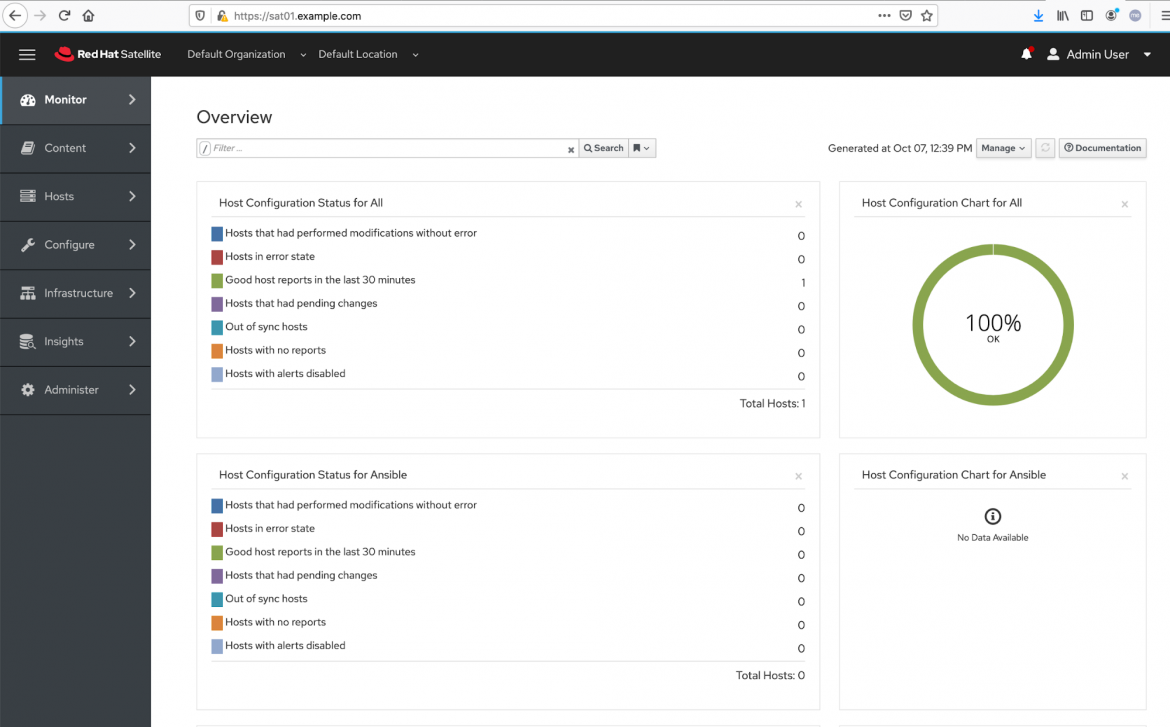
You are now at the Satellite home screen.
In our next post we'll cover how to create and use a Satellite manifest. Stay tuned!
References
Provisioning RHEL virtual machines to vSphere from Red Hat Satellite
 In this multi-part tutorial, we cover how to provision Red Hat Enterprise Linux (RHEL) virtual machines (VMs) to a vSphere environment from Red Hat Satellite. Missed any steps in the series? Check them out:
Sull'autore

Paul Lucas is a Chicagoland-based Red Hat Solutions Architect working with a variety of enterprise businesses. A 21 year technical sales veteran, Paul was previously a customer working at a benefits consulting firm, where he advised development teams on the use of Java and the then-emerging Java EE.
Ricerca per canale

Automazione
Le ultime novità sulla piattaforma di automazione che riguardano la tecnologia, i team e gli ambienti

Intelligenza artificiale
Aggiornamenti sulle piattaforme che consentono alle aziende di eseguire carichi di lavoro IA ovunque

Servizi cloud
Maggiori informazioni sul nostro portafoglio di servizi cloud gestiti

Sicurezza
Le ultime novità sulle nostre soluzioni per ridurre i rischi nelle tecnologie e negli ambienti

Edge computing
Aggiornamenti sulle piattaforme che semplificano l'operatività edge

Infrastruttura
Le ultime novità sulla piattaforma Linux aziendale leader a livello mondiale

Applicazioni
Approfondimenti sulle nostre soluzioni alle sfide applicative più difficili

Serie originali
Raccontiamo le interessanti storie di leader e creatori di tecnologie pensate per le aziende
Prodotti
- Red Hat Enterprise Linux
- Red Hat OpenShift
- Red Hat Ansible Automation Platform
- Servizi cloud
- Scopri tutti i prodotti
Strumenti
- Formazione e certificazioni
- Il mio account
- Risorse per sviluppatori
- Supporto clienti
- Calcola il valore delle soluzioni Red Hat
- Red Hat Ecosystem Catalog
- Trova un partner
Prova, acquista, vendi
Comunica
- Contatta l'ufficio vendite
- Contatta l'assistenza clienti
- Contatta un esperto della formazione
- Social media
Informazioni su Red Hat
Red Hat è leader mondiale nella fornitura di soluzioni open source per le aziende, tra cui Linux, Kubernetes, container e soluzioni cloud. Le nostre soluzioni open source, rese sicure per un uso aziendale, consentono di operare su più piattaforme e ambienti, dal datacenter centrale all'edge della rete.
Seleziona la tua lingua
Red Hat legal and privacy links
- Informazioni su Red Hat
- Opportunità di lavoro
- Eventi
- Sedi
- Contattaci
- Blog di Red Hat
- Diversità, equità e inclusione
- Cool Stuff Store
- Red Hat Summit