Image


Photo by Karolina Grabowska from Pexels
I grew up with two younger brothers; one is two years younger than me, and the other is five years younger. To say we were super competitive is a huge understatement. We played every sport and game imaginable growing up. If one of us got the better of the other, frequently the cry "DO-OVER!" came out. Sometimes really justifiably due to a piece of dust in the eye or a bee buzzing by at a crucial moment, but sometimes it was called just to get another chance at a result we didn't like.
In September 2021, I wrote an article about running Podman on Windows. In that article, I talked about how you had to set up Windows Subsystem for Linux (WSL) and then pay for, install, and run Fedora Remix. After that was all set up, you could install and run Podman within Fedora on Windows to your heart's content. But you had to do several steps and tweaks to make it all work.
Thanks to Jason Greene's new Podman client for Windows, released with Podman v4.1.0, it's much easier. The setup you have to do to make Podman work on a Windows machine has been greatly reduced. It is also completely free, as in no cost! Given that, I thought it was time to bring up my old battle cry one more time: "DO-OVER!" and update the article.
The Windows client is available on Podman's GitHub site, so I decided to grab it from there, install it, and do the same things I did in the first article. However, this time, I amped up the difficulty level by recording myself. Yikes! You can watch the walkthrough in the video at the end of this article, if you'd like.
I did this installation on my Windows 11 machine, and it's also supported on Windows 10. Prior versions of Windows might work, but you will be treading dangerous water.
The first thing to do is to go to the Releases page on GitHub and look for the v4.1.0 release. It is large, and there are many notes about it. If you scroll down quite a bit, you'll see an Assets line with an arrow next to it.

Click on that, and you'll see the assets, including the podman-v4.1.0.msi file.

Click on the podman-v4.1.0.msi file and download it to your machine. Click on the downloaded file and give it the OK to install when prompted. The installation should go quickly.
Side note. If you watch my video, you'll see I tried running Podman in a PowerShell window, which I opened before the installation. It failed, as PowerShell didn't know what Podman was or where it was located. Opening a new PowerShell window fixed this issue, and it was able to see the podman command right away.
Podman is now installed on your Windows machine, and it's time to run some Podman commands. These commands are not native to Windows without a bit of help. You can call podman help, and it will show you all the commands for Podman, but most of them will fail if you try to execute them now.
[ Get the free Podman Basics Cheat Sheet. ]
Before you can run Podman commands, you need to initialize a podman machine, a type of virtual machine that will give you a Linux environment on Windows. Entering the command podman machine init will get the machine ready to run.

After a minute or two of a lot of installation output, you should see it wrap up.

Although the output said to run podman machine start, I chose to run this machine as root, so I ran podman machine set --rootful before I ran podman machine start. This allows containers to run privileged operations, such as binding common system ports. In my walkthrough, I demonstrated port 8080, which is also compatible with rootless. It's easy to switch back and forth between running the podman machine in rootless or rootful mode.

The output above displays a warning about the runtime dir. There is a fix upstream, and it will be cleaned up in the next release. Until then, you can safely ignore this warning.
OK, that's it! That's all the setup and installation work that's necessary to get Podman running on Windows. To summarize the setup process, you download the podman-v4.1.0.msi file and run it, each taking just a few seconds. You then run podman machine init, which takes a couple of minutes, and then podman machine start, which takes just a few seconds. So four steps and less than five minutes elapsed time.
[ Learn about running containers with Red Hat in this free online course. ]
Now that the machine is running, all of the Podman commands are available to use. You can run a few quick checks to make sure things are working as expected.
I ran all of these commands from a PowerShell window. Unlike in previous versions of Podman, you don't need to hop into a Fedora virtual machine on Windows to run the commands. You can run them from any PowerShell, Command Prompt, or similar window, and the running podman machine will handle the commands on Windows.
First, I ran podman run ubi8-micro date. That pulled down the ubi8-micro container image, and it showed me the date.
Then I ran my favorite container image, quay.io/podman/hello. The nice thing about this image is, if it runs properly, you know your environment is ready to do pretty much anything you want in Podman.

I wanted to run the Nginx web server. If you watch my video, you'll see that this is where the demo came off the wheels a little bit.
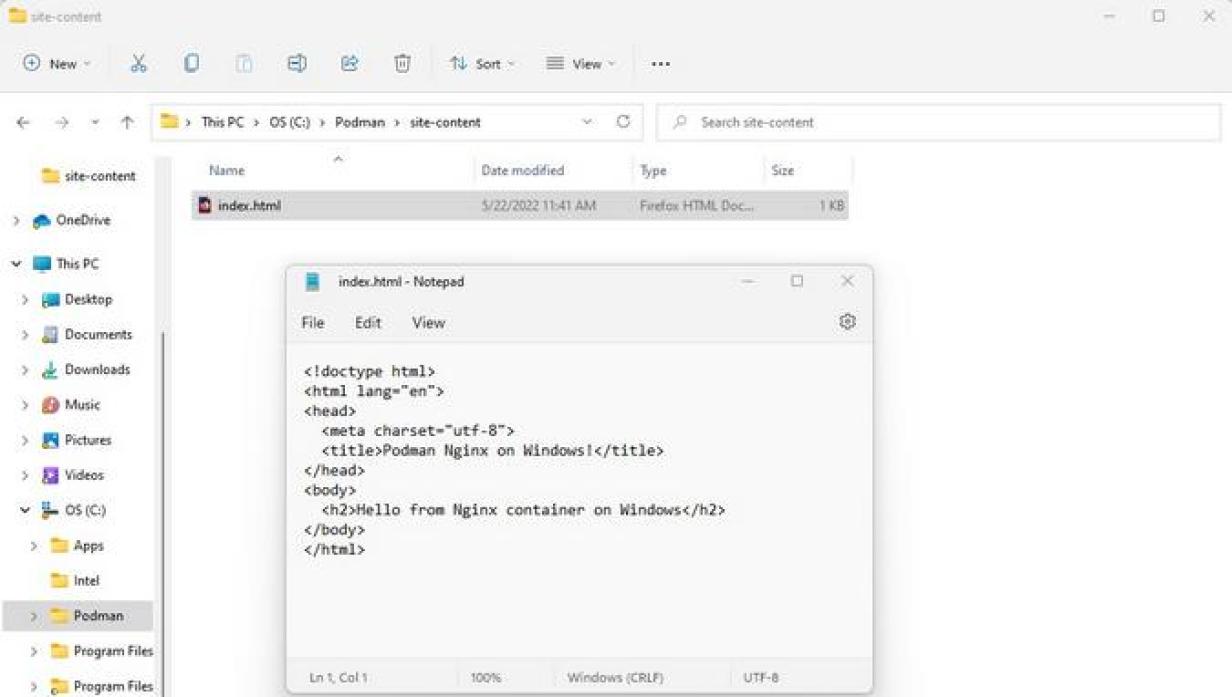
I created a directory and subdirectory on my C: drive, Podman/site-content. Then I created a text file and named it index.html, with these contents:
<!doctype html>
<html lang="en">
<head>
   <meta charset="utf-8">
   <title>Podman Nginx on Windows!</title>
</head>
<body>
   <h2>Hello from Nginx container on Windows</h2>
</body>
</html>
I ran this Podman command to start the Nginx webserver:
podman run -it --rm -d -p 8080:80 –-name web -v /mnt/Podman/site-content:/usr/share/nginx/html docker.io/libary/nginx
The command runs the container in detached mode and names it web. It also volume-mounts /mnt/Podman/site-content into the container's /user/share/nginx/html directory. This causes the webserver to use this simple index.html file as its home page.
However, when I did that, I got a permission-denied error when I tried to open the page at localhost:8080 in my web browser. That puzzled me for quite some time until I realized the Windows machine was relatively new, and I had not set it to show all file extensions. So when I created a text file and named it index.html, Windows created a file named index.html.txt. I removed the .txt extension and ran this webserver command:
podman run -it --rm -d -p 8080:80 –-name web -v c:/Podman/site-content:/usr/share/nginx/html docker.io/libary/nginx
Note that I changed the local volume from /mnt/Podman to c:/Podman, as they should be equivalent. Also, if you prefer, Windows style is also usable (such as C:\Podman\site-content).

I then hopped back into my web browser and hit localhost:8080 again.

Success! The webserver is running in the container and accepting responses. When you're done and you stop running your containers, you can turn off your Podman machine with the command podman machine stop.
Jason Greene has done a remarkable job making it easier to run Podman on Windows. He has also put together a great tutorial that resides on the Podman GitHub website. The tutorial was an invaluable resource when putting this article together. It has a lot more details about this Windows client, such as API forwarding, using SSH, rootless vs. rootful, volume mounting, troubleshooting, and more. I think it's one of the best tutorials the Podman team has turned out to date.
I hope you'll give running Podman on Windows a try. I think you'll find it very quick and easy to set up and an excellent solution for your container needs on Windows. As always, if you have any questions or concerns, please reach out to the Podman team on GitHub, especially in the Discussions or Issues sections. The team also monitors IRC and Discord, if that's more your style.
If you made it this far, thanks for reading, and as far as Podman on Windows is concerned, I hope you now don't feel the need to call DO-OVER!


Software engineer at Red Hat working on containers focusing on the Buildah and Podman projects. Manages the buildah.io and podman.io websites and can be found on freenode at #buildah and #podman. More about me

