
If you are not already familiar with EPEL, this is the name of a collection of add-on packages distributed by the Fedora project for use with enterprise Linux distributions. In order to avoid compatibility issues, there is no overlap between the EPEL packages and those distributed through the core OS. These packages are also 100% open source and free to use.
If you ever need an application that isn’t included in the official repositories, check EPEL before compiling it yourself. As of this writing, there are over 3,600 packages in the EPEL 8 repository with more added each month. EPEL is not part of the official Red Hat Enterprise Linux release, so the packages it contains are not officially supported by Red Hat. However, they are created by following strict packaging guidelines and have broad community backing.
Using Red Hat Satellite as a centralized administration point helps reduce overhead and time. Instead of individually managing the EPEL repository on all of your systems, you can instead leverage Satellite. This tactic also allows for Satellite to manage content across your lifecycle environments by promoting specific versions through development, testing, and (eventually) into production. You can also take advantage of Satellite’s distributed architecture by using capsule servers to replicate content onto networks that might be isolated from directly reaching the internet.
While this guide shows specific steps for the EPEL 8 repository, similar methods can be used to add other custom repositories to Satellite. Let's walk through the process.
Add the Red Hat CodeReady Linux Builder repository to your Satellite server
Some packages in the EPEL repository have dependencies on other packages that exist in the Red Hat CodeReady Linux Builder repository. Make sure that this content is already in Satellite, and enable it if necessary.
Then, from the Satellite repository page (Content -> Red Hat Repositories), search for the CodeReady repository. Select Both to see if it is already enabled, like this:
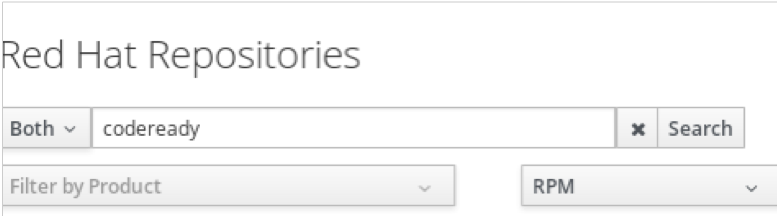
If the repository is not shown in the right side list of enabled repositories, drill down to the list of available repositories and select it there. Once the EPEL repository is added, we can then synchronize both repositories.
Add the EPEL GPG key
When a software package is added to the repository, that package gets signed by a GPG private key. This feature allows for integrity checks before installing the packages by comparing them against the public GPG key. If a package was modified or corrupted, it will fail the integrity check and should not be installed. To help support this check, the EPEL public GPG key can be added into Satellite so it is available for your hosts.
The key is located here. From Satellite, go to Content -> Content Credentials and select Create Content Credential. A dialog screen will open similar to this:

Provide a name for the credential (such as EPEL8), and from the drop-down select GPG Key. Next, either paste the text of the GPG public key or upload the key file and then save the credential.
Create a product
Next, create a custom product and subscription. Similar to Red Hat product subscriptions, each custom product added to Satellite will have its own subscription. Go to Content -> Products and select Create Product. This action will open a dialog page similar to the example shown here:
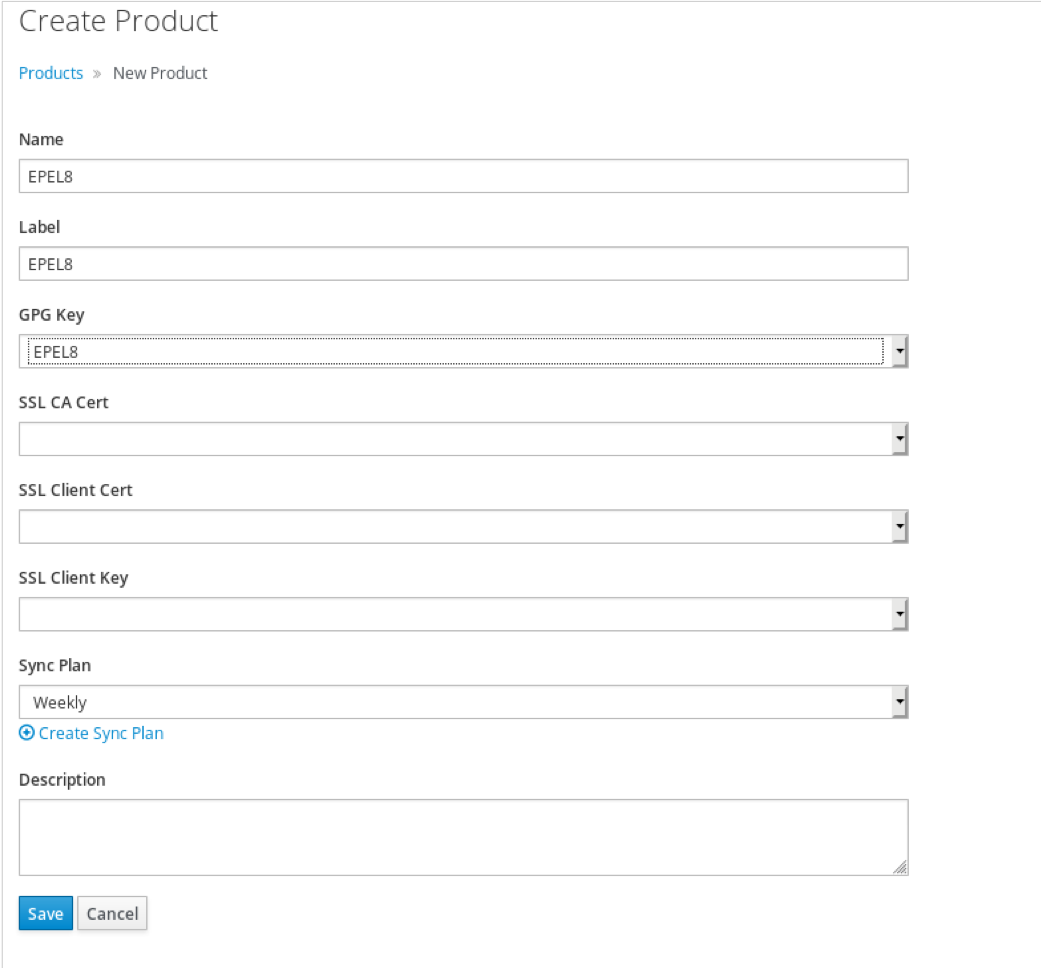
Provide a name for the new product, and the Label field will automatically populate to be compatible with naming rules. Use the drop-down to select the GPG Key you just added in the previous step, then select the appropriate sync plan. Typically, this selection should be the same plan you used for your other OS products. This policy will keep the EPEL repository synchronized at the same time as the others.
Repository setup
Now that the product is defined, we need to create the repository. Start by going to Content -> Products, and then select the EPEL product created in the previous step. Then select the option for New Repository to open the dialog in the below example:
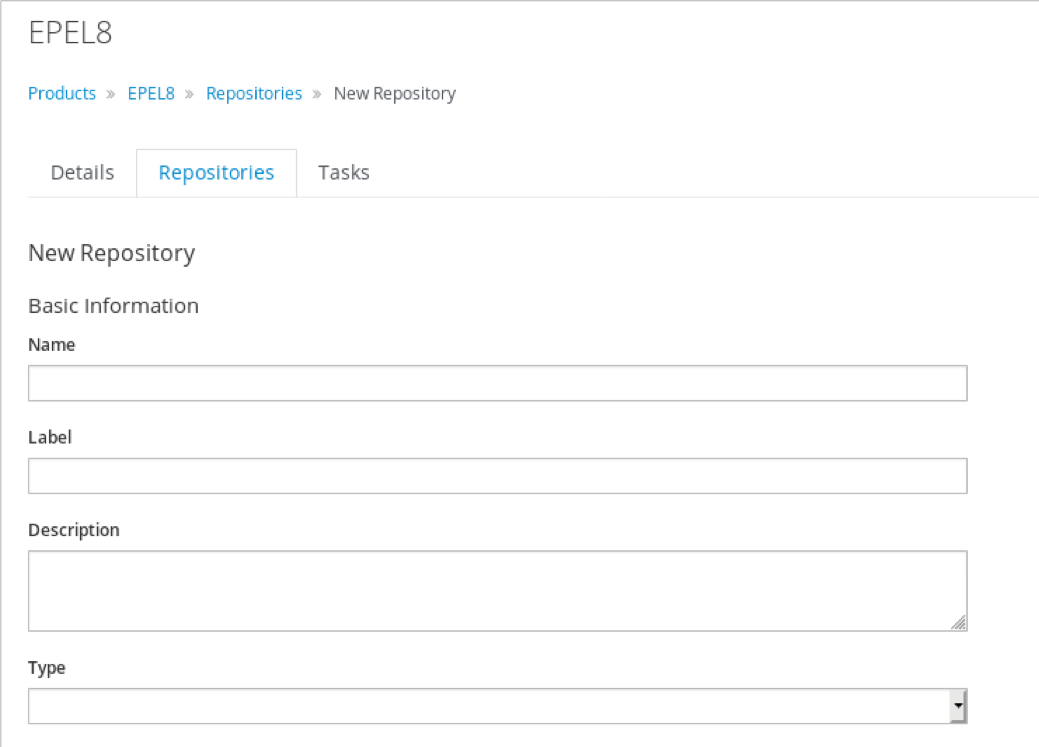
Provide a name for the repository, such as EPEL8 x86_64. The label will automatically populate the same way it did when the product was created. Add an optional description for the repository and then select yum from the Type drop-down.
After selecting yum, additional dialogs will open for completing the repository setup. In our example, we will restrict this setting to the x86_64 architecture by selecting that from the drop-down:
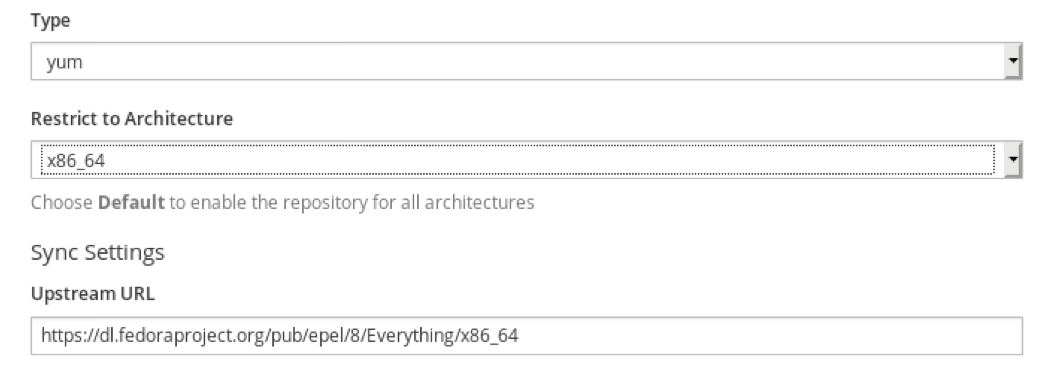
The Upstream URL can either be a mirror, or the default URL located here.
When using a mirror, replace the host dl.fedoraproject.org from the above URL with the mirror host. The rest of the URL should remain intact.
The full list of mirrors is published here.
The remaining options should be left with their default selections in most cases. Review the description for each to understand what each option offers and then Save this repository configuration when finished.
Sync now
This is a good time to synchronize the repository. To do that, select Content -> Sync Status and expand the products to find and select the repository you just added. Include the CodeReady Linux Builder if that was also added. Finally, click the Synchronize Now button to start that process:
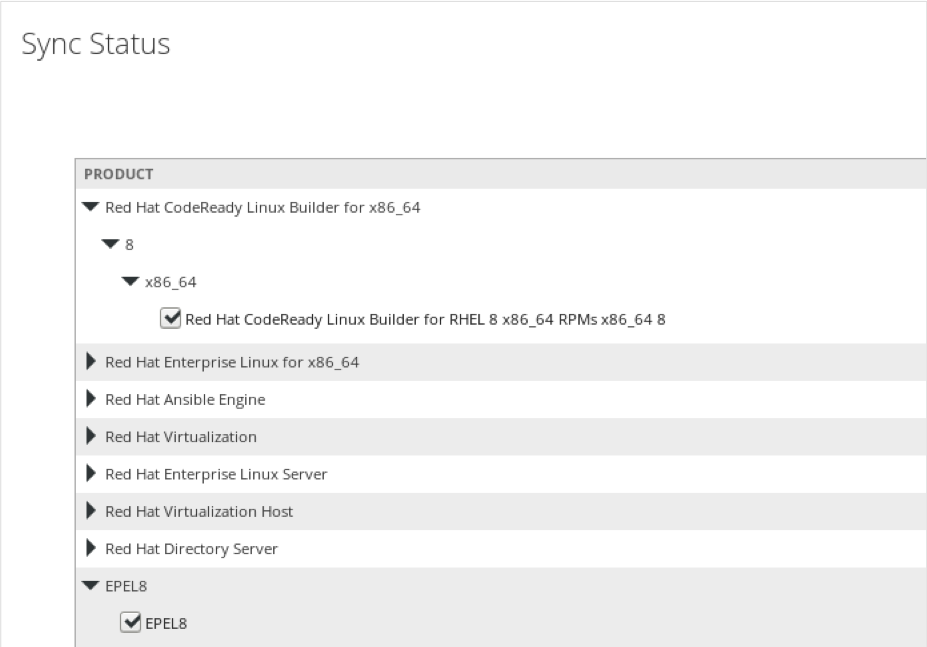
The time to complete this synchronization will depend on how busy your Satellite server is and the bandwidth available.
Subscriptions and content
These next steps will vary depending on your particular Satellite setup. To make the EPEL repository usable, we need to subscribe hosts to the new product and enable the repository sets. The most common method of managing these is through activation keys for subscriptions and content views for publishing the actual content.
There are two parts to adding subscriptions: subscribing existing hosts and adjusting activation keys to handle future host subscriptions. While many options exist to perform these steps. we’ll walk through one such method.
Subscribing existing hosts
Start by going to Hosts -> Content Hosts, which opens a list of all hosts in your Satellite environment. Create a filter to limit this output to just your RHEL 8 x86_64 hosts:

Select all hosts, or individually select the ones you want to have subscribed. In the Selection Action menu list, choose Manage Subscriptions.
This action opens the Content Host Bulk Subscriptions page, where you can select the EPEL8 subscription and then select Done:

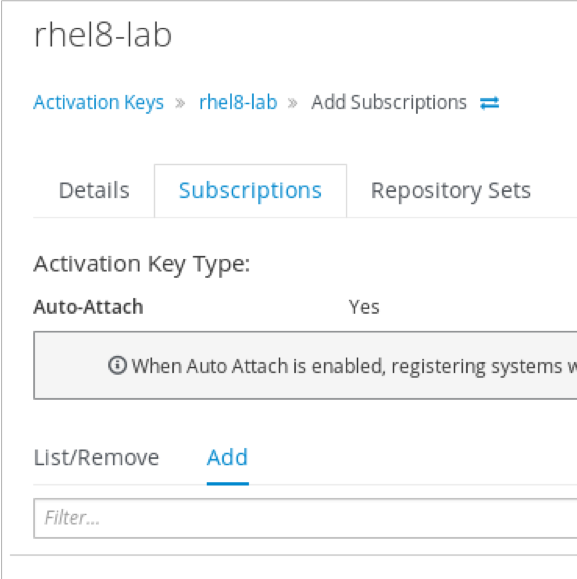
Adjusting Activation Keys
To adjust content publishing for future hosts to be subscribed, edit the appropriate Activation Key. Do this by going to Content -> Activation Keys and selecting the appropriate key. Once you are in the key, go to the Subscriptions tab, and select Add:

Choose the EPEL subscription and select Add Selected to complete this step:
Note: Reference the product documentation for managing activation keys. In, particular take note that "changes made to an [existing] activation key, are applicable only to hosts that are registered with the amended activation key in the future. The changes are not made to existing hosts."
Publish and promote content
Note: Pause here and check that the synchronization step completed. If not, take a quick break until that process finishes before moving on.
Using content views is the best practice, as they allow for managing the content lifecycle across your environments; for instance, moving a series of patches from development, to test, and then to production.
This final series of steps walks through adding the repository to your content view, publishes the new content and promotes that content to the lifecycle environment. These steps assume that a view already exists. You can reference the full documentation for managing content views for more details.
Select an existing content view by going to Content -> Content Views. Select the content view to be updated, and when that view opens, select the Yum Content tab and Repositories shown in the example here:
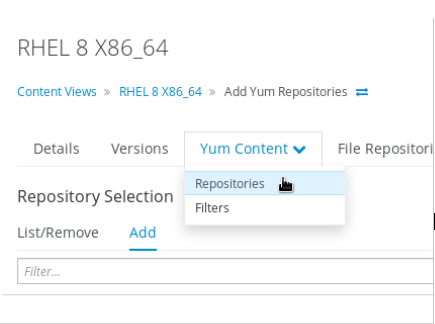
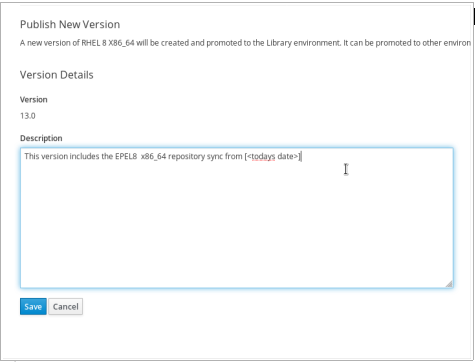
In the Repository selection list, choose the EPEL repository and then click Add Repositories. When that process finishes, go to the content view’s Versions tab and select Publish New Version.
Provide an optional description for what this new version adds, followed by clicking Save:
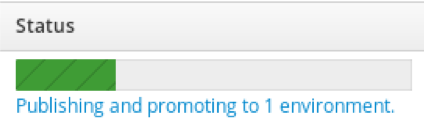
Wait for this publishing task to complete:
Once the new version is published, it will need to be promoted to the appropriate lifecycle environment. Do this by selecting the promote option for the version we just published. In the example here, we promote our selection to the Lab environment, which includes our test systems:
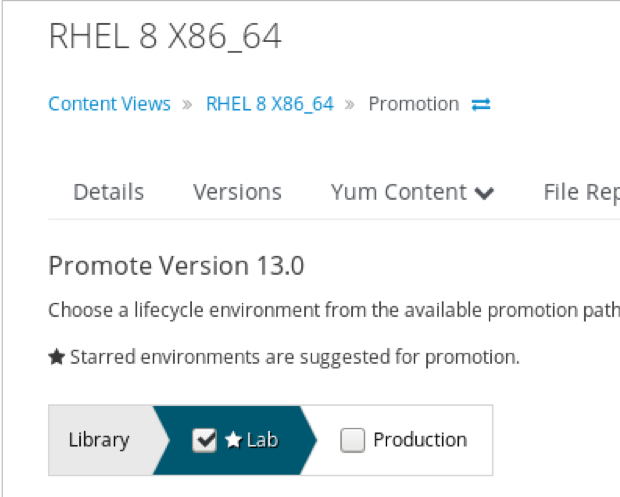
Check the environment, add an optional description, and select Promote Version.
At this point, the subscription has been added and the content should be published. If you perform a repolist, you should see that the new EPEL 8 repository is available:
$ yum repolist
Next steps
There are many other methods for performing this task. Most of the steps here we could complete using hammer commands from the Satellite CLI. In a future article, we will go into more detail on this topic. Also, these same steps can be modified for other custom product repositories you want to add into Satellite.
The EPEL repository is a great add-on for your enterprise systems, offering several additional packages. By adding this repository to your Satellite server, you can manage that content using the exact same methods and tools you already use for the systems you administer.
Want to try out Red Hat Enterprise Linux? Download it now for free.
About the author
Kevin is a Technical Account Manager at Red Hat with over 20 years working in various IT roles. In addition to being in the trenches as a sysadmin designing, supporting, and securing Linux and Unix based systems, Kevin has managed and led numerous sysadmin teams and enterprise projects.
When he isn't digging into a problem or learning a new technology you may find him camping or hiking in the woods of Pennsylvania.
More like this
Firefox and Thunderbird as RHEL Flatpaks: What it means for you
No time to lose: Why post-quantum security for financial services must start now
Infrastructure At The Edge | Compiler
Operating System Management | Compiler
Browse by channel

Automation
The latest on IT automation for tech, teams, and environments

Artificial intelligence
Updates on the platforms that free customers to run AI workloads anywhere

Open hybrid cloud
Explore how we build a more flexible future with hybrid cloud

Security
The latest on how we reduce risks across environments and technologies

Edge computing
Updates on the platforms that simplify operations at the edge

Infrastructure
The latest on the world’s leading enterprise Linux platform

Applications
Inside our solutions to the toughest application challenges
Virtualization
The future of enterprise virtualization for your workloads on-premise or across clouds