Migrating a virtual machine (VM) from one platform to another is a complex task. Nevertheless, organizations are looking for a unified platform that provides the same benefits for VMs as what's available for containers. With Red Hat OpenShift Virtualization, you don't have to make the journey alone. The Assisted Installer for OpenShift supports deploying connected clusters with OpenShift Virtualization from the start, so you can begin your migration journey today and modernize at your own pace.

What is the Assisted Installer?

The Assisted Installer simplifies the process of deploying connected OpenShift clusters by providing a guided, automated experience. Instead of relying on a dedicated bootstrap machine, the installer handles cluster bootstrapping as part of the installation process, reducing complexity and time to deployment. Available through a web-based UI, or API, the Assisted Installer gives you flexibility in how you manage installations. You can also integrate it with Red Hat Advanced Cluster Management to simplify deployment and ongoing management across multiple clusters, while still retaining the option to enable OpenShift Virtualization during installation.

Virtualization-ready from day one

With the Assisted Installer, you can enable OpenShift Virtualization during the cluster installation process. While some additional configuration may still be required, this approach simplifies deployment and shortens the path to running VM workloads alongside containers.

The Assisted Installer also provides built-in pre-installation validations, checking for hardware and system requirements (CPU virtualization flags, memory, storage, and so on) before installation begins. This helps ensure that your environment is properly configured for virtualization and reduces the risk of deployment errors.

Key benefits include:

  • Simplified experience: Deploy OpenShift clusters with virtualization included through a single, guided workflow.
  • Confidence through validation: Automated pre-checks ensure nodes meet cluster and Day 2 operator requirements before installation continues.
  • Consistency across environments: Gain a streamlined deployment experience across connected environments. Support for disconnected environments is in Developer Preview with the Agent Installer for OpenShift Virtualization.
  • Faster path to modernization: Accelerate your journey to running VMs and containers on a unified OpenShift platform.

Getting started with Assisted Installer

Using the Assisted Installer, deploying a connected OpenShift Virtualization cluster is straightforward:

  1. Click the Create cluster to access the Assisted Installer.
A screenshot of the OpenShift web console's "Select an OpenShift cluster type to create" page. The user has selected the Datacenter option. The page highlights the Assisted Installer as the easiest way to install, with a "Create cluster" button. Below this, there are other Installation options for different infrastructure providers like Bare Metal, Azure Stack Hub, and vSphere, each with an installation option listed as "Full stack automation" or "Pre-existing infrastructure."

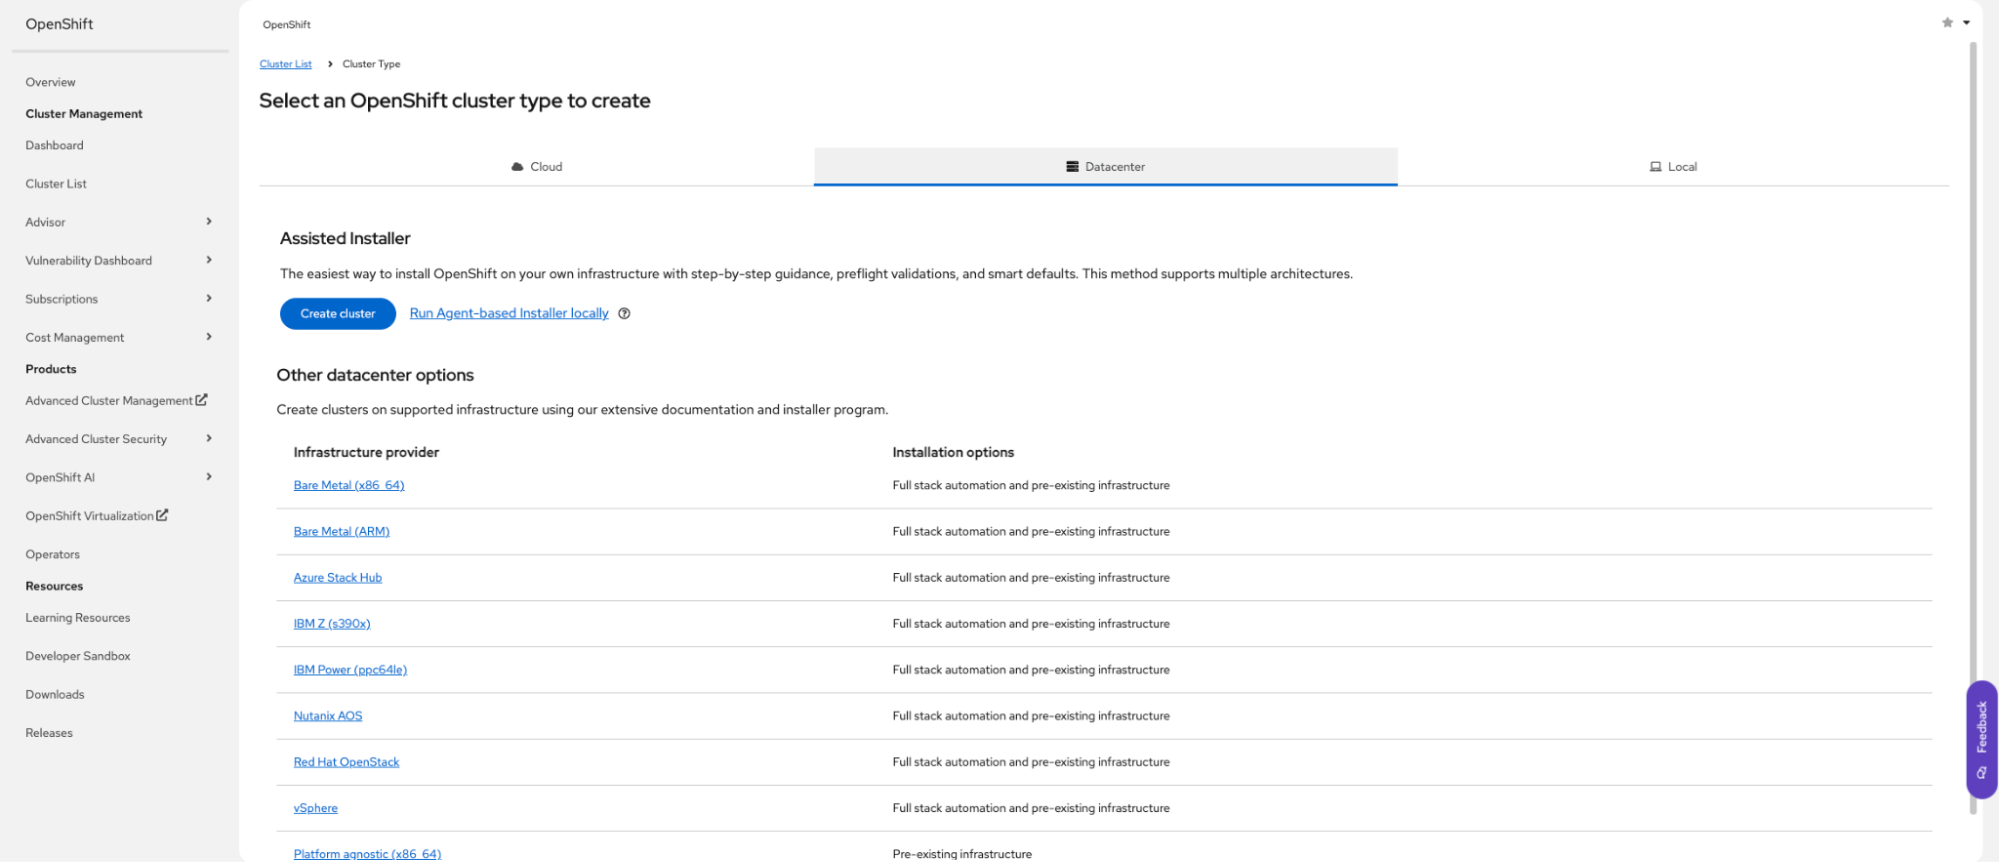
Alt text: Creating a cluster in the OpenShift web console. 

  1. Define your cluster configuration.
     
A screenshot of the OpenShift web console showing the "Cluster details" step for the Assisted Installer. The user is setting up a new cluster. The form fields visible are Cluster name (pre-filled with my-cluster), Base domain (pre-filled with localhost.host), OpenShift version (4.10.10 is selected), and CPU architecture (x86_64 is selected). A checkbox for "I'm installing on a disconnected/air-gapped/secured environment" is also shown.

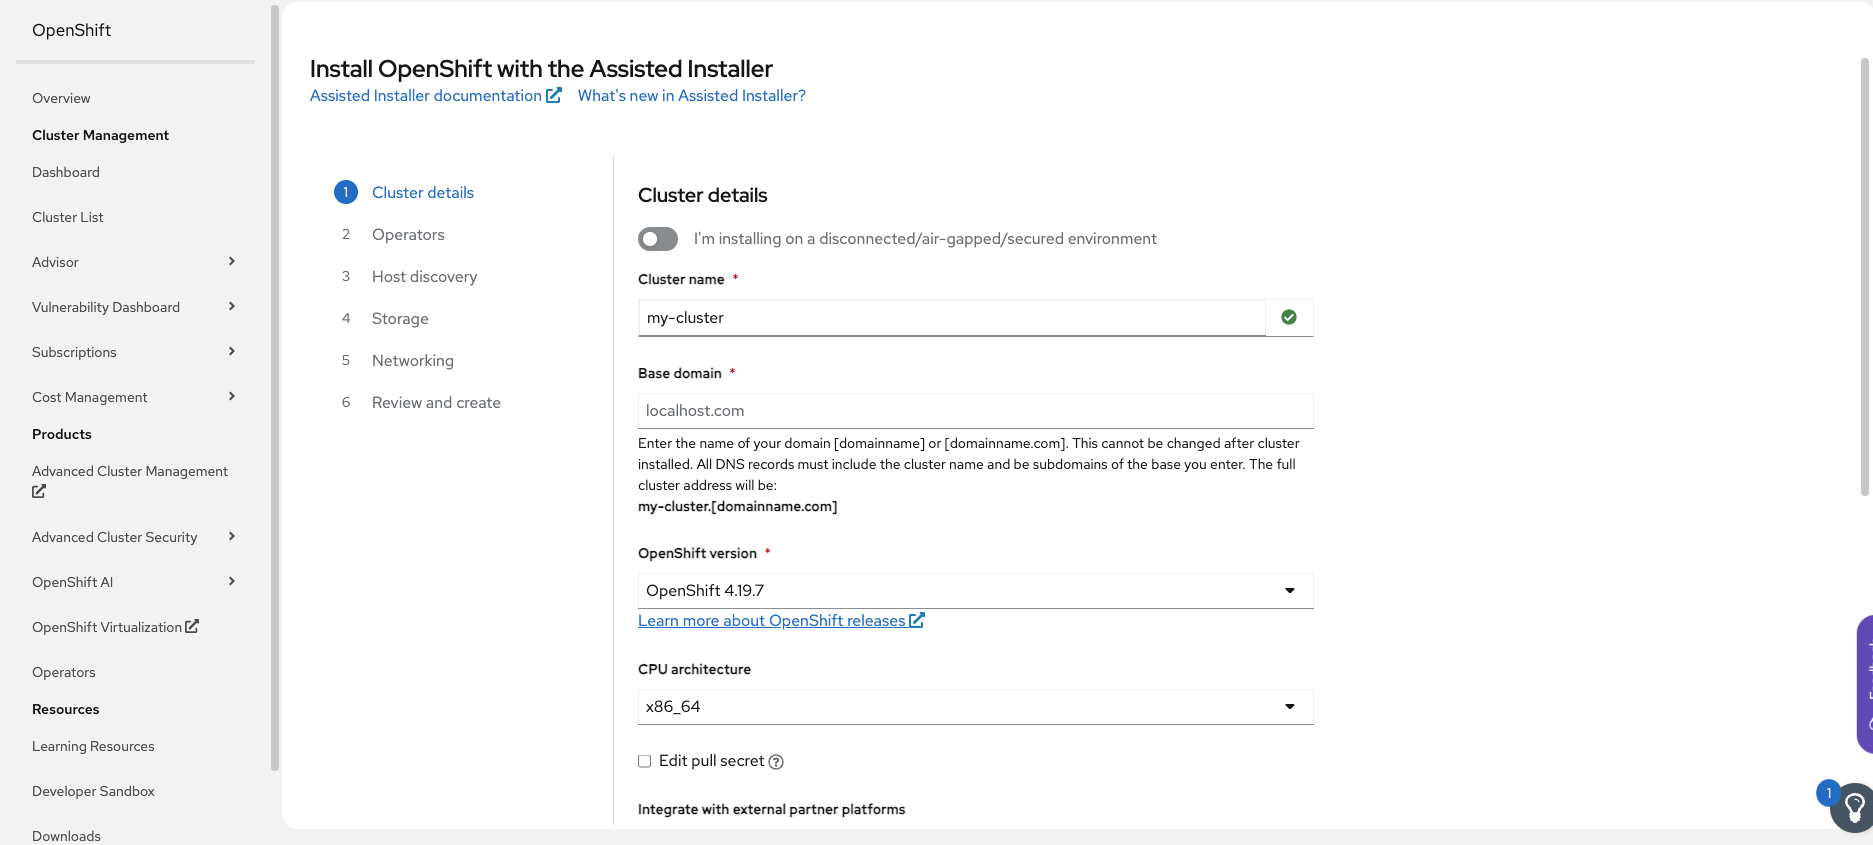
Alt text: Defining cluster details in the OpenShift web console.

  1. Select OpenShift Virtualization bundle, or cherry-pick operators to be installed, during setup.
     
A screenshot of the OpenShift web console during the "Operators" step of the Assisted Installer. The user is selecting optional operators to install with the cluster. The main section shows a list of operators, including Virtualization (which is checked), OpenShift AI, Local Storage Operator, and others. A dropdown for Bundles is visible with "Single Operators (26 | 12 selected)" chosen, indicating a number of operators have already been selected.

Alt text: Include operators you want to install. 

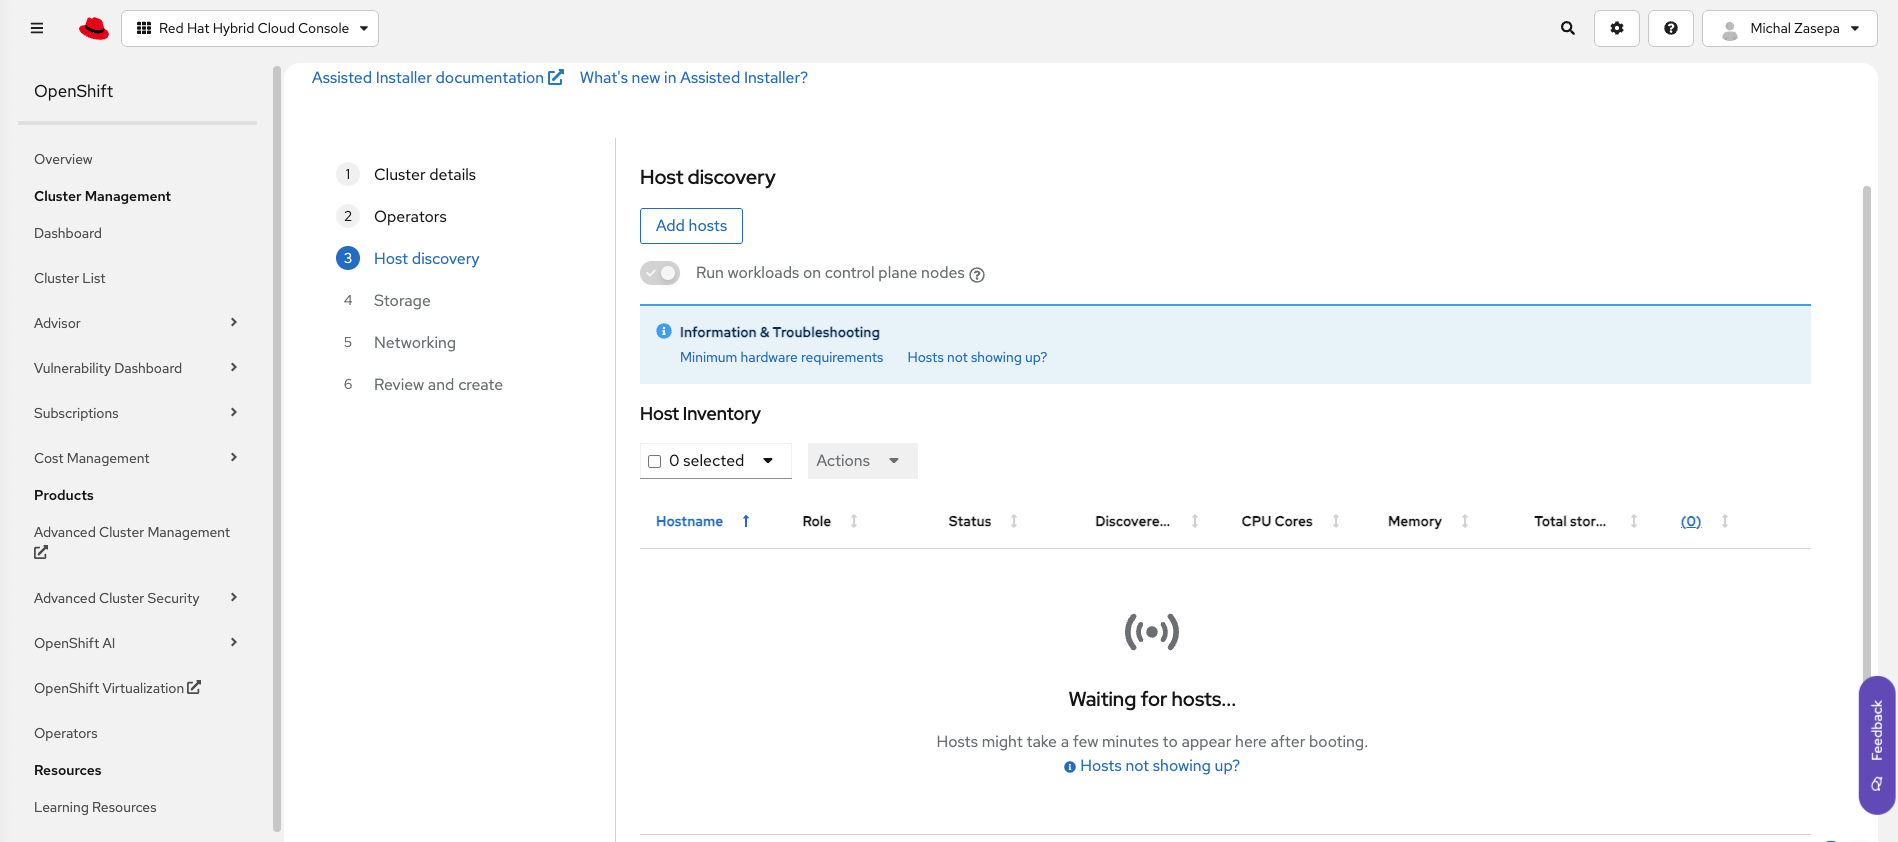
  1. Add your host to the new clusters using a bootable image (ISO).
     
A screenshot of a pop-up window titled "Add hosts" within the OpenShift web console. The user is prompted to generate a Discovery ISO to add hosts to the cluster. The options include choosing the Provisioning type ("Minimal image file" is selected), adding an SSH public key by browsing or dragging and dropping a file, and checkboxes for configuring proxy settings and trusted certificates. A button to Generate Discovery ISO is at the bottom of the pop-up.

Alt text: Add an ISO as your bootable image.

  1. The auto-assigning feature in Assisted Installer can help you select which node should be used as the control plane, and you can adjust it to your needs.
     
A screenshot of the OpenShift web console showing the "Host discovery" step for the Assisted Installer. The page is in a "Waiting for hosts..." state, with a message indicating that hosts might take a few minutes to appear after booting. A button to Add hosts is visible, and there's a toggle to "Run workloads on control plane nodes." Below the status message, there are links for "Information & Troubleshooting" and "Minimum hardware requirements."

Alt text: Assisted Installer can help you choose a control plane. 

  1. Configure the storage and network settings.
     
A screenshot of the OpenShift web console at the "Storage" step of the Assisted Installer. The page shows the Host Inventory, listing four hosts: one "Worker" node with 600.04 GB of total storage and three "Control plane node, Worker" nodes with 1.44 TB of storage each. All hosts are listed with a "Ready" status. A yellow warning banner at the bottom states, "All bootable disks, except for read-only disks, will be formatted during installation. Make sure to back up any critical data before proceeding." A screenshot of the OpenShift web console showing the "Networking" configuration step for the Assisted Installer. The user is configuring network settings for a cluster named "democluster1". The image shows options for Network Management (Cluster-Managed or User-Managed), Networking stack type (IPv4, Dual-stack), Machine network, API IP, and Ingress IP. Below these settings is the Host Inventory section, which lists the discovered hosts and their roles and statuses, currently "Pending input."

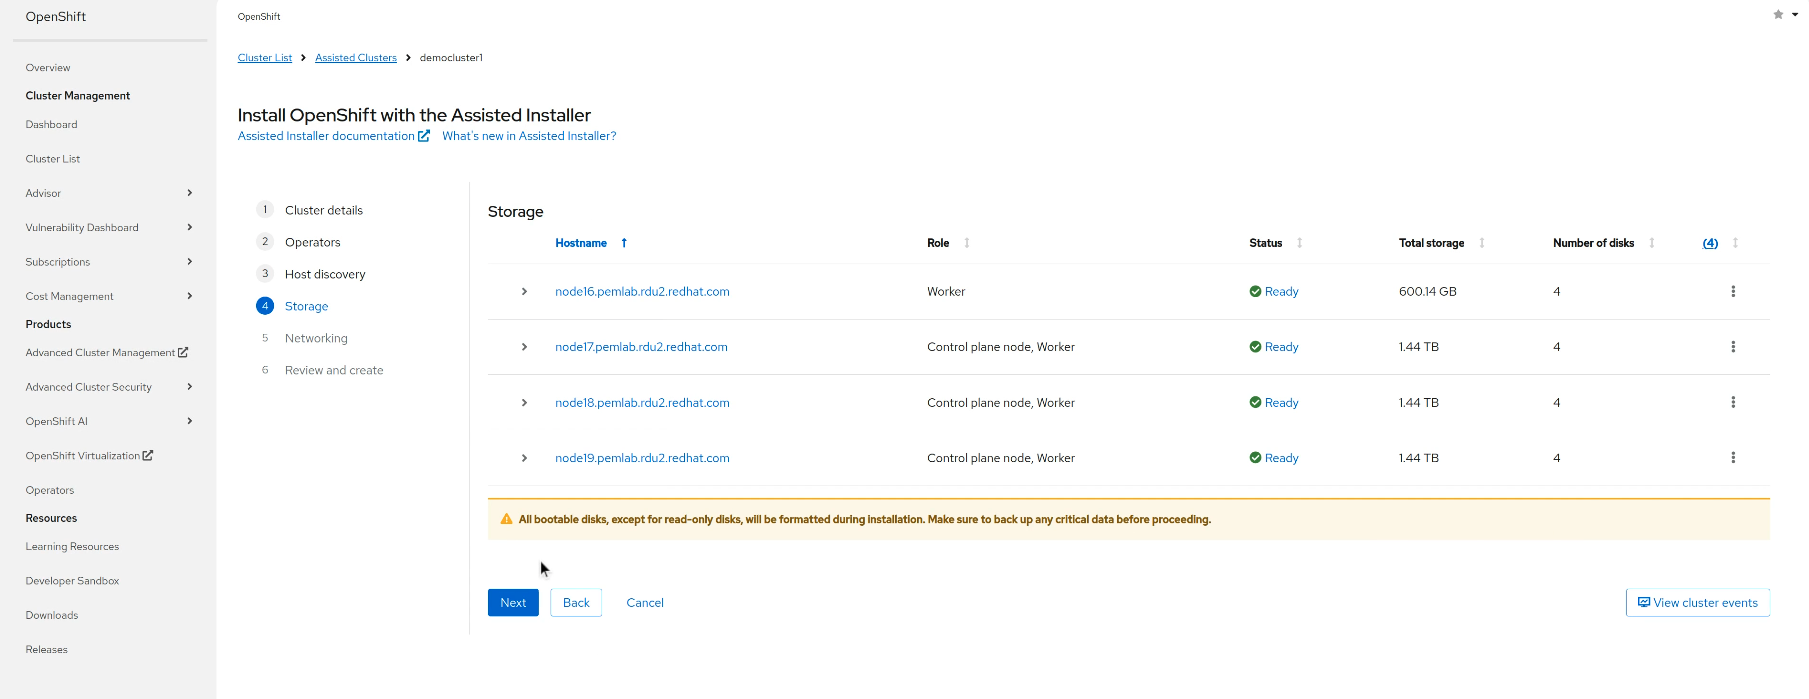
Alt text (for both images): Add your network and storage configuration.

  1. Run pre-install validations to confirm system readiness.
     
A screenshot of the OpenShift web console at the "Review and create" step of the Assisted Installer. The screen displays a Cluster summary with details about the cluster, including its name (democluster1), OpenShift version (4.10.10), CPU architecture (x86_64), and network configuration (DHCP). Below this, a section for Operators lists several operators that are enabled, such as Fence Agents Remediation, Cluster Observability, and Local Storage Operator. The Host Inventory is also summarized, showing four h

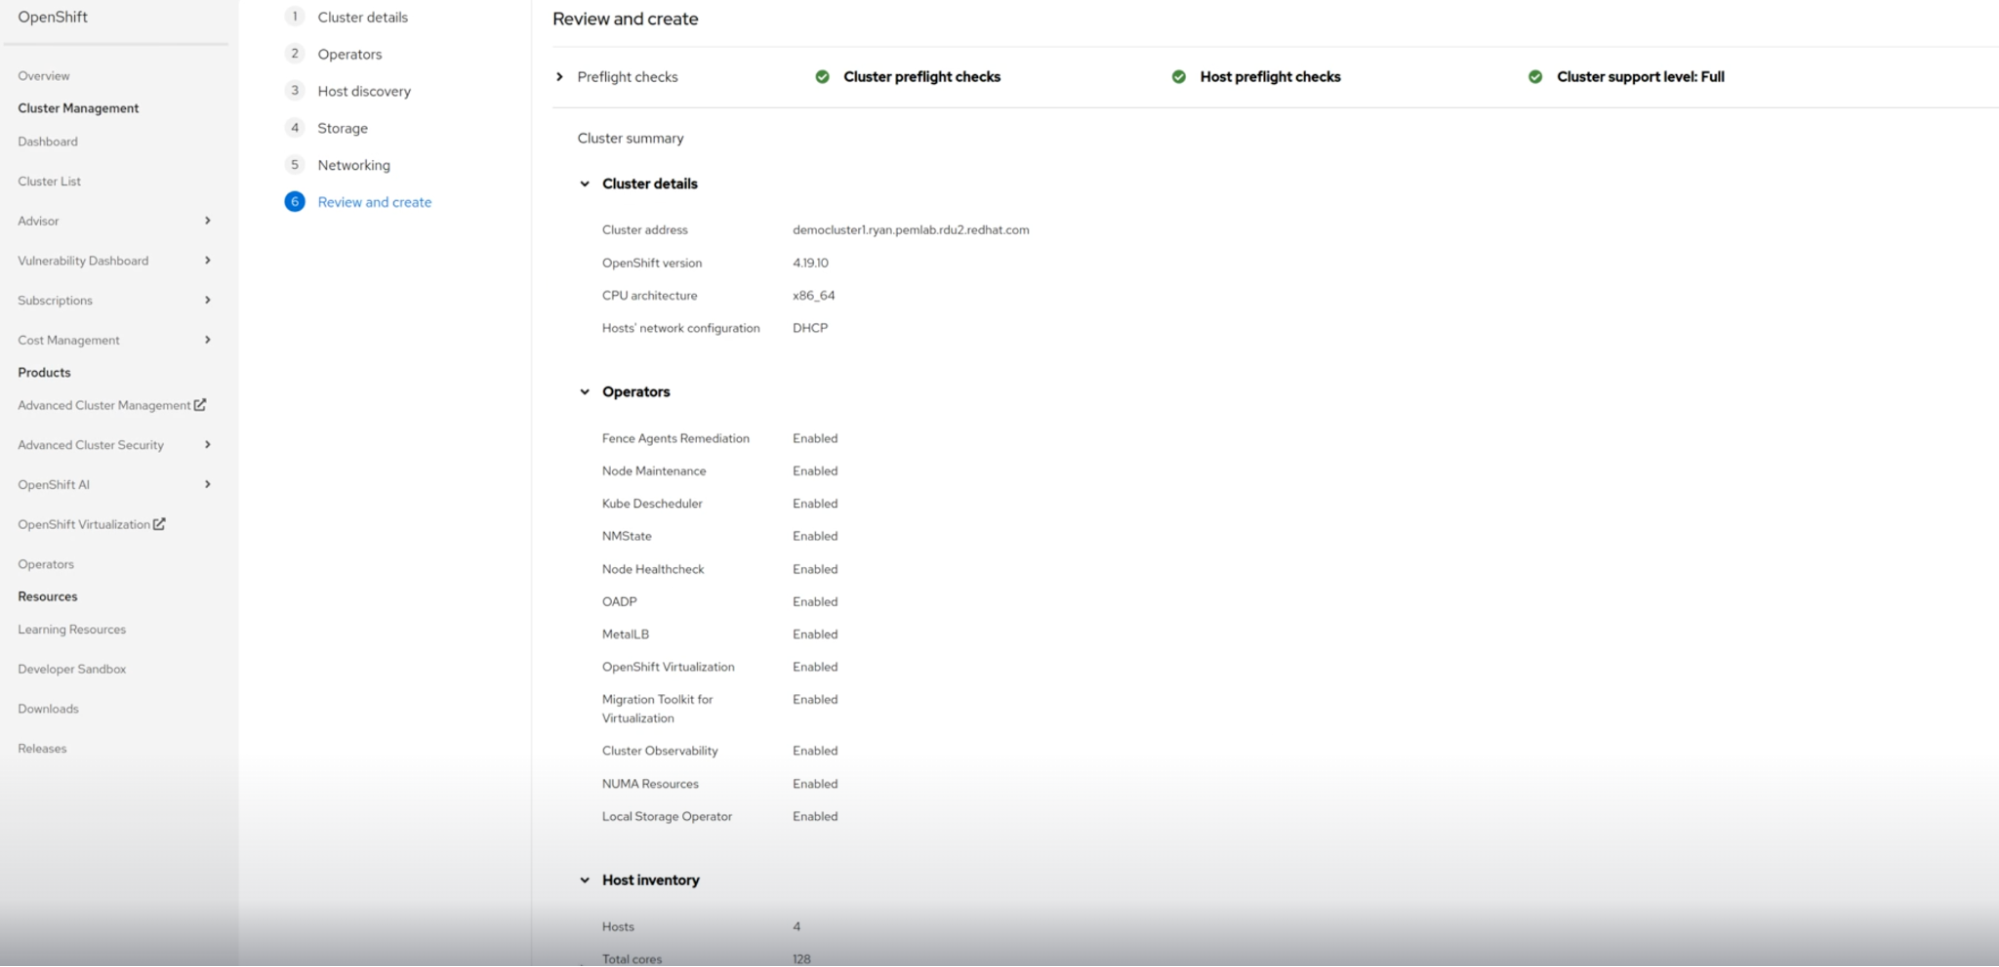
Alt text: Pre-install validations help confirm your configuration is ready.

  1. Launch your installation, and then log in to the deployed cluster to finish any configurations required by your application that are specific to your VM.
     
A screenshot of the OpenShift web console showing a successfully completed OpenShift installation. The page displays a green checkmark next to "Installation completed successfully." Below, it provides information on how to access the cluster: a button to "Launch OpenShift Console," a Web Console URL, and the Username and Password for the kubeadmin user. The Host Inventory section is expanded, showing four hosts with their roles (Worker, Control plane node) and their installation status as "Installed."

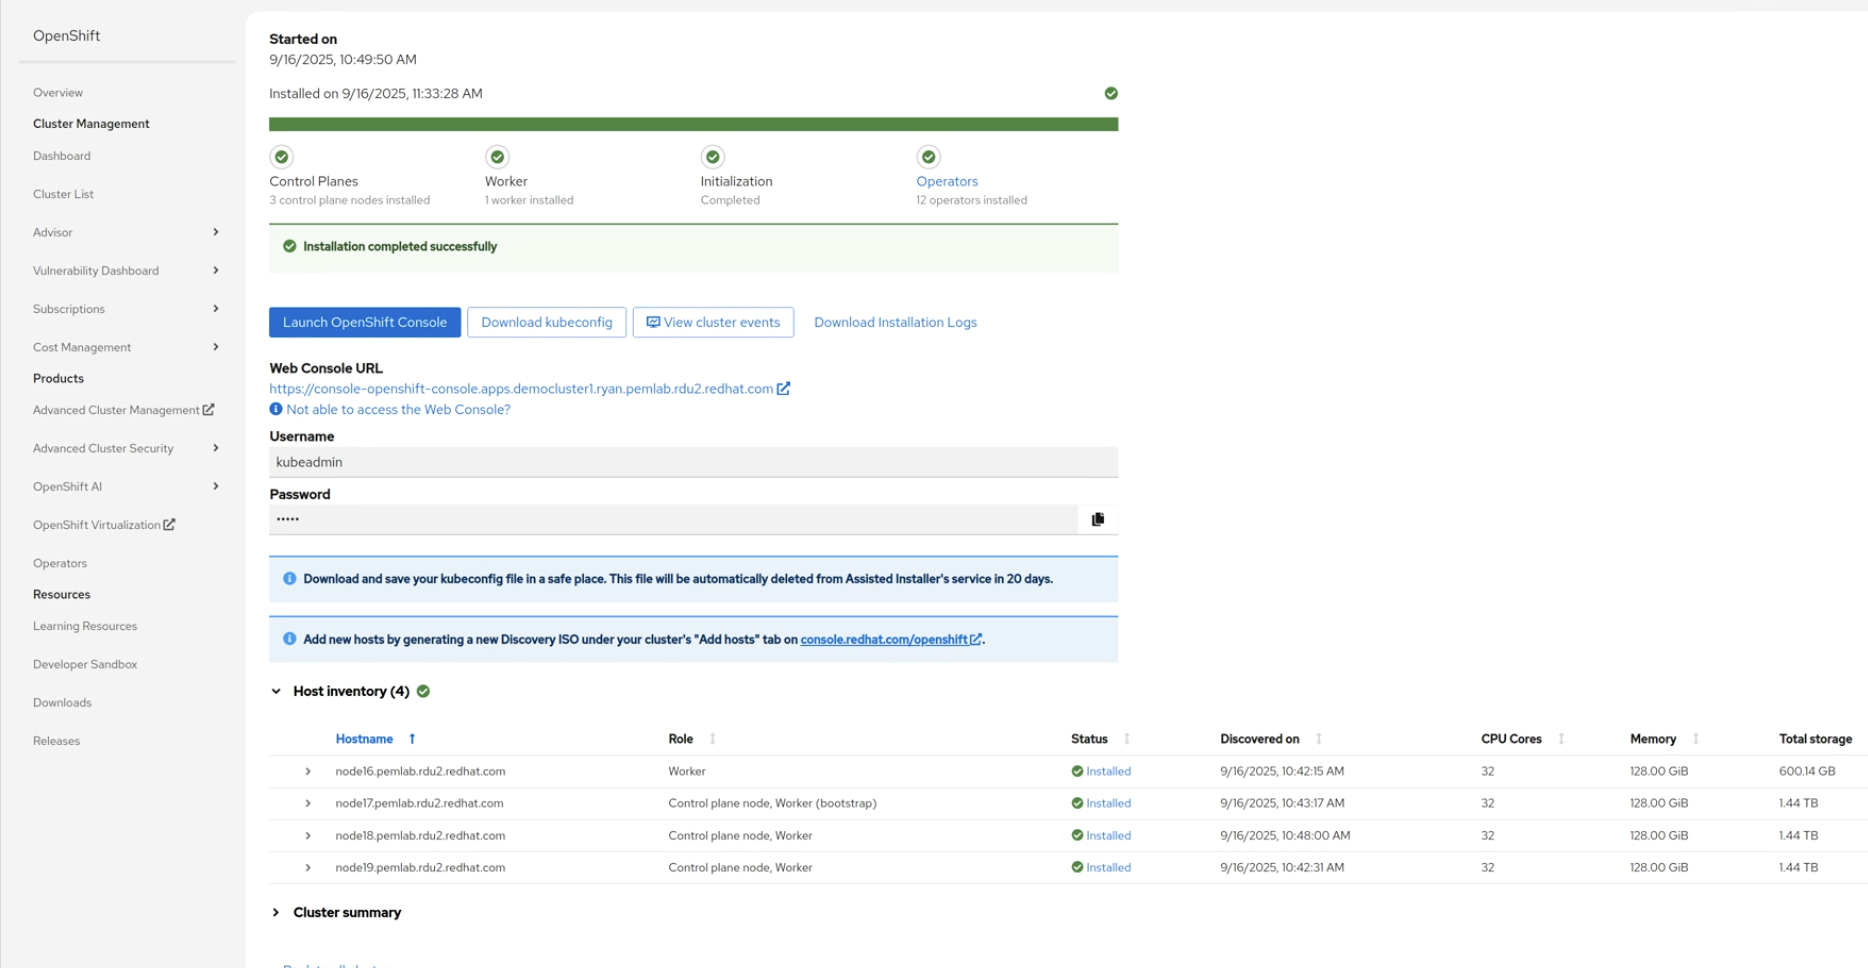
Alt text: After installation, you can configure your VM further, as required.

Migrate with confidence

The Assisted Installer is designed to help you deploy OpenShift clusters quickly and with confidence. With built-in support for OpenShift Virtualization, you can simplify operations and accelerate modernization by bringing your existing virtual machine workloads onto a cloud-native platform from day one.

Learn more about OpenShift Virtualization and the Assisted Installer:

产品试用

红帽 OpenShift 虚拟化引擎 | 产品试用

专门用于部署、管理和扩展虚拟机的精简解决方案。

关于作者

Courtney started at Red Hat in 2021 on the OpenShift team. With degrees in Marketing and Economics and certificates through AWS and Microsoft she is passionate about cloud computing and product marketing.

UI_Icon-Red_Hat-Close-A-Black-RGB

按频道浏览

automation icon

自动化

有关技术、团队和环境 IT 自动化的最新信息

AI icon

人工智能

平台更新使客户可以在任何地方运行人工智能工作负载

open hybrid cloud icon

开放混合云

了解我们如何利用混合云构建更灵活的未来

security icon

安全防护

有关我们如何跨环境和技术减少风险的最新信息

edge icon

边缘计算

简化边缘运维的平台更新

Infrastructure icon

基础架构

全球领先企业 Linux 平台的最新动态

application development icon

应用领域

我们针对最严峻的应用挑战的解决方案

Virtualization icon

虚拟化

适用于您的本地或跨云工作负载的企业虚拟化的未来