If you plan to create your own Overview page for your OKD installation, this blog will help you get started.
The Overview page has a standardized layout consisting of three columns. The left column contains the Details and Inventory cards, the center column consists of the Status and Utilization cards, and the right column holds a single Activity card. You can of course use any other custom cards in your overview page and I will show you how in this blog.

To learn more about the design and high level concepts, you can check out this blog. This post focuses on the code.
Building Blocks of the Overview Page
Let’s take a look at components which you will be using to build your own Overview page.
const FooOverview = () => (
  <Dashboard>
    <DashboardGrid mainCards={[]} leftCards={[]} rightCards={[]} />
  </Dashboard>
);
You probably noticed that components used for overview pages are prefixed with Dashboard. Overview pages were originally called dashboard pages. They were later renamed to avoid confusion with monitoring dashboards, but the code hasn’t yet been updated to reflect this change.
The root Dashboard component simply adds some CSS styling, such as a gray background and padding around the page. DashboardGrid places the card props passed into it (mainCards, leftCards, rightCards) into a grid layout, and ensures that the grid is responsive to screen size changes. To achieve this responsiveness, it measures the actual grid component width (not browser’s viewport) and will render the grid as a single column if the width is smaller than PatternFly’s defined LG breakpoint (992px). In the single column presentation, the main cards are shown first, followed by the left and right cards.

Now, we have an overall page layout, which means it’s time for the fun part: creating content! In our case, the content is a series of cards.
Generally speaking, every card looks like this:
const FooCard = () => (
  <DashboardCard>
    <DashboardCardHeader>
      <DashboardCardTitle>Foo</DashboardCardTitle>
      <DashboardCardLink to=”/foo-location”>Foo action</DashboardCardLink>
    </DashboardCardHeader>
    <DashboardCardBody>
       {// your content here}
    </DashboardCardBody>
  </DashboardCard>
);
The root DashboardCard component is using the withFallback higher-order component (HOC), which makes sure that if something goes wrong with a particular card, the misbehaving card will be hidden instead of ruining the whole page.
At the top of each card is a DashboardCardHeader. It has a title and optionally, some actions. Nothing fancy here.
The DashboardCardBody is the place where you will want to show the interesting stuff. Usually, you will fetch some data from the backend (k8s, prometheus, or some other service running in the cluster) and somehow render them here.
Getting Data from the Backend
Since you will have multiple cards on your page, with all of them making some remote requests, it may happen that some cards will require the same data from the same service. If you just blindly create these requests from the cards, you will fetch the same data multiple times, for each card separately, and due to various resolution times the results won't be synchronized. Imagine a case where you, for whatever reason, want to show the data for the same prometheus metric in two cards. Every card will create its own request and every request is resolved after a different amount of time which leads to data not being the same and you also needlessly overfetched.
To avoid these issues, you will want to use the withDashboardResources HOC (we don't have a hook yet, but contributions are welcome!) which injects functions for fetching data from prometheus or any other in-cluster service and makes sure there are no duplicate requests. In order to fetch k8s resources, you will use useK8sWatchResource hook.
A Card that Actually Does Something
Let's put it all together and create a card that actually gets some data from the backend and renders it.
FooCard will fetch data from various sources - CPU metrics from prometheus, cluster health from the healthz endpoint, and a Pod resource from k8s.
import * as React from 'react';

import { getPrometheusQueryResponse } from '@console/internal/actions/dashboards';
import { withDashboardResources } from '@console/internal/components/dashboard/with-dashboard-resources';
import { humanizePercentage } from '@console/internal/components/utils';
import { useK8sWatchResource } from '@console/internal/components/utils/k8s-watch-hook';
import { PodModel } from '@console/internal/models';
import { PodKind } from '@console/internal/module/k8s';
import DashboardCard from '@console/shared/src/components/dashboard/dashboard-card/DashboardCard';
import DashboardCardHeader from '@console/shared/src/components/dashboard/dashboard-card/DashboardCardHeader';
import DashboardCardTitle from '@console/shared/src/components/dashboard/dashboard-card/DashboardCardTitle';
import DashboardCardLink from '@console/shared/src/components/dashboard/dashboard-card/DashboardCardLink';
import DashboardCardBody from '@console/shared/src/components/dashboard/dashboard-card/DashboardCardBody';
import { fetchK8sHealth } from '@console/app/src/components/dashboards-page/status';

const healthzEndpoint = 'healthz';
const cpuMetric = 'cluster:cpu_usage_cores:sum';

const FooCard = withDashboardResources(({ watchPrometheus, stopWatchPrometheusQuery, prometheusResults, watchURL, stopWatchURL, urlResults }) => {
  React.useEffect(() => {
    watchPrometheus(cpuMetric);
    watchURL(healthzEndpoint, fetchK8sHealth);
    return () => {
      stopWatchPrometheusQuery(cpuMetric);
      stopWatchURL(healthzEndpoint);
    };
  });
  const healthz = urlResults.getIn([healthzEndpoint, 'data']);
  const healthzError = urlResults.getIn([healthzEndpoint, 'loadError']);
  const [cpuResults, cpuMetricError] = getPrometheusQueryResponse(prometheusResults, cpuMetric);
  const [pods, podsLoaded, podsLoadError] = useK8sWatchResource<PodKind[]>({
    kind: PodModel.kind,
    isList: true,
  });

  return (
    <DashboardCard>
      <DashboardCardHeader>
        <DashboardCardTitle>Foo</DashboardCardTitle>
        <DashboardCardLink to="/foo-location">Foo action</DashboardCardLink>
      </DashboardCardHeader>
      <DashboardCardBody>
        <div>Cluster health: {healthzError ? 'error' : !healthz ? 'loading' : healthz}</div>
        <div>CPU usage: {cpuMetricError ? 'error' : !cpuResults ? 'loading' : humanizePercentage(cpuResults.data.result[0].value[1]).string}</div>
        <div>Pods count: {podsLoadError ? 'error' : !podsLoaded ? 'loading' : pods.length}</div>
      </DashboardCardBody>
    </DashboardCard>
  );
});

export default FooCard;
The only thing that remains is to add the card to the FooOverview page.
import * as React from 'react';

import Dashboard from '@console/shared/src/components/dashboard/Dashboard';
import DashboardGrid from '@console/shared/src/components/dashboard/DashboardGrid';

import FooCard from './FooCard';

const FooOverview = () => (
  <Dashboard>
    <DashboardGrid mainCards={[{ Card: FooCard }]} leftCards={[{ Card: FooCard }]} rightCards={[{ Card: FooCard }]} />
  </Dashboard>
);

export default FooOverview;
In the above snippet, I've actually added the FooCard to every column so you can verify (via the browser's network tab, for example) that the same fetch request is executed only once.
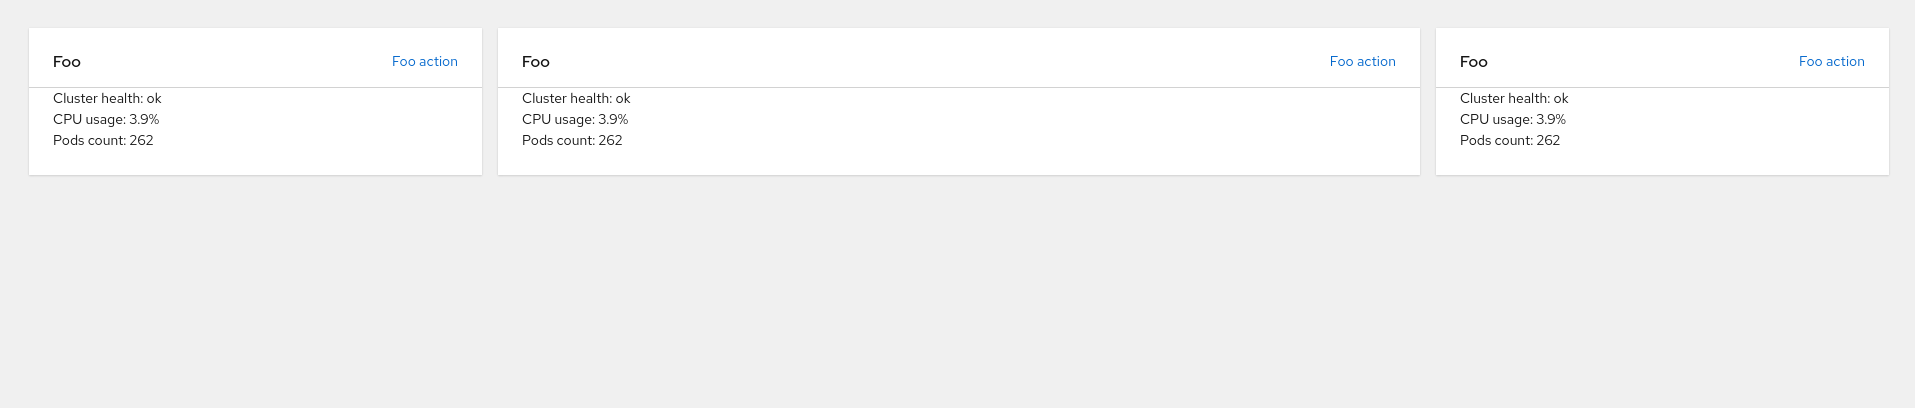 Yay! Our fancy
 FooOverview page.
Exposing the FooOverview Page
To expose your newly created FooOverview page, you will need to create a static plugin for the OpenShift Console. We have a nice readme that will help you get started in our github repository.
Every static plugin has a plugin.ts file that exports all plugin extensions. Console provides a few extension points that you can choose to expose FooOverview as a tab next to Cluster overview, as a page that will appear in main navigation, or as a standalone page.
To expose FooOverview as a page, your plugin.ts will look like this:
import { Plugin, RoutePage, HrefNavItem } from '@console/plugin-sdk';

type ConsumedExtensions = RoutePage | HrefNavItem;

const plugin: Plugin<ConsumedExtensions> = [
  // expose as page & add item to navigation
  {
    type: 'Page/Route',
    properties: {
      exact: true,
      path: 'foo-overview',
      loader: () => import('./components/FooOverview' /* webpackChunkName: "foo-overview" */).then((m) => m.default),
    },
  },
  {
    type: 'NavItem/Href',
    properties: {
      id: 'fooNav',
      componentProps: {
        name: 'Foo Overview',
        href: '/foo-overview',
      },
    },
  },
];

export default plugin;
That's a Wrap
I hope this gives you a solid idea of how to create your own Overview page. The React components that you will be using can be found in the console-shared package.
Happy hacking!
저자 소개

유사한 검색 결과
과거의 운영 방식에서 벗어나 IT의 미래 구축
AI의 다음 변곡점: 에이전트를 엔터프라이즈 슈퍼유저로 전환
The Containers_Derby | Command Line Heroes
Crack the Cloud_Open | Command Line Heroes
채널별 검색

오토메이션
기술, 팀, 인프라를 위한 IT 자동화 최신 동향

인공지능
고객이 어디서나 AI 워크로드를 실행할 수 있도록 지원하는 플랫폼 업데이트

오픈 하이브리드 클라우드
하이브리드 클라우드로 더욱 유연한 미래를 구축하는 방법을 알아보세요

보안
환경과 기술 전반에 걸쳐 리스크를 감소하는 방법에 대한 최신 정보

엣지 컴퓨팅
엣지에서의 운영을 단순화하는 플랫폼 업데이트

인프라
세계적으로 인정받은 기업용 Linux 플랫폼에 대한 최신 정보

애플리케이션
복잡한 애플리케이션에 대한 솔루션 더 보기
가상화
온프레미스와 클라우드 환경에서 워크로드를 유연하게 운영하기 위한 엔터프라이즈 가상화의 미래