
A few weeks ago, I joined the OpenShift team as a Developer Advocate. To help me get a better understanding of the platform, I went through the process of building and deploying a React app on Red Hat OpenShift Online. After trying the standard Create React App and the Node.js sample repository, I built an app that has both a React frontend and an Express backend, and then set it up so that it could be deployed on Red Hat OpenShift. In this post, I’m sharing the process I followed and some tips so that other developers can have a more smooth experience the first time around.
Some Details on the App
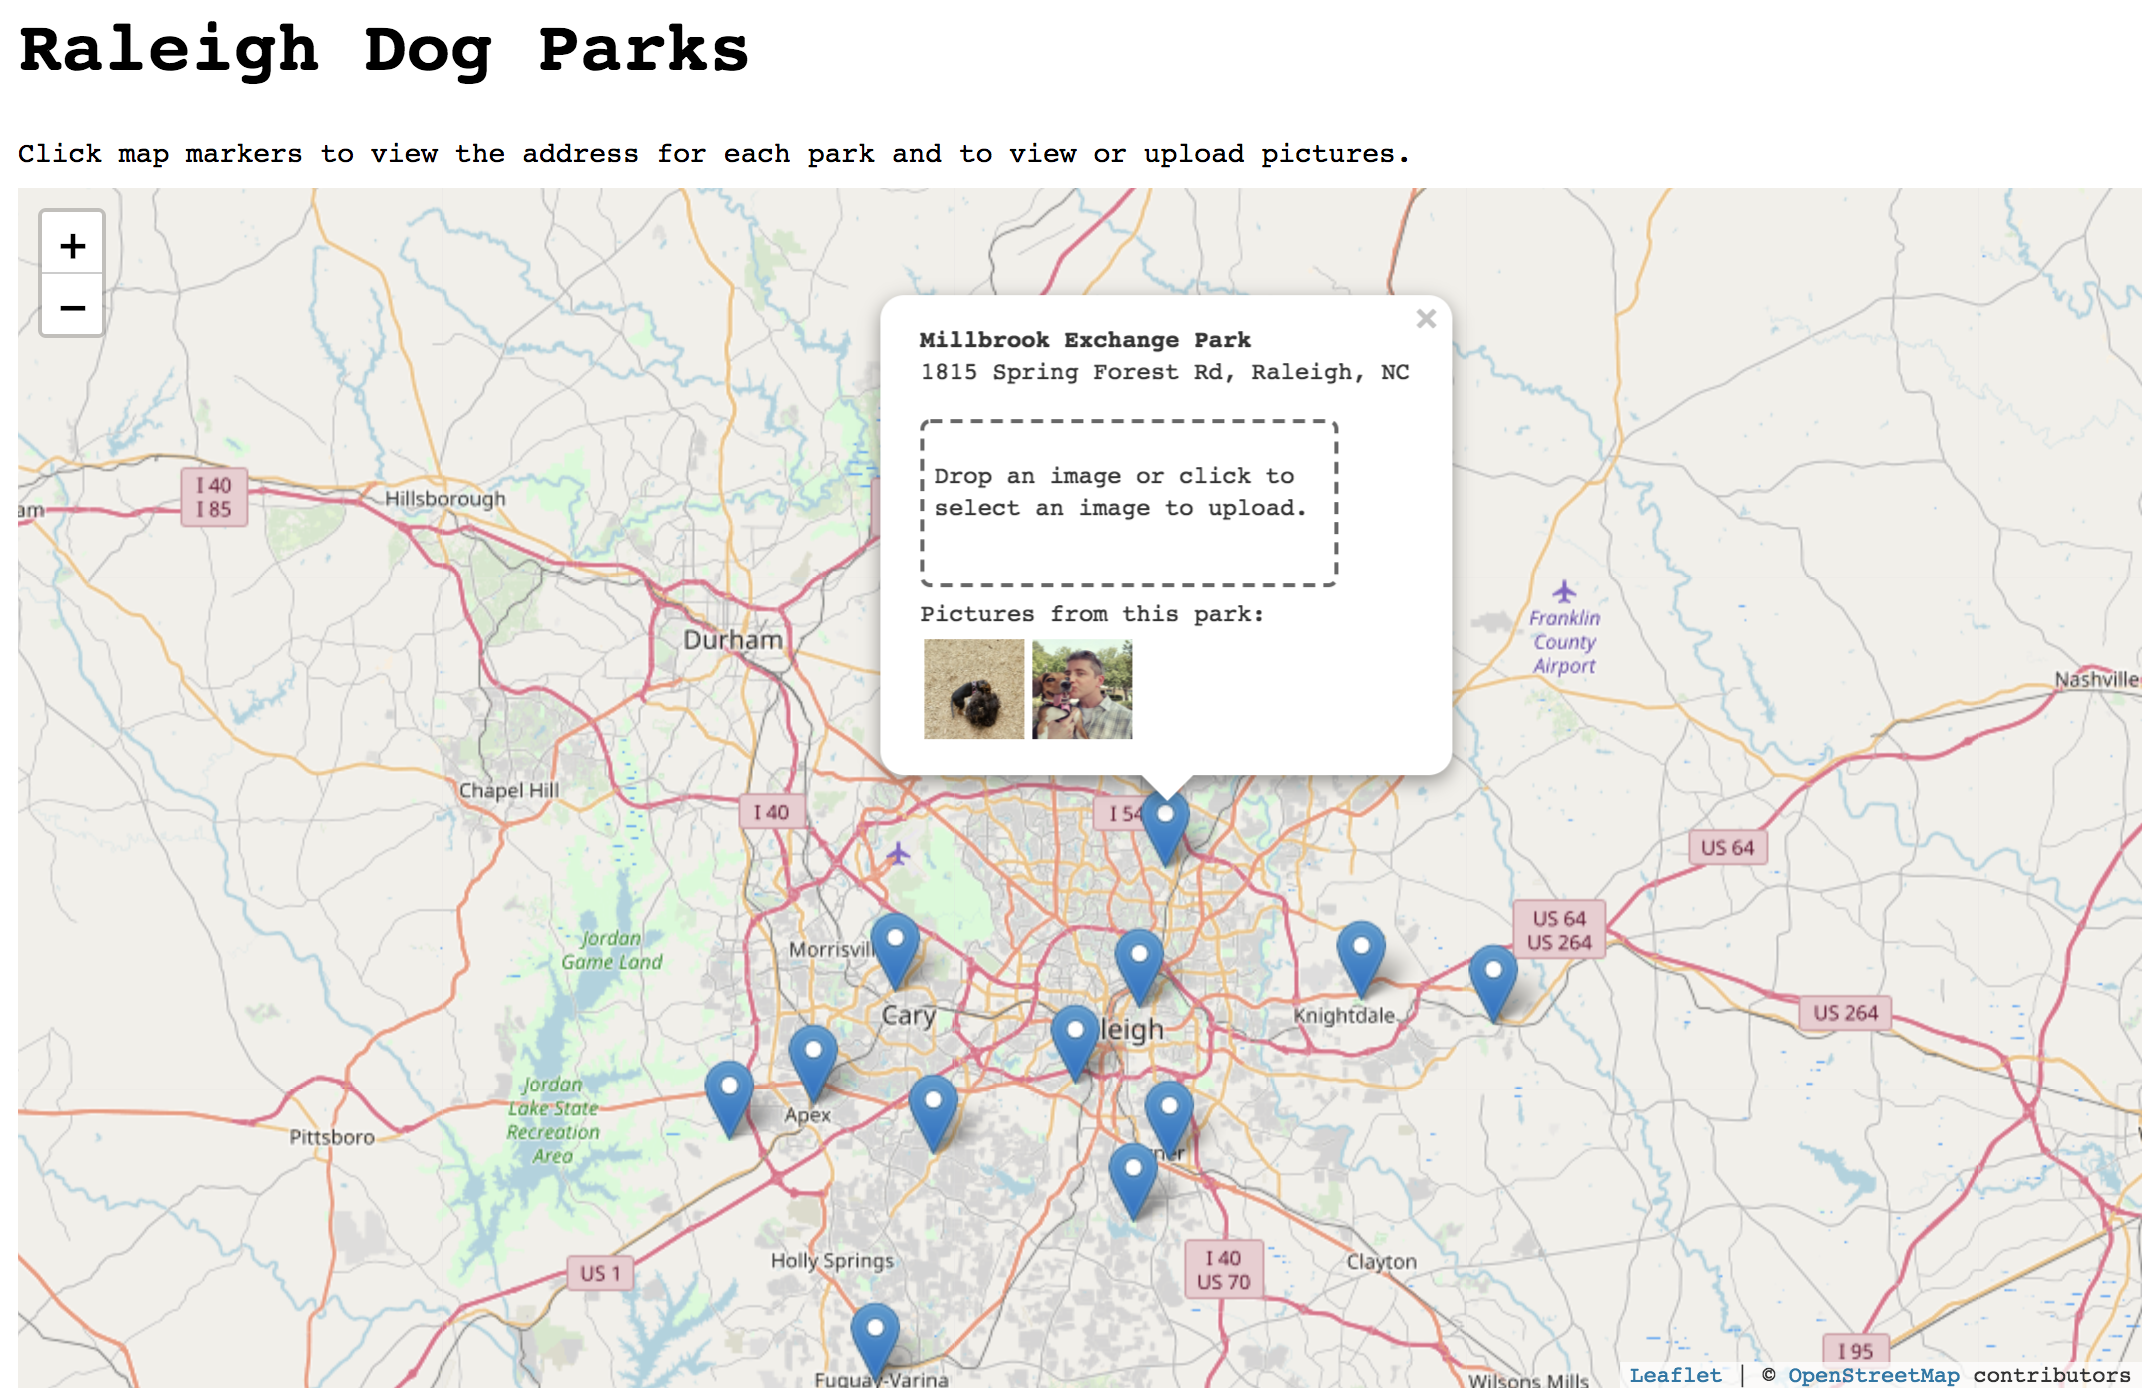
 I take too many pictures of my dog, especially when we’re at the dog park. I built this web app to give me a place to upload and view pictures I’ve taken at different dog parks near my hometown of Raleigh, NC. The user clicks on a map marker for each park, and can view or upload pictures taken at that park. The dog park location data is pulled from one of the Open Data Raleigh APIs. Then, it uses React-Leaflet to handle the map features. Finally, it’s using Cloudinary to host the images that are uploaded for each park. In a future version of the app, I may use MongoDB to store the images instead, but for now, the free tier of Cloudinary works just fine.
Setup and Dependencies
To follow along, you’ll need a Red Hat OpenShift Online account and a Cloudinary account. Of course, you could also walk through this using Minishift and run OpenShift locally. If you don’t already have an OpenShift account, you can create one here.
Deploying to OpenShift
In this post, we’ll be using the web console to deploy our app, but there are alternatives including the oc command line tool and Odo.
Sign in to your Red Hat OpenShift Online account. When you first sign in, you’ll see a catalog of supported languages, databases, and other options. Find Node.js in the list and select it.
This opens a wizard which will guide you through the deployment process. On the initial information screen, click “Next.”
On the Configuration screen that appears next, click the link at the bottom to view advanced options.
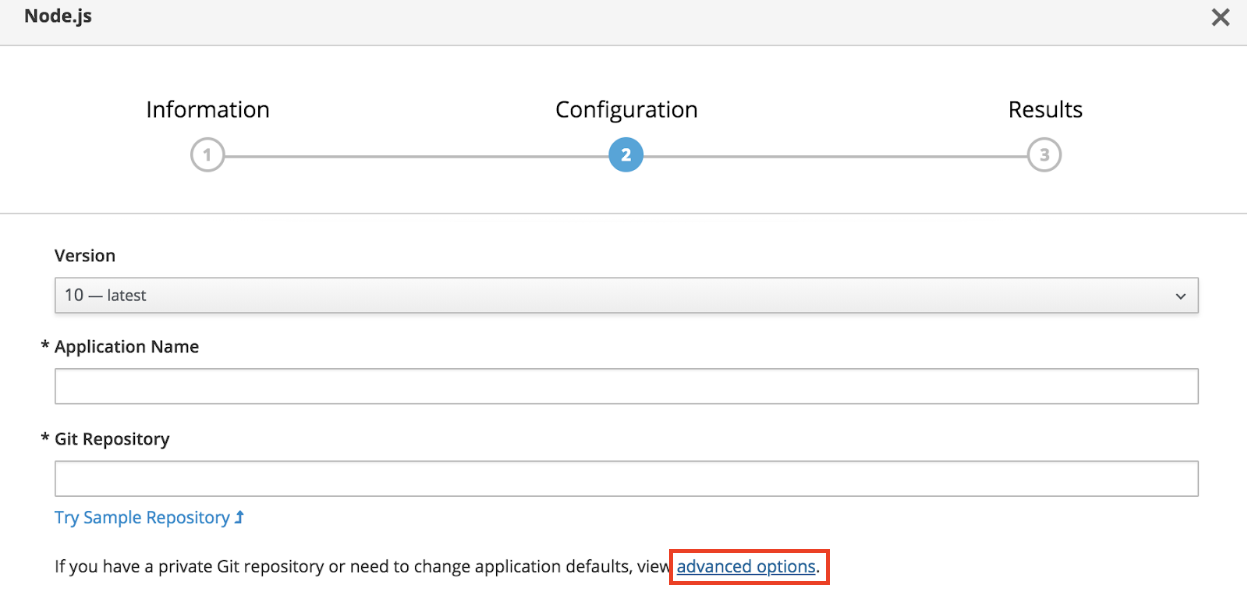
Set the following values:
Name: raleigh-dogparks
Github Repository URL: https://github.com/jankleinert/raleigh-dogparks.git
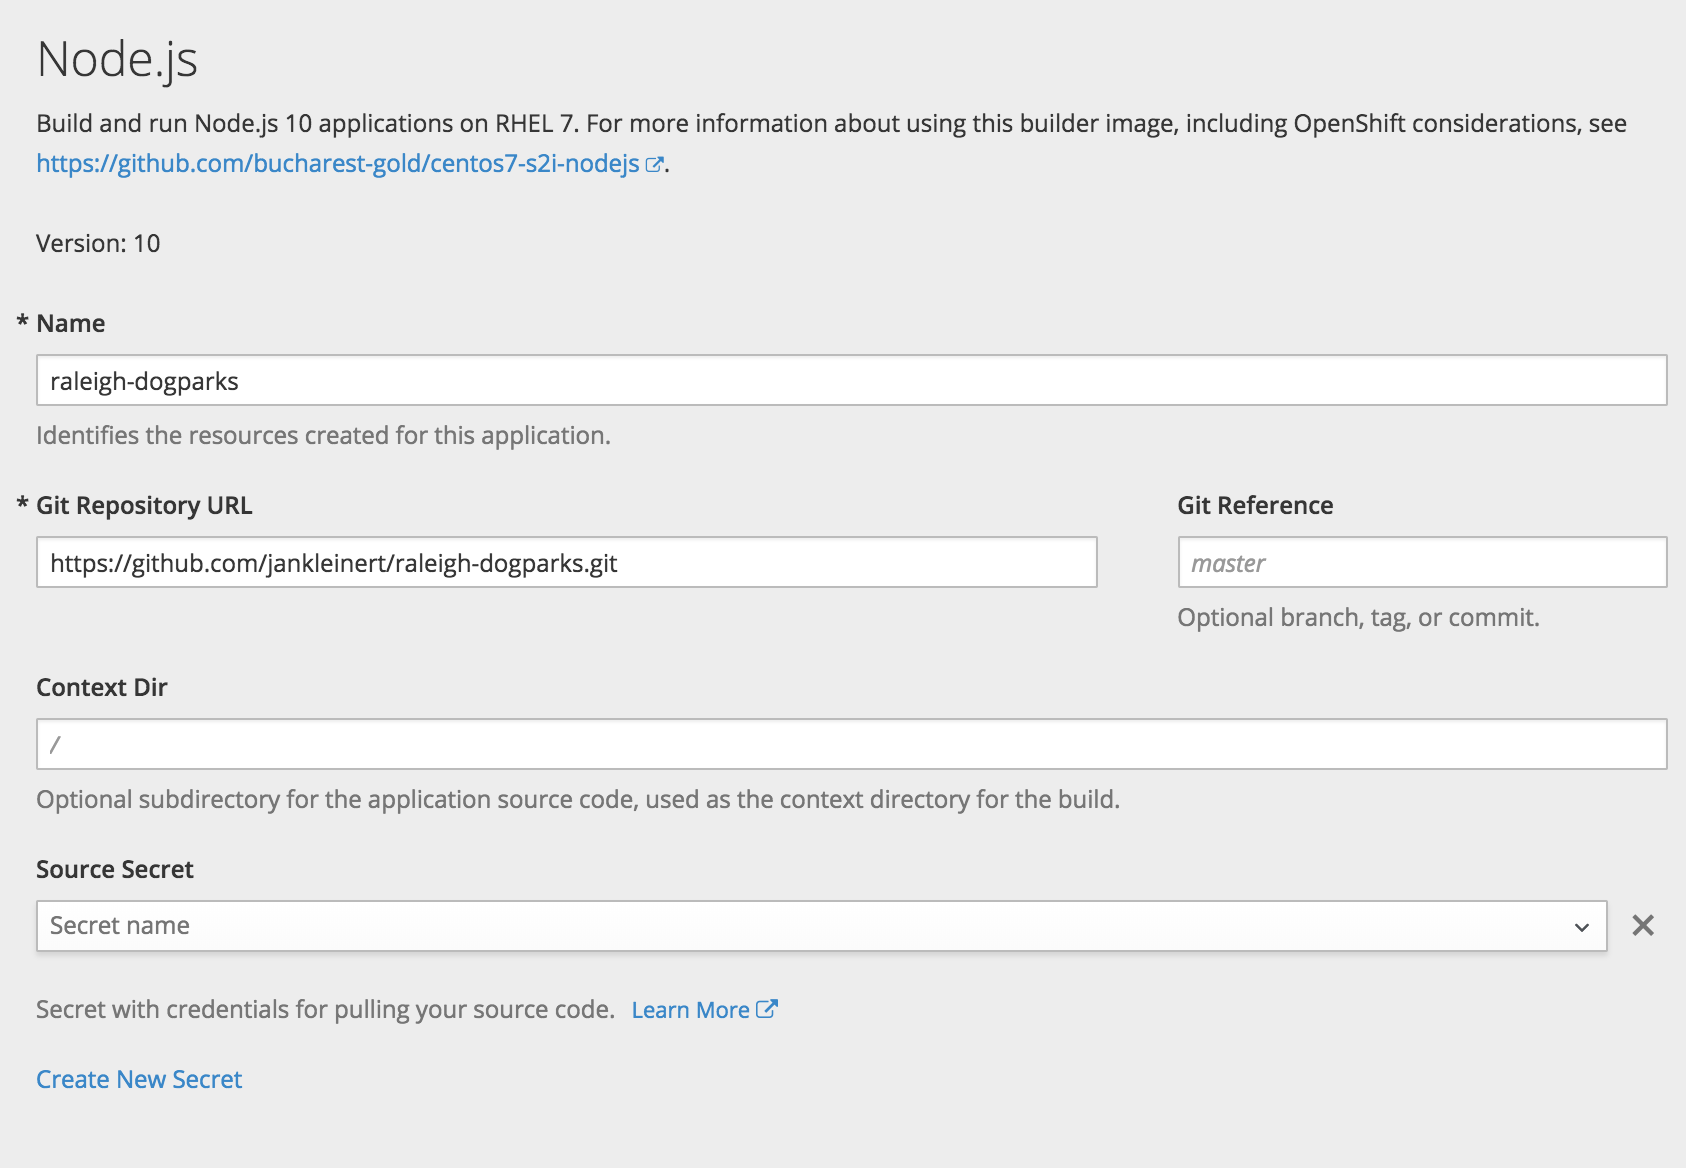
Then, scroll down to the Build Configuration section. First, deselect the checkbox next to “Launch the first build when the build configuration is created.” I’ll explain the reason for this in a moment.
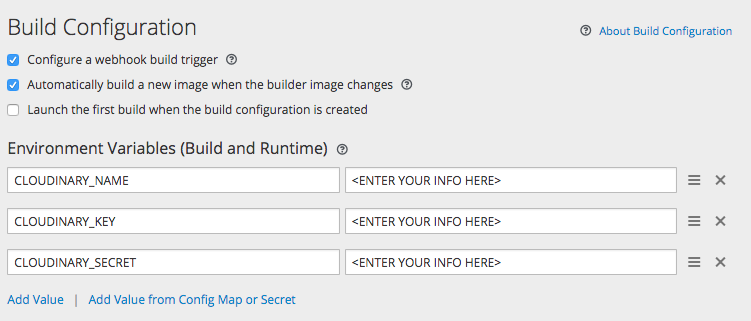
The three environment variables that we will add are for the Cloudinary API. You can find these in the main dashboard of the Cloudinary account you created. Those environment variables are referenced in server/routes/routes.js as part of the Cloudinary config:
cloudinary.config({

  cloud_name: process.env.CLOUDINARY_NAME,

  api_key: process.env.CLOUDINARY_KEY,

  api_secret: process.env.CLOUDINARY_SECRET

});
Leave all the other settings as-is and click “Create” to exit the wizard.
We didn’t launch the build right away because our app needs additional memory allocated to the build process. This is sometimes the case for Node.js apps that use webpack and npm to install packages.
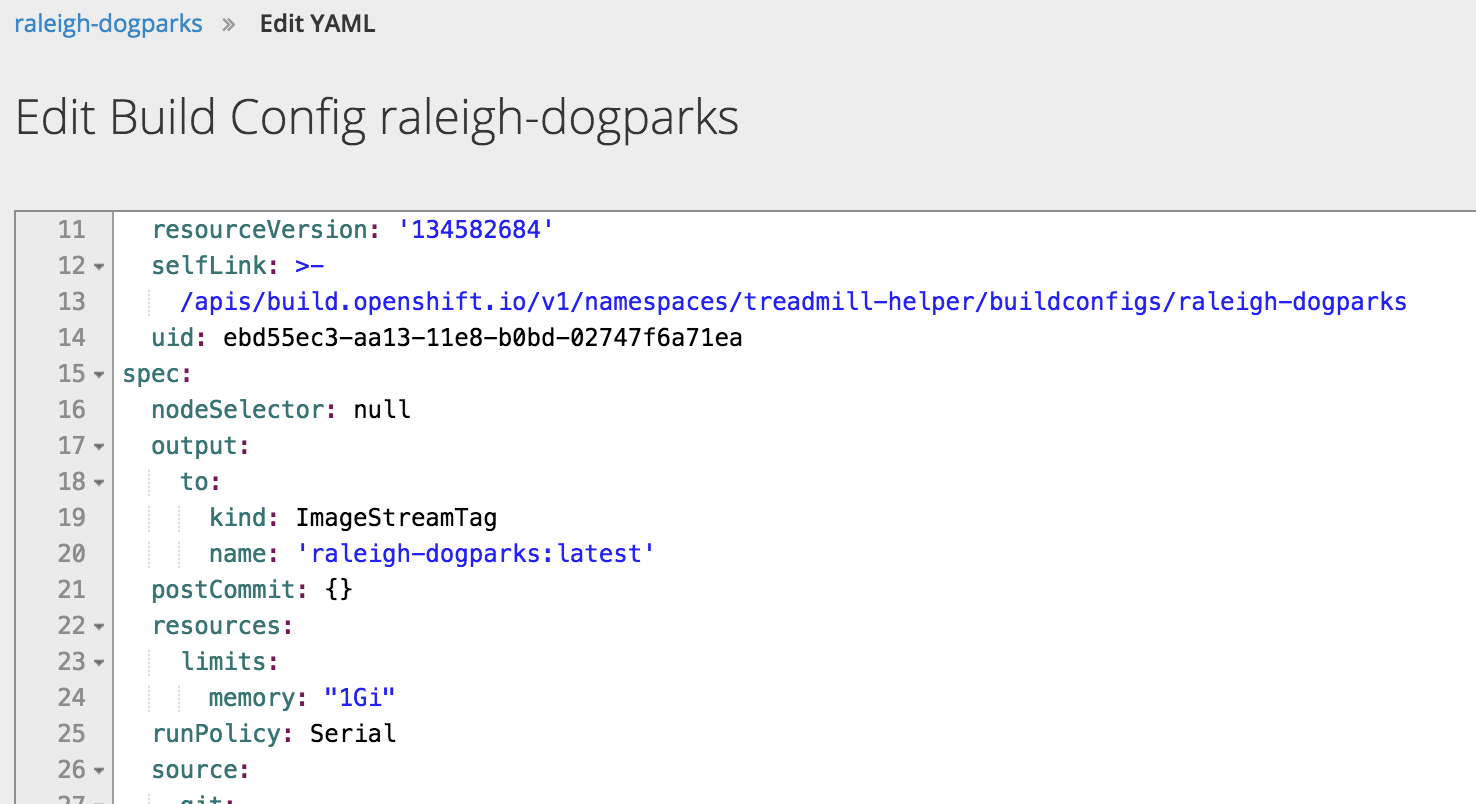
To do that, click Builds > Builds in the left navigation. On the Builds screen, click on “raleigh-dogparks” and then Actions > Edit YAML to edit the Build Config.

In the Build Config editor, update the resources section to specify a memory limit of 1Gi (the default is 512Mi), as shown below.
Now click "Start Build".
Once the build completes, go back to the Overview panel, and expand the raleigh-dogparks application to see that it’s deployed.
In the initial setup, you may have noticed that the option to create a route to the application was selected by default.
 Creating a route allows the app to be externally accessible by a URL. If you click that Route URL, you should be able to launch the app. That’s it! You’ve successfully deployed the app on Red Hat OpenShift Online.

Development Notes
In order to make the move from running this app locally to running it on Red Hat OpenShift Online, there were a couple small changes I needed to make.
Default IP and port
Containers in OpenShift should bind to any address, which we designate with 0.0.0.0 and use port 8080 by default. That may not be what your app is set up for, particularly if you use something like Create React App or another kind of generator tool to create an initial framework. For this app, you can see that in bin/www I’ve set the IP address and port to 0.0.0.0 and 8080, respectively, unless some other values are set via environment variables.
var app = require('../server/server');

var ip = process.env.IP || '0.0.0.0';

var port = process.env.PORT || 8080;
app.listen(port, ip, function() {
 console.log('running at ' + ip + ':' + port);
 });
NPM scripts in package.json
If you view the log from your build, you’ll see the following:
During a build, OpenShift runs npm install -s --only=production and then npm start. In the case of this app, I also wanted to run webpack after install. You can do that by adding a postinstall step in your npm scripts, like this:
"scripts": {

  "build": "webpack",

  "postinstall": "npm run build",

  "start": "node bin/www"

}
Summary
Now you should have all the information you need to be able to deploy an app on Red Hat OpenShift Online using React, Node.js, and Express. Don’t stop there, though! Build off these basics adding in a webhook to trigger a build each time a change is pushed to your Github repository or setting up a custom hostname for your route.
저자 소개
유사한 검색 결과
빠르게 진화하는 AI 위협, 더 빠른 대응
메탈에서 에이전트로: 에이전틱 AI가 애플리케이션의 진화인 이유
Container Roundup | Compiler
Untangling Networks | Compiler
채널별 검색

오토메이션
기술, 팀, 인프라를 위한 IT 자동화 최신 동향

인공지능
고객이 어디서나 AI 워크로드를 실행할 수 있도록 지원하는 플랫폼 업데이트

오픈 하이브리드 클라우드
하이브리드 클라우드로 더욱 유연한 미래를 구축하는 방법을 알아보세요

보안
환경과 기술 전반에 걸쳐 리스크를 감소하는 방법에 대한 최신 정보

엣지 컴퓨팅
엣지에서의 운영을 단순화하는 플랫폼 업데이트

인프라
세계적으로 인정받은 기업용 Linux 플랫폼에 대한 최신 정보

애플리케이션
복잡한 애플리케이션에 대한 솔루션 더 보기
가상화
온프레미스와 클라우드 환경에서 워크로드를 유연하게 운영하기 위한 엔터프라이즈 가상화의 미래