
The Samba project provides file sharing and print services for computers on a network. It uses the Server Message Block and Common Internet File System (SMB/CIFS) protocol, so the services created by running Samba are available to Linux, macOS, and Windows clients. It's an essential service to run in organizations that support multiple operating systems, and it's even useful on homogenous networks.
It's not difficult to set up, and all you need is at least one server you want to designate as a file-share host (it doesn't have to be rack mounted and could even be a dedicated workstation). For client access, Samba is either built into the operating system or easily installed from a repository.
Install Samba
On your designated Samba server, install the Samba package:
$ sudo dnf install samba
This command also installs the samba-common-tools and samba-libs packages.
Next, start the SMB and NMB daemons. The SMB daemon manages most Samba services, while the NMB daemon provides NetBIOS services. Here are the commands:
$ systemctl enable --now smb

$ systemctl enable --now nmb
That's the installation. All that's left is a little configuration.
Configure your firewall
Make sure that your file-share server is accessible over your network by adding the samba service to your firewall config:
$ sudo systemctl enable --now firewalld

$ sudo firewall-cmd --list-services
cockpit dhcpv6-client ssh

$ sudo firewall-cmd --add-service samba
success
Configure Samba
Create a directory on the server to hold your shared files and folders, and change the SELinux context to samba_share_t:
$ sudo mkdir /sambashare

$ sudo chcon -t samba_share_t /sambashare/
To configure shares and users, edit the /etc/samba/smb.conf file. The default file has several good examples of common options, including provisions for shared printers and home directories.
There's a global section, which defines a workgroup. I arbitrarily set mine to SAMBA. I have no other existing workgroups on my network, so the workgroup hardly matters for my setup. If your organization has a specific workgroup structure, then follow that.
[global]
  workgroup = SAMBA
  security = user
  passdb backend = tdbsam
...
By default, your Samba server's NetBIOS name is the server's Linux hostname. If you don't have DNS configured on your local network, you can use the server's IP address when contacting the Samba server.
[ Download the Linux networking cheat sheet to get a list of Linux utilities and commands for managing servers and networks. ]
Create a shared location
To create a new share location, add a section to the /etc/samba/smb.conf configuration file with these two definitions:
[sambashare]
   path = /sambashare
   read only = No
Each section of this configuration file defines a service. When users access a Samba server, they connect to a service named for one of the bracket sections in the config, such as [sambashare], [homes], [print$], and so on. Most users don't need to be aware of this subtlety, but you might see these service names when testing and troubleshooting.
You can test your Samba configuration with the testparm command:
$ testparm /etc/samba/smb.conf
Add users
Users logging into a Samba share must either have accounts on the server or log in as a guest. You can also use standard Unix groups to manage access. For instance, run the following command to create a group of staff members who need access to the server:
[server]$ sudo groupadd staff
Assuming you need to add a staff member named tux to your Samba server, the process is initially the same as usual:
[server]$ sudo adduser -g staff \
--create-home \
tux

[server]$ passwd tux
You must also set a dedicated Samba password:
[server]$ sudo smbpasswd -a tux
[ Keep essential commands close at hand. Download the Linux commands cheat sheet. ]
Restart and test Samba
To load in the new configuration, restart Samba:
[server]$ sudo systemctl restart {s,n}mb
Samba is now serving sambashare to any authenticated user. You can test it using the smbclient command:
[client]$ smbclient -L //sambaserver
Enter SAMBA\tux's password:

Sharename    Type   Comment
---------    ----   -------
sambashare   Disk
print$       Disk   Printer Drivers
IPC$         IPC    IPC Service (Samba 4.14.5)
tux          Disk   Home Directories
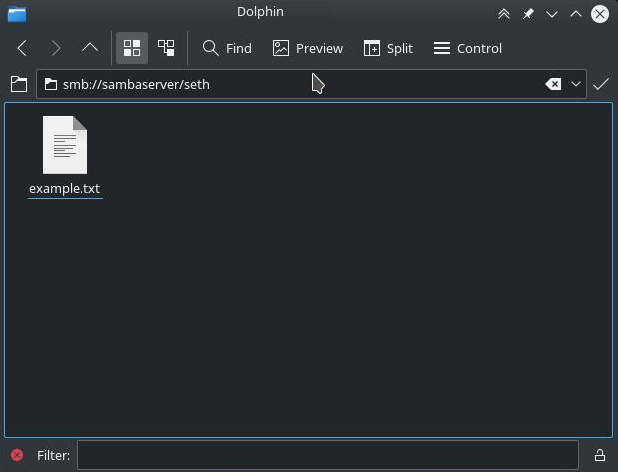
Users can access their Samba shares through file managers, terminal commands, and other services that communicate over SMB. For instance, in KDE Dolphin:
Share files with Samba
Setting up file sharing with Samba is easy and provides flexible cross-platform collaboration. Additional configuration options are available when using workgroups and domains or when Samba is the Active Directory domain controller. It's built into all major operating systems, has rich terminal and GUI tools, and is quick to configure. Help your users break through silos and share data with Samba.
저자 소개
Seth Kenlon is a Linux geek, open source enthusiast, free culture advocate, and tabletop gamer. Between gigs in the film industry and the tech industry (not necessarily exclusive of one another), he likes to design games and hack on code (also not necessarily exclusive of one another).
유사한 검색 결과
Ansible Automation Platform 2.6 업그레이드 경로 계획
Red Hat Ansible Automation Platform과 Cisco Meraki를 통한 네트워크 운영 간소화
Operating System Management | Compiler
Technically Speaking | Taming AI agents with observability
채널별 검색

오토메이션
기술, 팀, 인프라를 위한 IT 자동화 최신 동향

인공지능
고객이 어디서나 AI 워크로드를 실행할 수 있도록 지원하는 플랫폼 업데이트

오픈 하이브리드 클라우드
하이브리드 클라우드로 더욱 유연한 미래를 구축하는 방법을 알아보세요

보안
환경과 기술 전반에 걸쳐 리스크를 감소하는 방법에 대한 최신 정보

엣지 컴퓨팅
엣지에서의 운영을 단순화하는 플랫폼 업데이트

인프라
세계적으로 인정받은 기업용 Linux 플랫폼에 대한 최신 정보

애플리케이션
복잡한 애플리케이션에 대한 솔루션 더 보기
가상화
온프레미스와 클라우드 환경에서 워크로드를 유연하게 운영하기 위한 엔터프라이즈 가상화의 미래