
One of the core components of Ansible is inventories. In its most basic form, an inventory provides host information to Ansible so it can trigger the tasks on the right host or system. In most environments, the static inventory is sufficient for the Ansible control node to work from, however as we expand our use of automation, we need to transition to more effective methods of gathering ever-changing environment details.
This is where the use of a dynamic inventory is beneficial. This allows the platform to gather information for the inventory from environments that are not static sources. A prime example of this is using a dynamic inventory plugin to gather inventory information from a cloud provider or hypervisor, enabling you to keep an inventory up to date with instance details.
Amazon Web Services (AWS) is one of the biggest public cloud providers used around the world. Organizations use their Elastic Compute Cloud services (EC2) for their workflows, however managing an inventory for your instances running on AWS would typically have to be done manually, which is problematic and time consuming. Using the AWS Identity and Access Management interface (IAM), we are able to get programmatic access to the AWS account. Automation controller, the control plane and webUI for Red Hat Ansible Automation Platform, uses this IAM credential to build an inventory and execute automated tasks on your AWS account.
So let's dive in!
Preparing Amazon Web Services
To be able to access AWS instance information for our dynamic inventory, we will need to create an IAM user on our AWS account. Navigate to the IAM section of your AWS account and select “users” followed by the “add users” button.
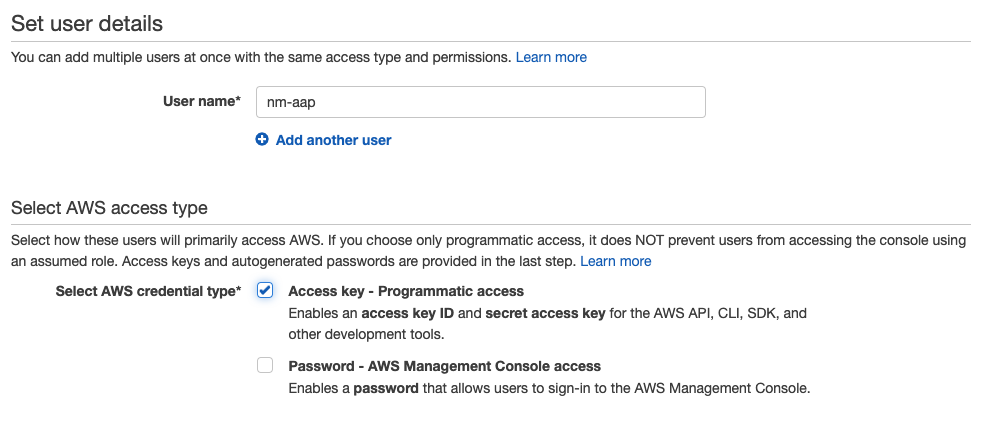
The account should be configured to have programmatic access to create the keys needed for automation controller.
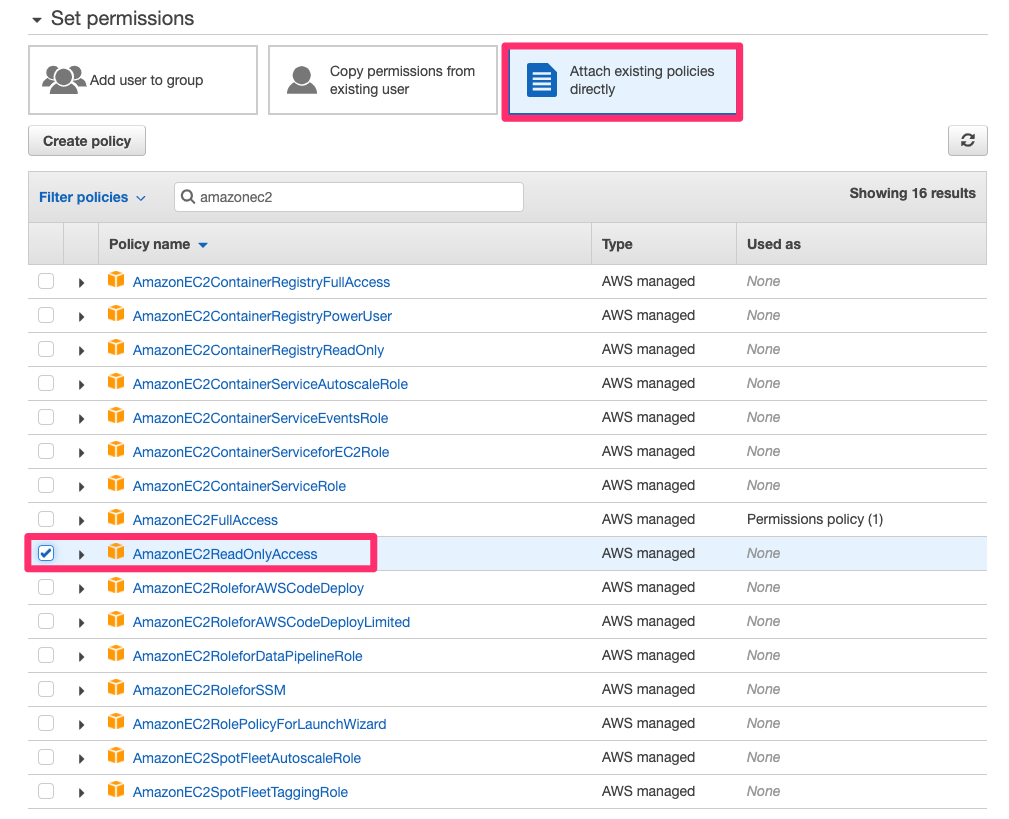
Next we need to set permissions for this user account. Set the permissions policy to “Attach existing policies directly” and select "AmazonEC2ReadOnlyAccess” as your permission policy.
You can also add tags to this credential for better management.
Once the credential has been created, you will receive a token and secret key to use in our automation controller.
Configuring Automation Controller
Automation controller has support for AWS credentials. For us to add the IAM credentials to our controller we will first create a credential for AWS. Under “Resources” on the controller, we select “Credentials” and under “Credential Type”, we select “Amazon Web Services”.

Once we have populated the details with the previously provided token and secret key, we are ready to configure the dynamic inventory.
We can navigate back to the resources on our automation controller and select “Inventories”. To add an inventory, we need to provide a name and organization. Navigating to the “details” of this inventory we have created, we can edit the sources for our inventory.
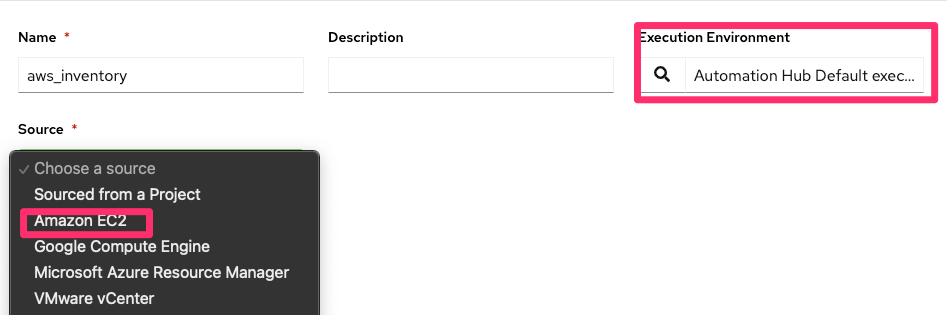
Automation controller lists a number of available inventory sources that can be used for dynamic inventories. We are going to select the “Amazon EC2” source.
In addition to selecting the source, we need to select a default automation execution environment for the dynamic inventory plugin.
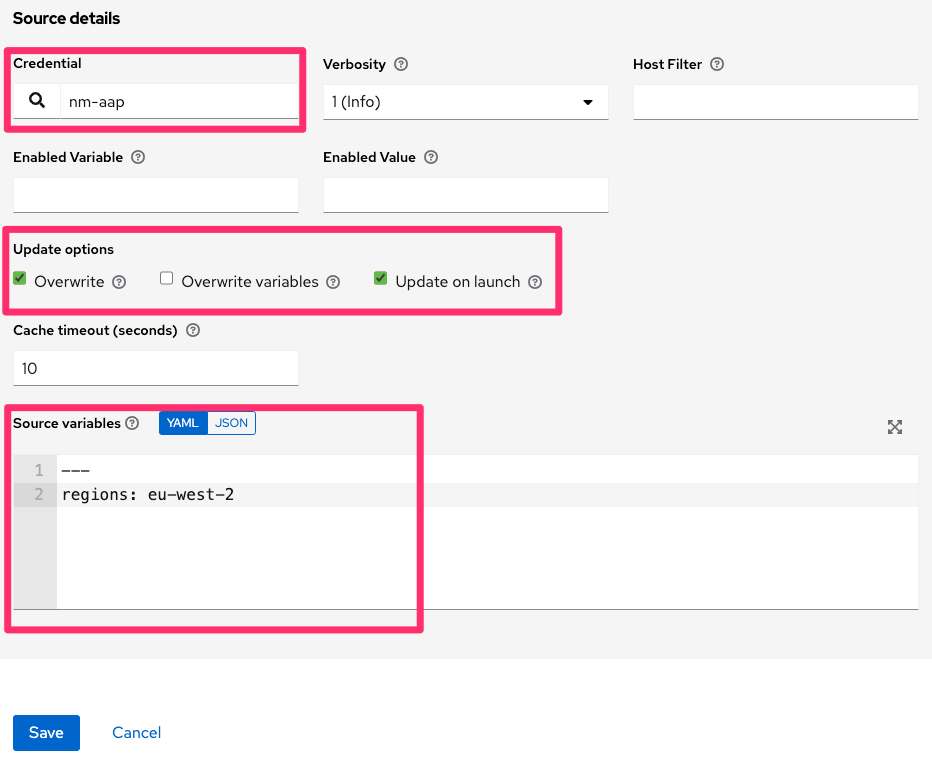
To configure the source details for the dynamic inventory, we need to supply the credentials we had previously configured in the automation controller.
We may also want to specify update options for the inventory and additional variables to assist in filtering the results the controller will retrieve with source variables.
If we want to group instances based on regions, we can use something like the following under source variables:
keyed_groups:
 - key: placement.region
    prefix: aws_region
This will tell the automation controller to create groups in the inventory based on the AWS regions.
There are additional settings here that are pretty powerful should you wish to use them:
Host Filter: Specifies matching hostnames to be imported.
Enabled Variable: Specifies the automation controller to retrieve the enabled state from the given dictionary of host variables.
Enabled Value: The value to enable on import with the specified Enabled Variable.
Once we have submitted these changes, we can synchronize the inventory that will allow the automation controller to look up the instances and populate the inventory.

We are now ready to use our dynamic inventory and trigger our templates and workflows against AWS instances.
What can I do next?
Whether you are beginning your automation journey or a seasoned veteran, there are a variety of resources to enhance your automation knowledge:
- Self-paced exercises - We have interactive, in-browser exercises to learn and dive into Ansible Automation Platform.
- Trial subscription - Are you ready to install on-premises? Get your own trial subscription for unlimited access to all the components of Ansible Automation Platform.
- Developer license - Did you know that you can get a free developer license to learn in your home lab? Register and get access to all the latest tools, technologies and community that Red Hat has to offer.
- Subscribe to the Red Hat Ansible Automation Platform YouTube channel. Be sure to check out our new web series, Automated Live hosted by Colin McNaughton.
- Follow Red Hat Ansible Automation Platform on Twitter - Do you have questions or an automation project you want to show off? Tweet at us!
저자 소개
유사한 검색 결과
과거의 운영 방식에서 벗어나 IT의 미래 구축
모델이 아니라 애플리케이션이 수익을 창출합니다.
Technically Speaking | Inside open source AI strategy
Collaboration In Product Security | Compiler
채널별 검색

오토메이션
기술, 팀, 인프라를 위한 IT 자동화 최신 동향

인공지능
고객이 어디서나 AI 워크로드를 실행할 수 있도록 지원하는 플랫폼 업데이트

오픈 하이브리드 클라우드
하이브리드 클라우드로 더욱 유연한 미래를 구축하는 방법을 알아보세요

보안
환경과 기술 전반에 걸쳐 리스크를 감소하는 방법에 대한 최신 정보

엣지 컴퓨팅
엣지에서의 운영을 단순화하는 플랫폼 업데이트

인프라
세계적으로 인정받은 기업용 Linux 플랫폼에 대한 최신 정보

애플리케이션
복잡한 애플리케이션에 대한 솔루션 더 보기
가상화
온프레미스와 클라우드 환경에서 워크로드를 유연하게 운영하기 위한 엔터프라이즈 가상화의 미래