
Troubleshooting a network is fun, challenging, and interesting, especially for sysadmins. Linux comes with various tools under its belt to help you along the way, including Nmap, ping, traceroute, netstat, ns lookup, and dig. For the purpose of this article, I will stick to Nmap and will explain the steps for how to troubleshoot a network.
Nmap is a useful tool for troubleshooting networks by detecting open ports, the OS version, routes between servers, and much more. Read the official documentation yourself to get a more in-depth look at this tool. Now, let’s dive into using some of the Nmap commands. First, check the version of Nmap (I’m using Red Hat Enterprise Linux 7.5), like this:
If Nmap is not installed, type the following on an RHEL-based system:
$ sudo yum install -y nmap
Now, run Nmap on our gateway IP:
$ sudo nmap -sn <Your-IP>
The results look like this:

[ Related Story: How to validate your security measures ]
Determine this host's OS with the -O switch:
$ sudo nmap -O <Your-IP>
The results look like this:

[ You might also like: Six practical use cases for Nmap ]
Then, run the following to check the common 2000 ports, which handle the common TCP and UDP services. Here, -Pn is used to skip the ping scan after assuming that the host is up:
$ sudo nmap -sS -sU -PN <Your-IP>
The results look like this:
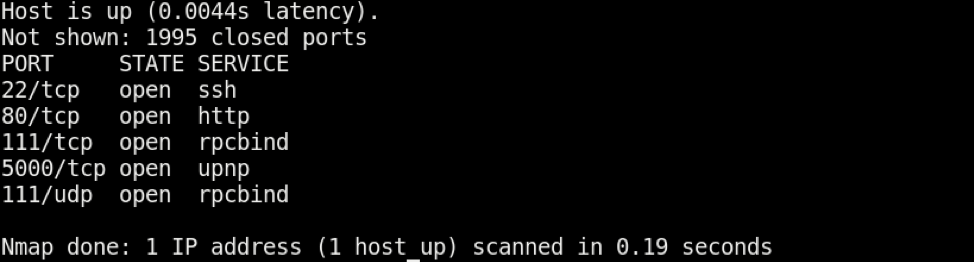
Note: The -Pn combo is also useful for checking if the host firewall is blocking ICMP requests or not.
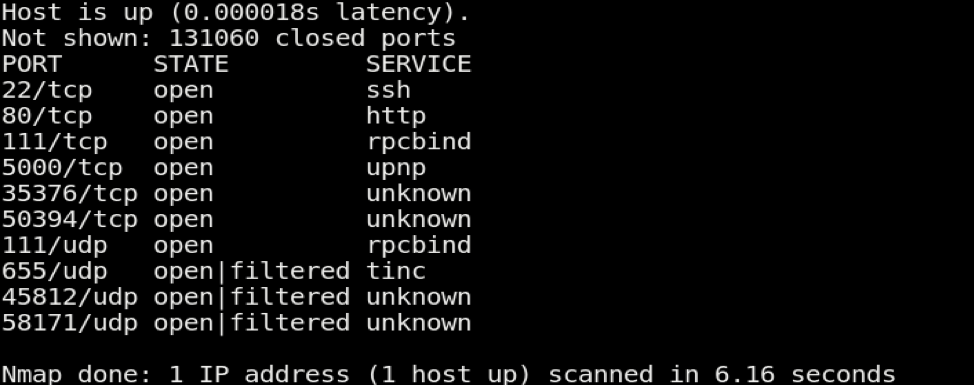
Also, as an extension to the above command, if you need to scan all ports instead of only the 2000 ports, you can use the following to scan ports from 1-66535:
$ sudo nmap -sS -sU -PN -p 1-65535 <Your-IP>
The results look like this:
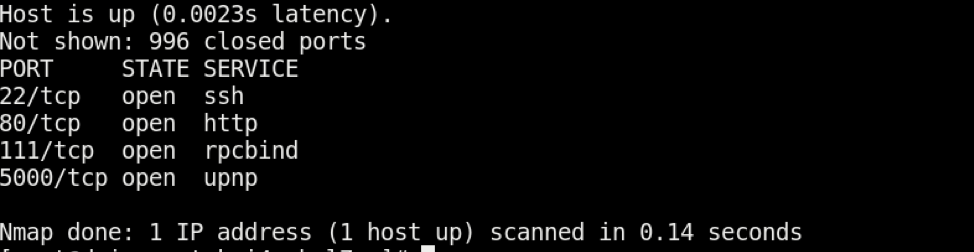
You can also scan only for TCP ports (default 1000) by using the following:
$ sudo nmap -sT <Your-IP>
The results look like this:
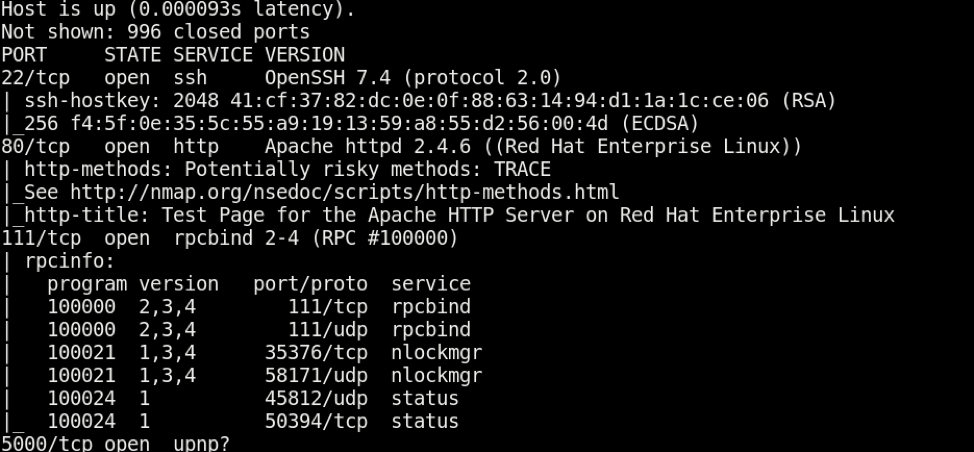
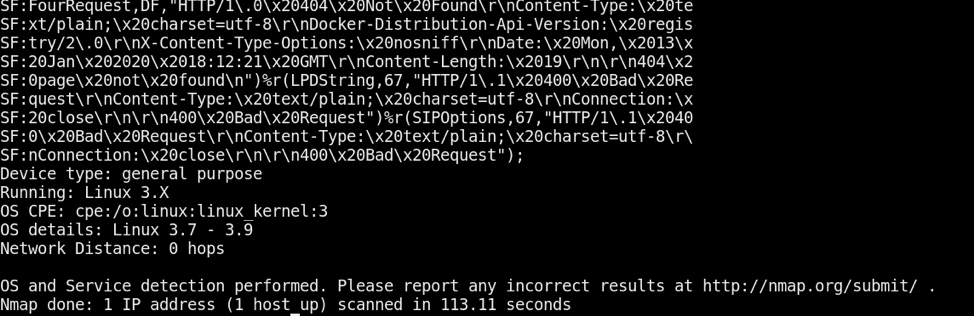
Now, after all of these checks, you can also perform the "all" aggressive scans with the -A option, which tells Nmap to perform OS and version checking using -T4 as a timing template that tells Nmap how fast to perform this scan (see the Nmap man page for more information on timing templates):
$ sudo nmap -A -T4 <Your-IP>
The results look like this, and are shown here in two parts:
There you go. These are the most common and useful Nmap commands. Together, they provide sufficient network, OS, and open port information, which is helpful in troubleshooting. Feel free to comment with your preferred Nmap commands as well.
[ Readers also liked: My 5 favorite Linux sysadmin tools ]
저자 소개
I work as a Solutions Engineer at Red Hat and my day-to-day work involves OpenShift and Ansible. I'm highly passionate about open source software, cloud, security, and networking technologies.
유사한 검색 결과
빠르게 진화하는 AI 위협, 더 빠른 대응
자동화 그 이상의 가치: AI 기반 보안 취약점 급증에 따라 기술 전문가의 지원이 필요한 이유
Untangling Networks | Compiler
Technically Speaking | Defining sovereign AI with open source
채널별 검색

오토메이션
기술, 팀, 인프라를 위한 IT 자동화 최신 동향

인공지능
고객이 어디서나 AI 워크로드를 실행할 수 있도록 지원하는 플랫폼 업데이트

오픈 하이브리드 클라우드
하이브리드 클라우드로 더욱 유연한 미래를 구축하는 방법을 알아보세요

보안
환경과 기술 전반에 걸쳐 리스크를 감소하는 방법에 대한 최신 정보

엣지 컴퓨팅
엣지에서의 운영을 단순화하는 플랫폼 업데이트

인프라
세계적으로 인정받은 기업용 Linux 플랫폼에 대한 최신 정보

애플리케이션
복잡한 애플리케이션에 대한 솔루션 더 보기
가상화
온프레미스와 클라우드 환경에서 워크로드를 유연하게 운영하기 위한 엔터프라이즈 가상화의 미래