This is part 5 of a tutorial that demonstrates how to add OpenShift Virtualization 2.5 to an existing OpenShift 4.6 cluster and start a Fedora Linux VM inside that cluster.
Please refer to “Your First VM with OpenShift Virtualization Using the Web Console” for the introduction of this tutorial and for links to all of its parts and refer to “Creating a VM Using the OpenShift Web Console” for part 4 of this tutorial.
Because this tutorial performs all actions using the OpenShift Web Console, you could follow it from any machine you use as a personal workstation, such as a Windows laptop. You do not require a shell prompt to type oc or kubectl commands.
Before you open network connections to the VM you created in the previous part of this tutorial, we dig inside the components of a running OpenShift Virtualization VM, and so these VMs are not black boxes anymore, and you can perform basic troubleshooting if the need arises.
Virtual Machine and Virtual Machine Instances
As stated in the previous part of this series, a Virtual Machine (VM) resource is not the Kubernetes resource that represents a running Virtual Machine. A running Virtual Machine is represented by a Virtual Machine Instance (VMI) resource.
You can make an analogy between a VM and a Deployment resource, and also between a VMI and a Pod resource. Both VM and Deployment are controller resources that declare the intent of having and keeping something running, while both a VMI and a Pod represent something that is actually running or failed to run.
That analogy is not perfect, and OpenShift Virtualization adds a few other more resource types for managing running VMs such as Virtual Machine Replica Sets (VMRS). VMRS and other resources related to VMs are not in scope of this series, and you can look for information in the OpenShift Virtualization product documentation.
What’s Inside an OpenShift VM?
Log in on the OpenShift web console using the same user account you used in the previous part to create your VM. It is expected that it is a regular, non-cluster administrator account.
Please rely on the written instructions more than on the screen captures. They are here mostly to provide you visual aid and assurance that you are on the correct page for each step.
Switch to the Administrator perspective of the web console to follow these instructions. You can create VMs and perform most of the developer’s tasks from this series from the Developer perspective, but I confess I was too lazy to take more screen captures and describe alternative ways of performing the same tasks from each perspective.
1. Find the Virtual Machine Instance of your running VM.
Click Home → Search and select VirtualMachineInstance in the Resources combo box. It should display a single VMI resource named testvm in your myvms project.

2. Find the virt-launcher pod of your running VM.
For every running VM, there is also a virt-launcher pod. That pod includes a container that runs libvirtd like a regular RHEL server running a KVM VM and also provides the virsh command. If you find that strange, remember that KVM VMs are standard Linux kernel processes, and so there is nothing unusual about running them inside a container, which is also just a regular kernel process tree.
Click Workloads → Pod and click the virt-launcher-testvm-xxxx pod in the myvms project to enter the Pod Details page.

3. Find the qemu-kvm process inside the virt-launcher pod of your VM.
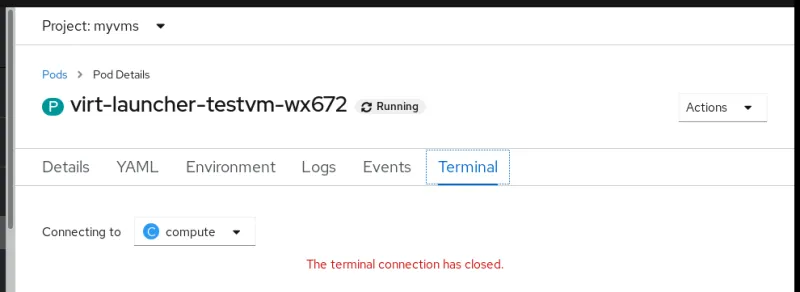
At that point, you might be tempted to click the Terminal tab to look inside the virt-launcher pod of your VM. As a developer, you cannot. That way, OpenShift Virtualization protects its internals and its VMs from regular users.

To really look inside the virt-launcher pod, you need to switch to an OpenShift user with elevated privileges. So log off and log in again as a cluster administrator, find your virt-launcher pod, enter its Terminal tab, and use the ps command to list all running processes inside the virt-launcher pod.

Also use the virsh command to list all VMs inside the container.

That proves that underlying OpenShift Virtualization there is the tried and proved technology of Linux KVM that also powers Red Hat Open Stack Platform and Red Hat Virtualization, not to mention the largest Internet cloud providers.
Next Steps
Now that you have a running Virtual Machine Instance you can proceed to part 6 of this tutorial: “Accessing Your VM using SSH and the Web Console.”
关于作者
Fernando lives in Rio de Janeiro, Brazil, and works on Red Hat's certification training for OpenShift, containers, and DevOps.
