
A LAMP (Linux, Apache, MySQL/MariaDB, PHP) server is an all-in-one, single-tier, data-backed, web application server that is relatively easy to set up and administer. Some Linux system administrators argue that the 'P' in LAMP can also stand for Perl or even Python. That is fine with me, but for the purpose of this article, I'm using MySQL and PHP. I've included MariaDB as an option, but I strongly suggest that for production systems that your LAMP stack consist of Red Hat Enterprise Linux, Apache, MySQL, and PHP. This has always been my formula, even before coming to Red Hat. I used CentOS and Maria DB for test and development but my production systems were always the commercially supported versions of the operating system and the database server software. There's an old saying that goes, "You never get fired for buying IBM," and I feel the same way about all my production systems. I've never been fired for choosing a commercially supported operating system or database server.
Installation and prerequisites
Before installing new software on your system, whether production or test, always update your software to be sure you have the latest patched versions of everything. There's no excuse for not doing it and security is far too important to skip this step:
$ sudo dnf -y update
I've always installed every component of the LAMP stack prior to configuring them, but for this tutorial, I'll install each component individually, go through any setup and configuration steps, and then proceed to the next component. Since the Linux part of the LAMP stack has to be installed as a prerequisite, I'll proceed through the rest of the components in the order of the acronym.
First up, the Apache web server.
Apache
The Apache web server is still the standard web service for Linux systems. There are others such as NGINX that have some compelling features, but Apache is the LAMP stack favorite. To install the Apache web server and other required components, use the following command:
$ sudo dnf -y install httpd
Enable the httpd (Apache) service so that it starts upon reboot:
$ sudo systemctl enable httpd.service
Created symlink /etc/systemd/system/multi-user.target.wants/httpd.service → /usr/lib/systemd/system/httpd.service.
Start the httpd service to continue with installation and setup:
$ sudo systemctl start httpd.service
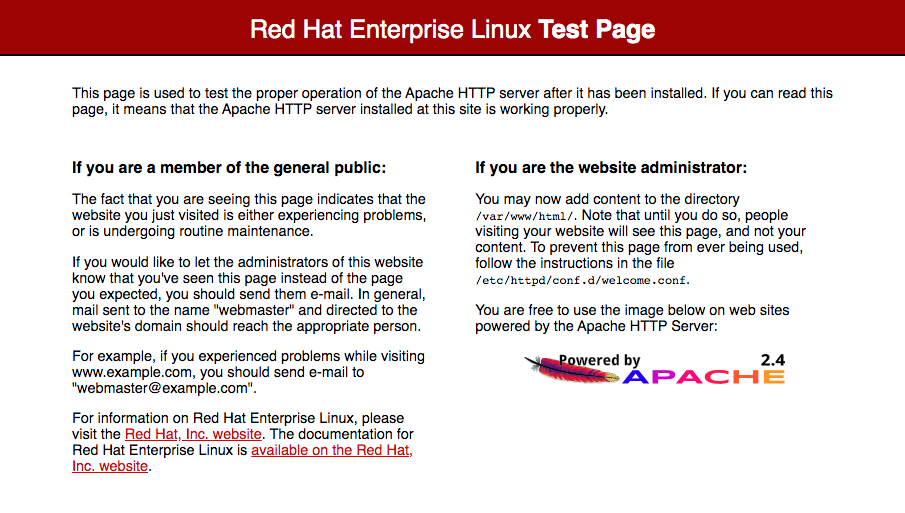
Use a browser from another system and enter the server's IP address or DNS name into the URL field to test that Apache is up, running, and accessible in the format:
http://<server-name or IP address>
For example:
http://192.168.1.100
If you don't see the page above, and instead receive a message that the site can't be reached, be sure to check that the httpd service is running:
$ ps -ef | grep httpd

root     14846     1  0 00:58 ?        00:00:00 /usr/sbin/httpd -DFOREGROUND
apache   14847 14846  0 00:58 ?        00:00:00 /usr/sbin/httpd -DFOREGROUND
apache   14848 14846  0 00:58 ?        00:00:00 /usr/sbin/httpd -DFOREGROUND
apache   14849 14846  0 00:58 ?        00:00:00 /usr/sbin/httpd -DFOREGROUND
apache   14850 14846  0 00:58 ?        00:00:00 /usr/sbin/httpd -DFOREGROUND
Once you verify that your service is running, your firewall might be blocking port 80 access. Use the following commands to allow port 80 through the firewall and to reload the firewall configuration:
$ sudo firewall-cmd --zone=public --add-port=80/tcp --permanent
success

$ sudo firewall-cmd --reload
success
Try the URL for your server again and you should see the Apache test page.
MySQL
MySQL is a robust and full-featured open source relational database management system that powers many of the world's busiest data-backed sites. This software is available in package format or as source code. The following command installs the MySQL server, client, and dependencies:
$ sudo dnf -y install mysql-server mysql
Optionally, you can make your MySQL installation more secure by supplying a password for the MySQL root user, removing anonymous users, preventing the MySQL root user (not the Linux root user) from logging in remotely, and removing the test database.
Enable and start the MySQL server service:
$ sudo systemctl enable mysqld.service
Created symlink /etc/systemd/system/multi-user.target.wants/mysqld.service → /usr/lib/systemd/system/mysqld.service.

$ sudo systemctl start mysqld.service
Secure the MySQL installation:
$ sudo mysql_secure_installation

Securing the MySQL server deployment.

Connecting to MySQL using a blank password.

VALIDATE PASSWORD COMPONENT can be used to test passwords
and improve security. It checks the strength of password
and allows the users to set only those passwords which are
secure enough. Would you like to setup VALIDATE PASSWORD component?

Press y|Y for Yes, any other key for No: y

There are three levels of password validation policy:

LOW    Length >= 8
MEDIUM Length >= 8, numeric, mixed case, and special characters
STRONG Length >= 8, numeric, mixed case, special characters and dictionary                  file

Please enter 0 = LOW, 1 = MEDIUM and 2 = STRONG: 2
Please set the password for root here.

New password:

Re-enter new password:

Estimated strength of the password: 100
Do you wish to continue with the password provided?(Press y|Y for Yes, any other key for No) : y
By default, a MySQL installation has an anonymous user,
allowing anyone to log into MySQL without having to have
a user account created for them. This is intended only for
testing, and to make the installation go a bit smoother.
You should remove them before moving into a production
environment.

Remove anonymous users? (Press y|Y for Yes, any other key for No) : y
Success.


Normally, root should only be allowed to connect from
'localhost'. This ensures that someone cannot guess at
the root password from the network.

Disallow root login remotely? (Press y|Y for Yes, any other key for No) : y
Success.

By default, MySQL comes with a database named 'test' that
anyone can access. This is also intended only for testing,
and should be removed before moving into a production
environment.


Remove test database and access to it? (Press y|Y for Yes, any other key for No) : y
 - Dropping test database...
Success.

 - Removing privileges on test database...
Success.

Reloading the privilege tables will ensure that all changes
made so far will take effect immediately.

Reload privilege tables now? (Press y|Y for Yes, any other key for No) : y
Success.

All done!
Your MySQL database server is now installed, running, and secured.
PHP
PHP is a server-side scripting language that is easy to use, even for those who have few programming skills or little experience. It has a simple syntax and is actually fun to use in web programming. There are a lot of resources available on php.net, including code snippets, tutorials, and a large, active user community in case you run into problems.
I always install the base PHP package, the php-mysqlnd module, and the PHP command-line interface package, php-cli, because I like to test things at the command line. Some administrators think that php-cli is a security risk, and it is, but only if you leave your php-cli scripts in either your web-accessible directories or with open permissions where anyone can execute them. I prefer to install it but be careful. The following command installs PHP, the MySQL native driver components for PHP, the PHP CLI package, and dependencies:
$ sudo dnf -y install php php-mysqlnd php-cli
It's time to test your LAMP installation, but first, restart Apache after installing PHP:
$ sudo systemctl restart httpd.service
Now, open your favorite text editor (vi is the correct answer here) and create a new file under /var/www/html named test.php:
$ sudo vi /var/www/html/test.php
Enter the following into the test.php file:
<?php
phpinfo();
?>
Save and exit the file.
Open your browser again and point it to the test.php file on your LAMP server:
http://192.168.1.100/test.php
The browser might take a second or two to read in all the information, but you should see something like the following in your browser:
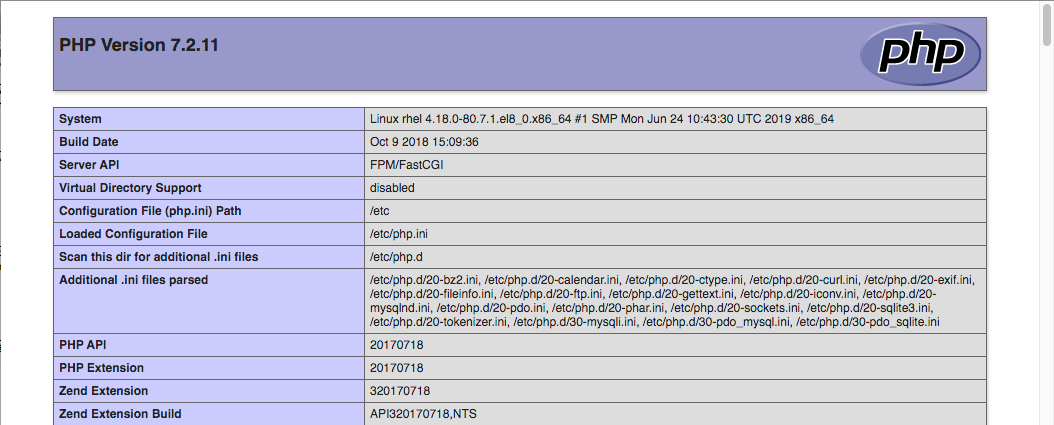
This is only a partial screenshot. The actual file is very long.
The file you created, test.php, contains the phpinfo command, which displays PHP, MySQL, Apache, and other component information complete with version numbers. Remove this file once you have checked it. Hackers look for files containing this information.
Wrapping up
Congratulations, you now have a fully functioning LAMP server. Place your PHP and HTML files in /var/www/html, or any web-enabled directory of your choice. Remember to place your command-line PHP scripts in your home directory and remove all permissions from others. Have fun with your new LAMP system. Be sure to let me know how your experience goes via Twitter or on LinkedIn.
Sobre el autor
Ken has used Red Hat Linux since 1996 and has written ebooks, whitepapers, actual books, thousands of exam review questions, and hundreds of articles on open source and other topics. Ken also has 20+ years of experience as an enterprise sysadmin with Unix, Linux, Windows, and Virtualization.
Follow him on Twitter: @kenhess for a continuous feed of Sysadmin topics, film, and random rants.
In the evening after Ken replaces his red hat with his foil hat, he writes and makes films with varying degrees of success and acceptance. He is an award-winning filmmaker who constantly tries to convince everyone of his Renaissance Man status, also with varying degrees of success and acceptance.
Más como éste
4 razones para comenzar a utilizar el modo de imagen para Red Hat Enterprise Linux
Avance de las funciones poscuánticas de SSH en Red Hat Enterprise Linux
Infrastructure At The Edge | Compiler
Operating System Management | Compiler
Navegar por canal

Automatización
Las últimas novedades en la automatización de la TI para los equipos, la tecnología y los entornos

Inteligencia artificial
Descubra las actualizaciones en las plataformas que permiten a los clientes ejecutar cargas de trabajo de inteligecia artificial en cualquier lugar

Nube híbrida abierta
Vea como construimos un futuro flexible con la nube híbrida

Seguridad
Vea las últimas novedades sobre cómo reducimos los riesgos en entornos y tecnologías

Edge computing
Conozca las actualizaciones en las plataformas que simplifican las operaciones en el edge

Infraestructura
Vea las últimas novedades sobre la plataforma Linux empresarial líder en el mundo

Aplicaciones
Conozca nuestras soluciones para abordar los desafíos más complejos de las aplicaciones
Virtualización
El futuro de la virtualización empresarial para tus cargas de trabajo locales o en la nube