
table { border: #ddd solid 1px; } td, th { padding: 8px; border: #ddd solid 1px; } td p { font-size: 15px !important; }
In this post, we will configure Red Hat Satellite to manage content for our Red Hat Enterprise Linux (RHEL) environment. We will enable RHEL repositories on Satellite and define a RHEL lifecycle.
Adding Software Repositories to Satellite
We will be only using RHEL 8 content for this tutorial, but we will enable both RHEL 7 and RHEL 8 repositories to Satellite for practice.
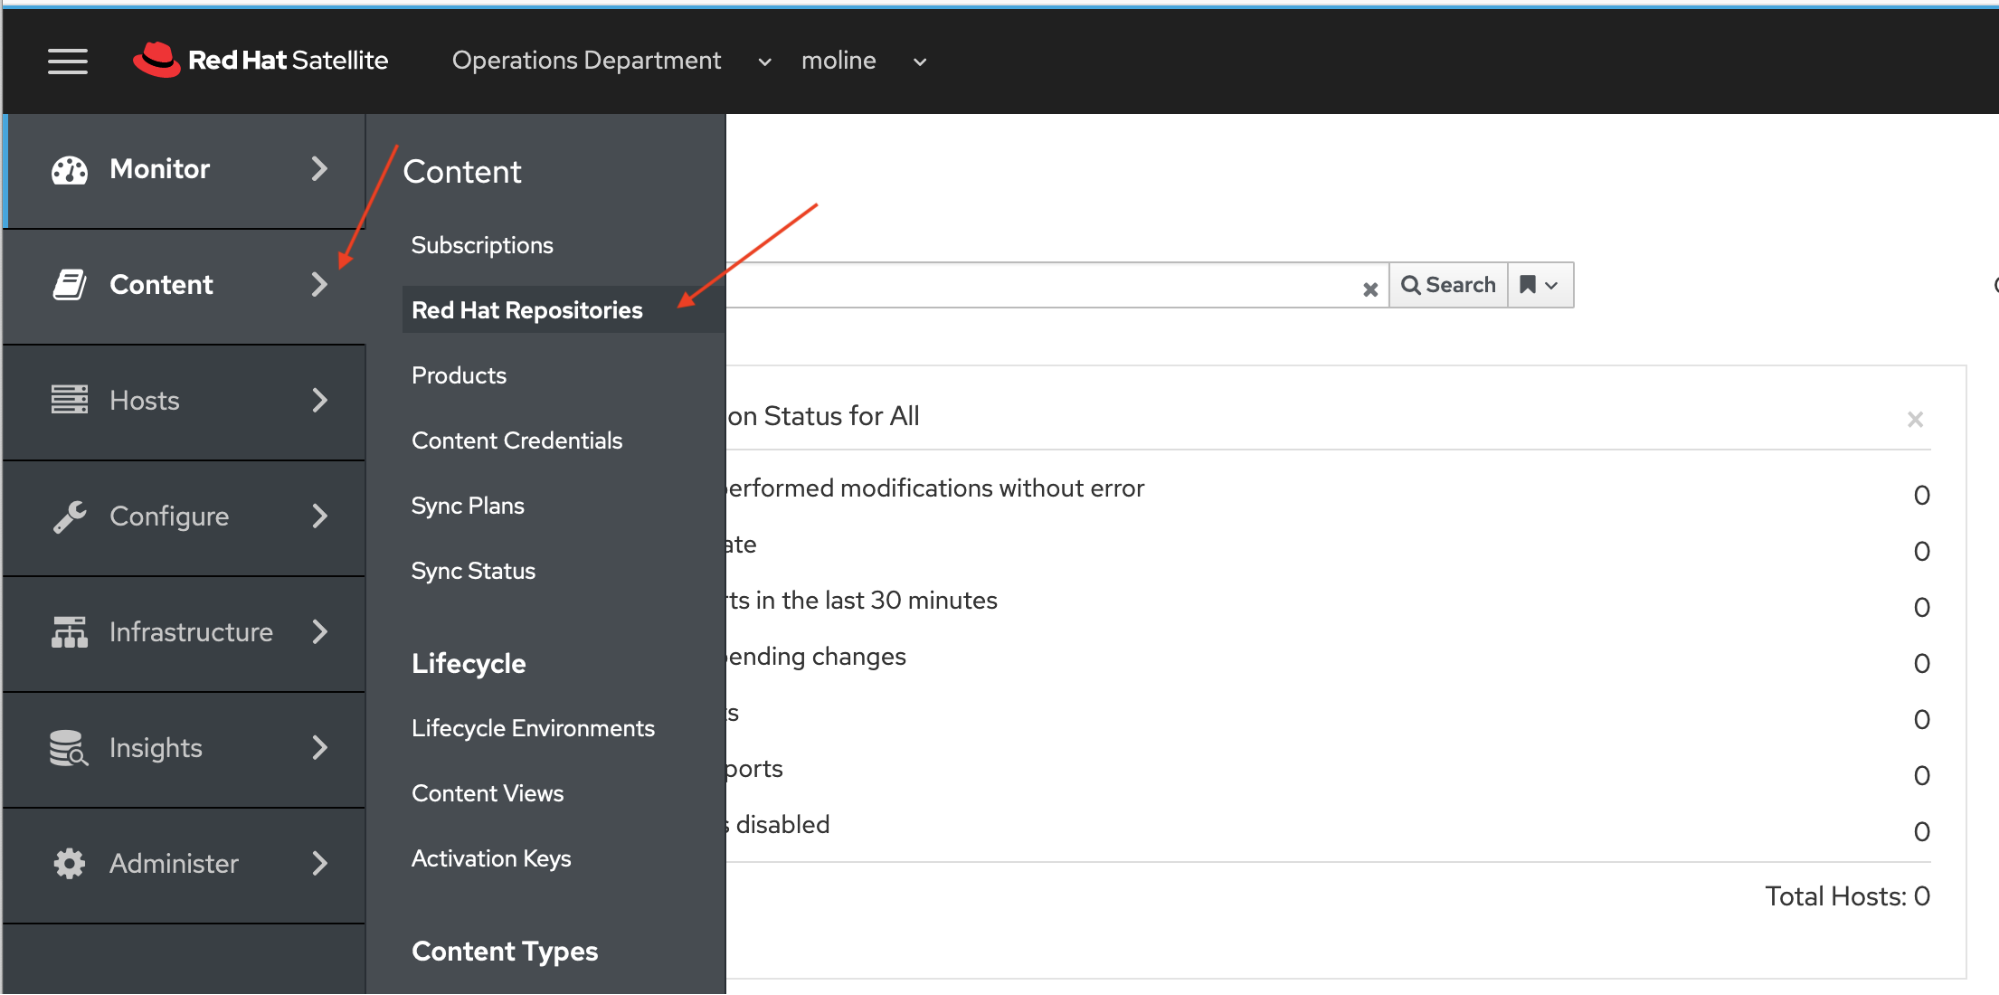
Log in to the Satellite console and on the side menu navigate to Content -> Red Hat Repositories. Make sure that your organization and location is set to the Operations Department and moline. Remember, Organization and Location are located in the upper left area of the Satellite console
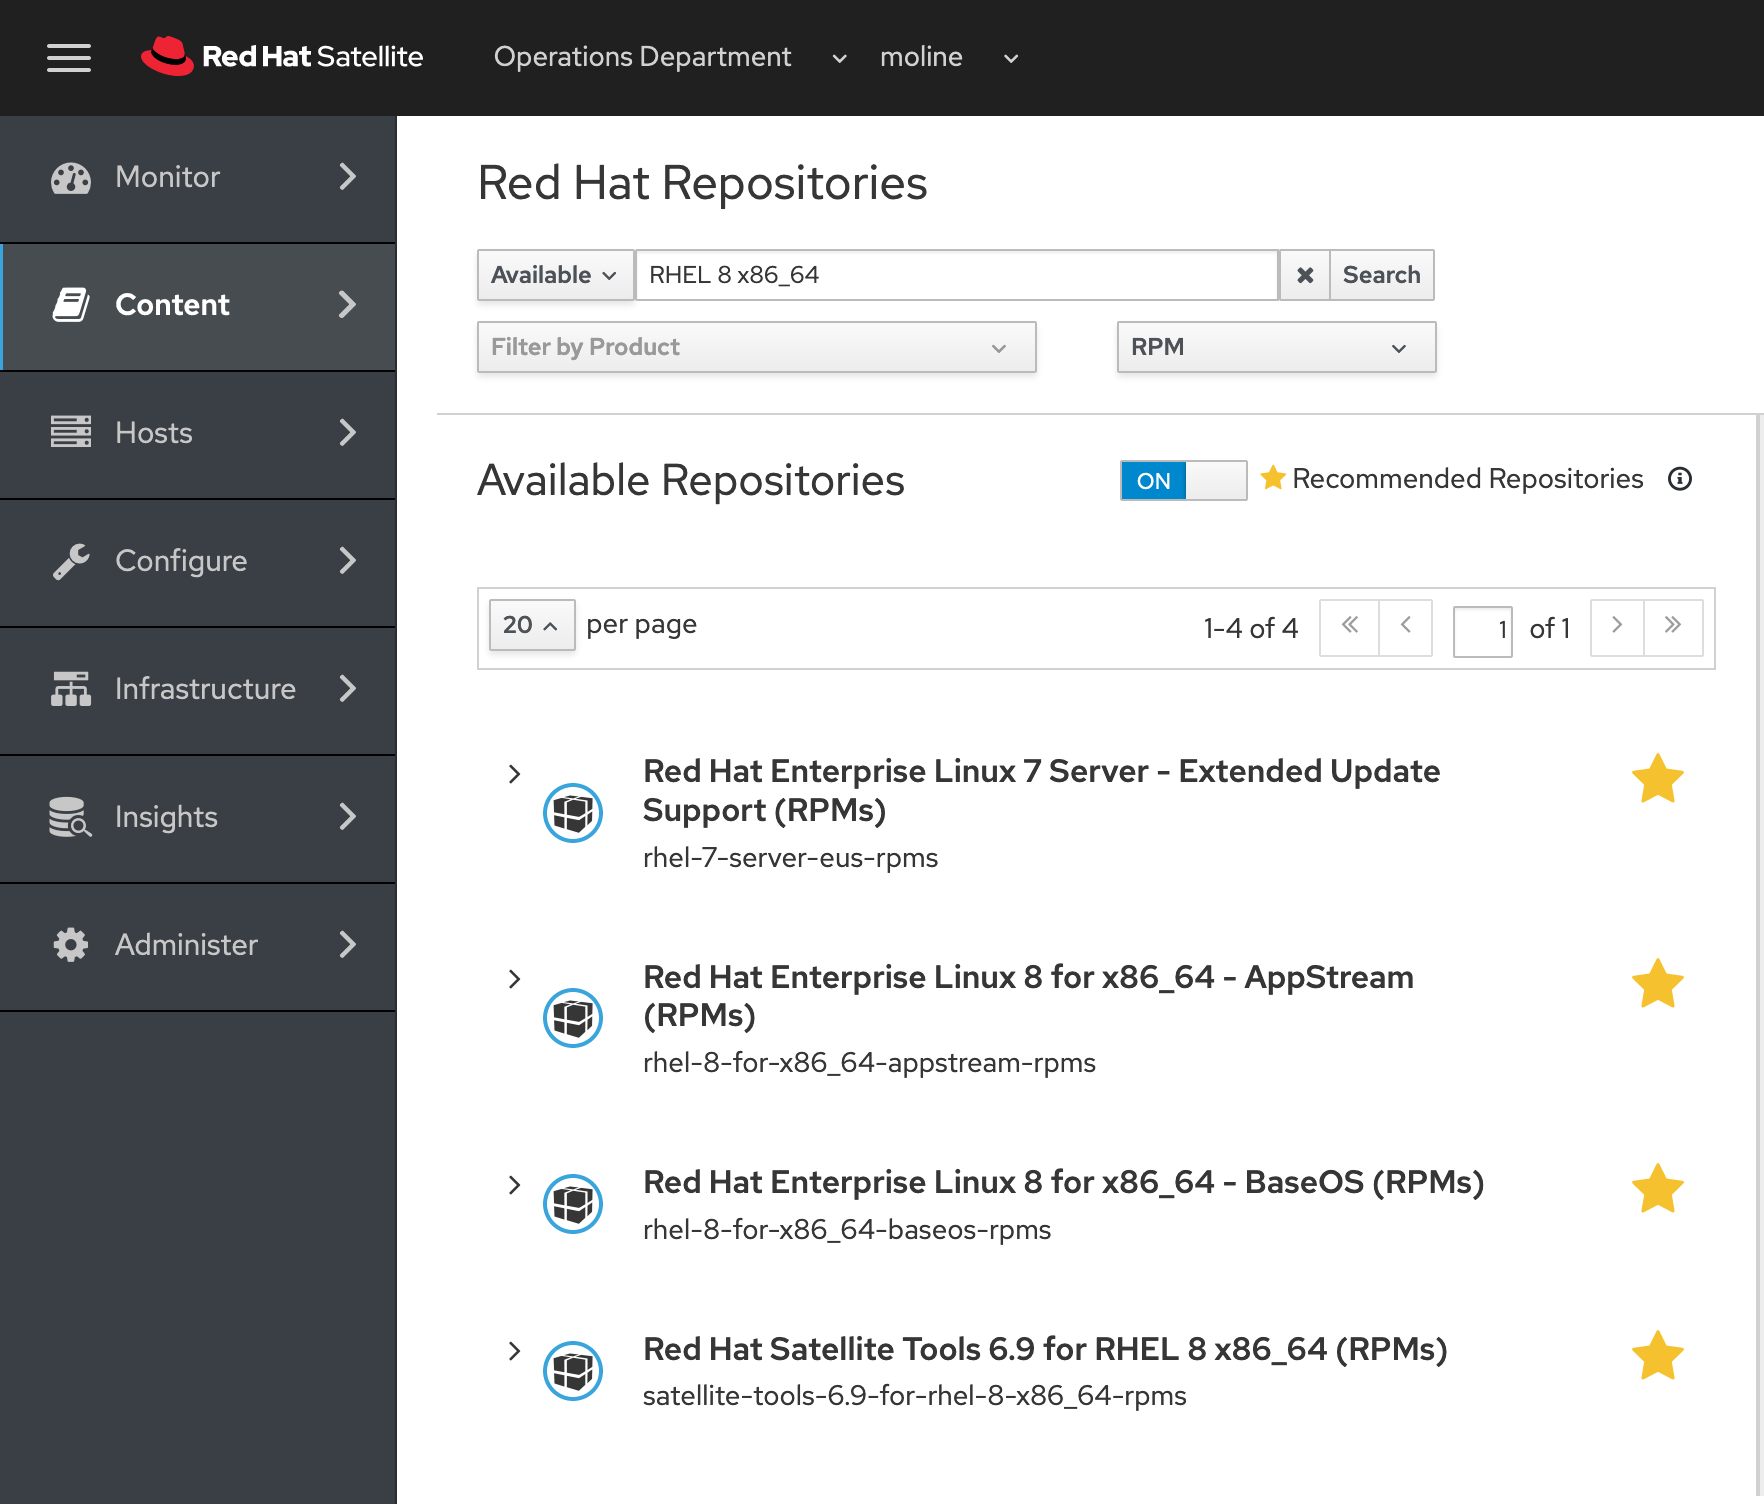
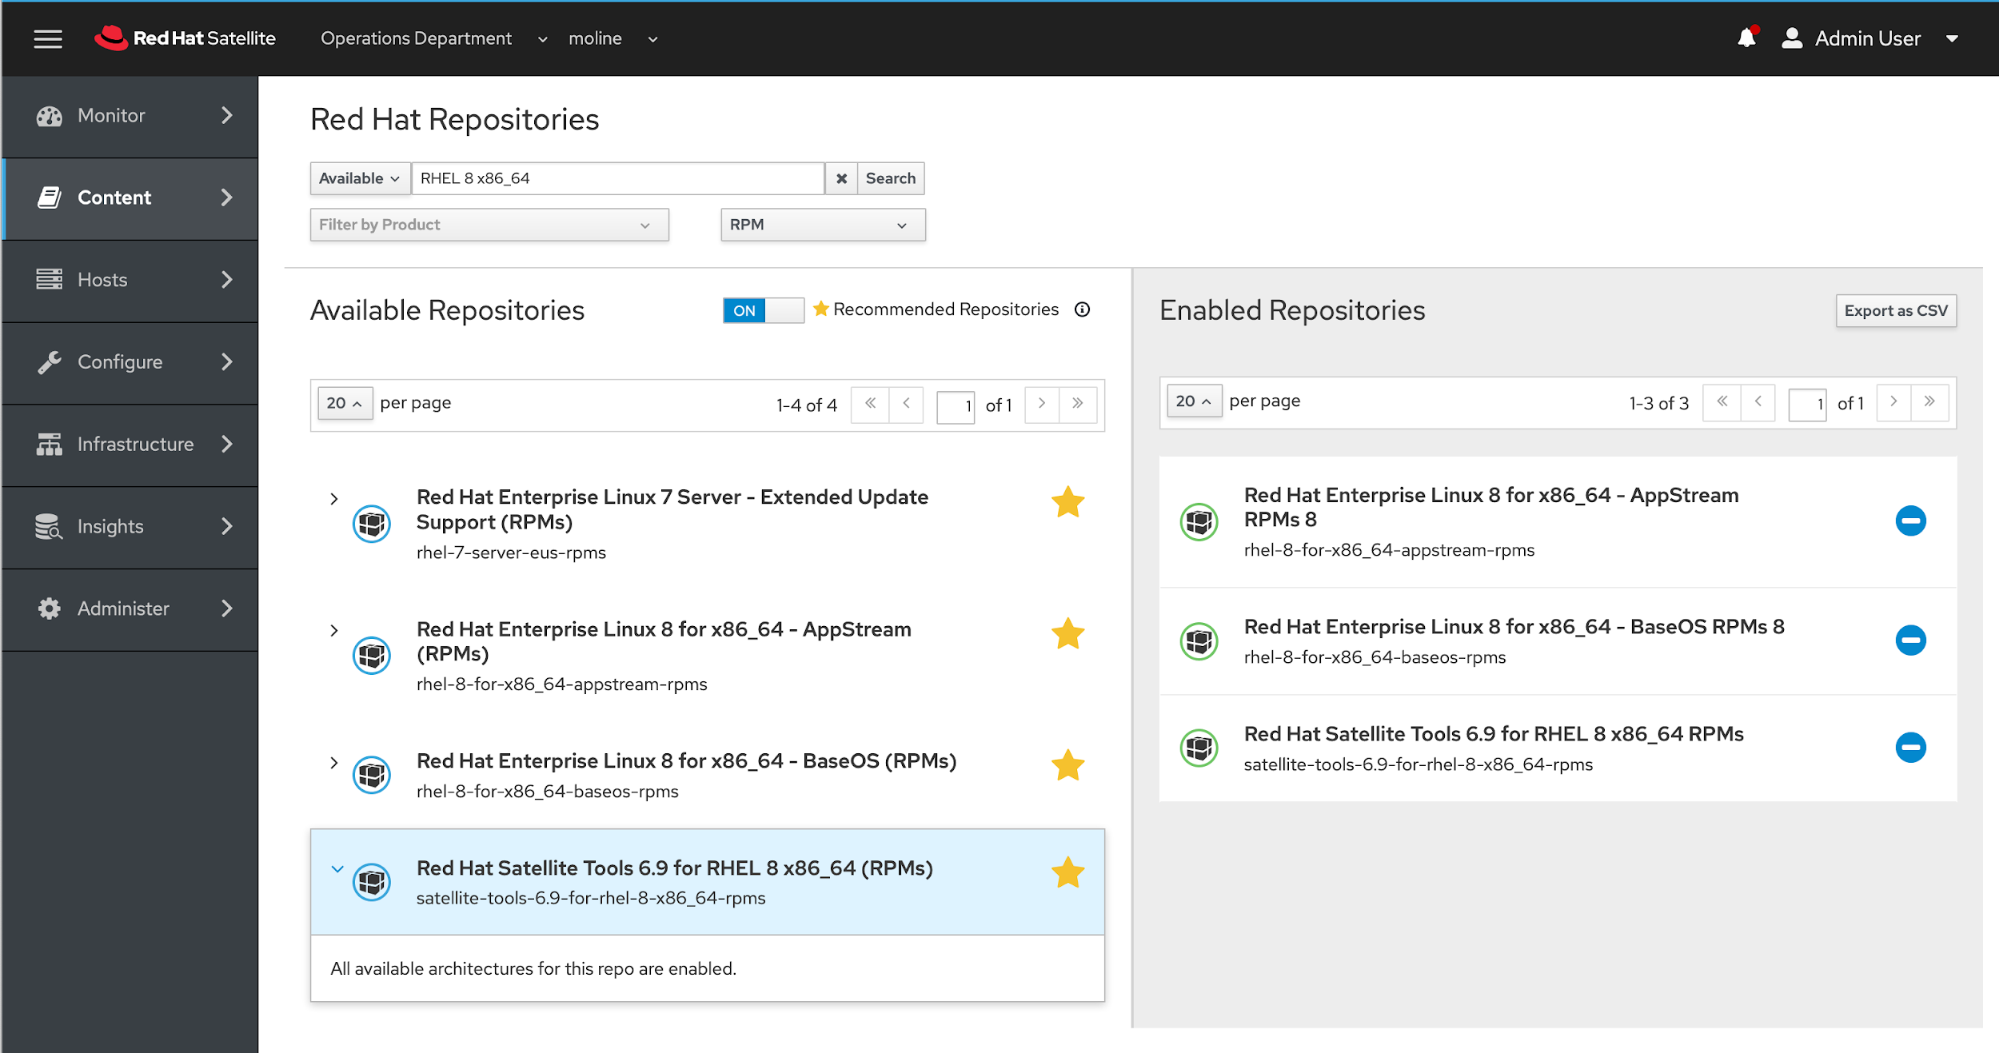
We will first search for RHEL 8 repositories. Enter RHEL 8 x86_64 in the Available search field and then click the Search button. Now toggle the Recommended Repositories switch to On.
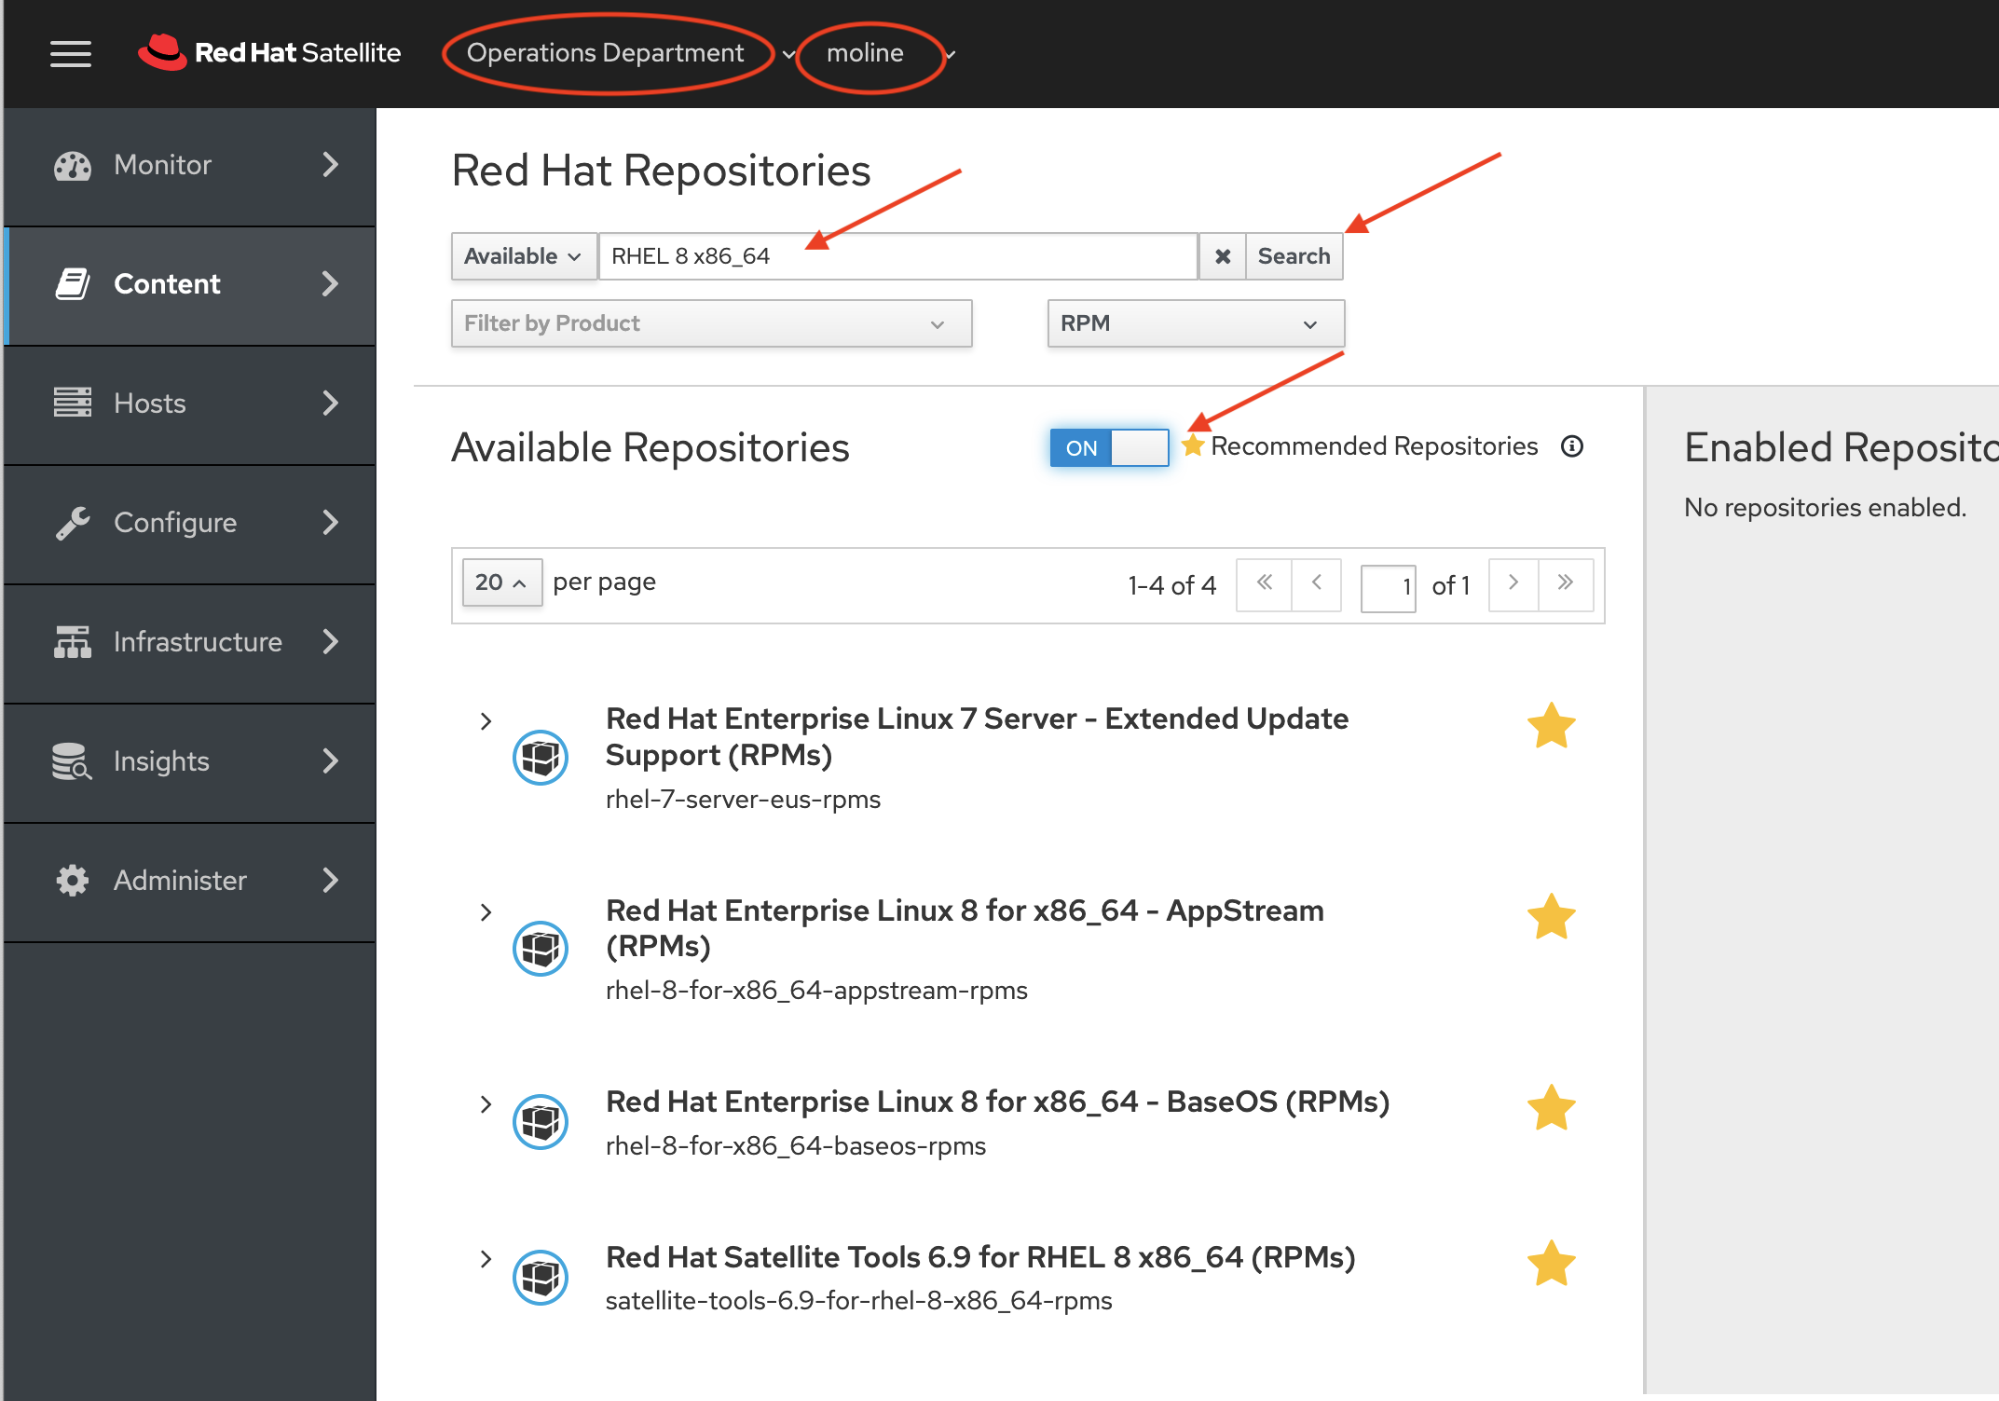
You will now see a smaller set of repositories. We will be enabling three RHEL 8 Repositories:
|
Name |
Repository |
|
Red Hat Enterprise Linux 8 for x86_64 - AppStream (RPMs) |
rhel-8-for-x86_64-appstream-rpms |
|
Red Hat Enterprise Linux 8 for x86_64 - BaseOS (RPMs) |
rhel-8-for-x86_64-baseos-rpms |
|
Red Hat Satellite Tools 6.9 for RHEL 8 x86_64 (RPMs) |
satellite-tools-6.9-for-rhel-8-x86_64-rpms |
To enable a repository, click the twisty icon to the left of the repository name and then click the blue plus icon. If you hover your mouse point over the blue plus icon you will see a pop-up text that says enable. We recommend enabling the version release of a RHEL repository and not the point release. We chose the version release of the RHEL repository as it contains the errata from GA until that release is no longer supported.

After you click the blue plus sign, you will see the selected repository is now in the right column titled Enabled Repositories.
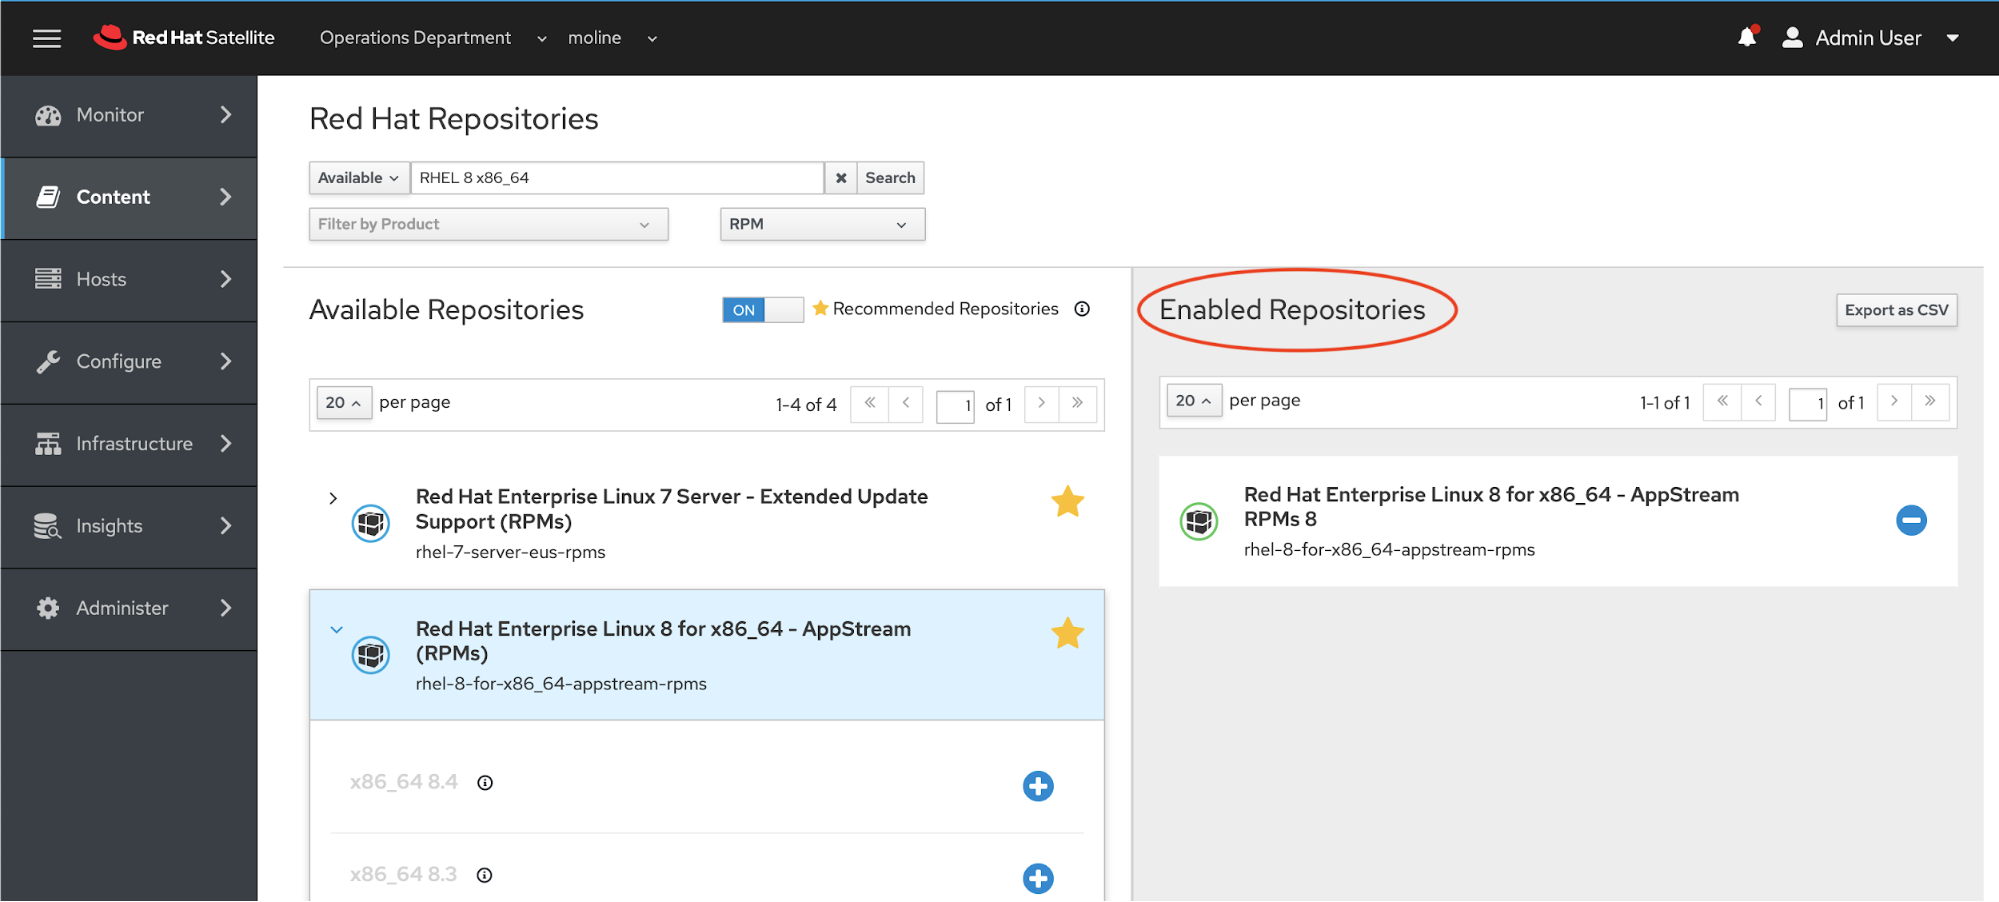
Repeat the steps above to enable the other RHEL 8 repositories. When you are finished, the Satellite console should look like the next screenshot.
We will now enable some RHEL 7 repositories. Enter RHEL 7 in the Available search field, click the Search button and then toggle Recommended Repositories switch to On.
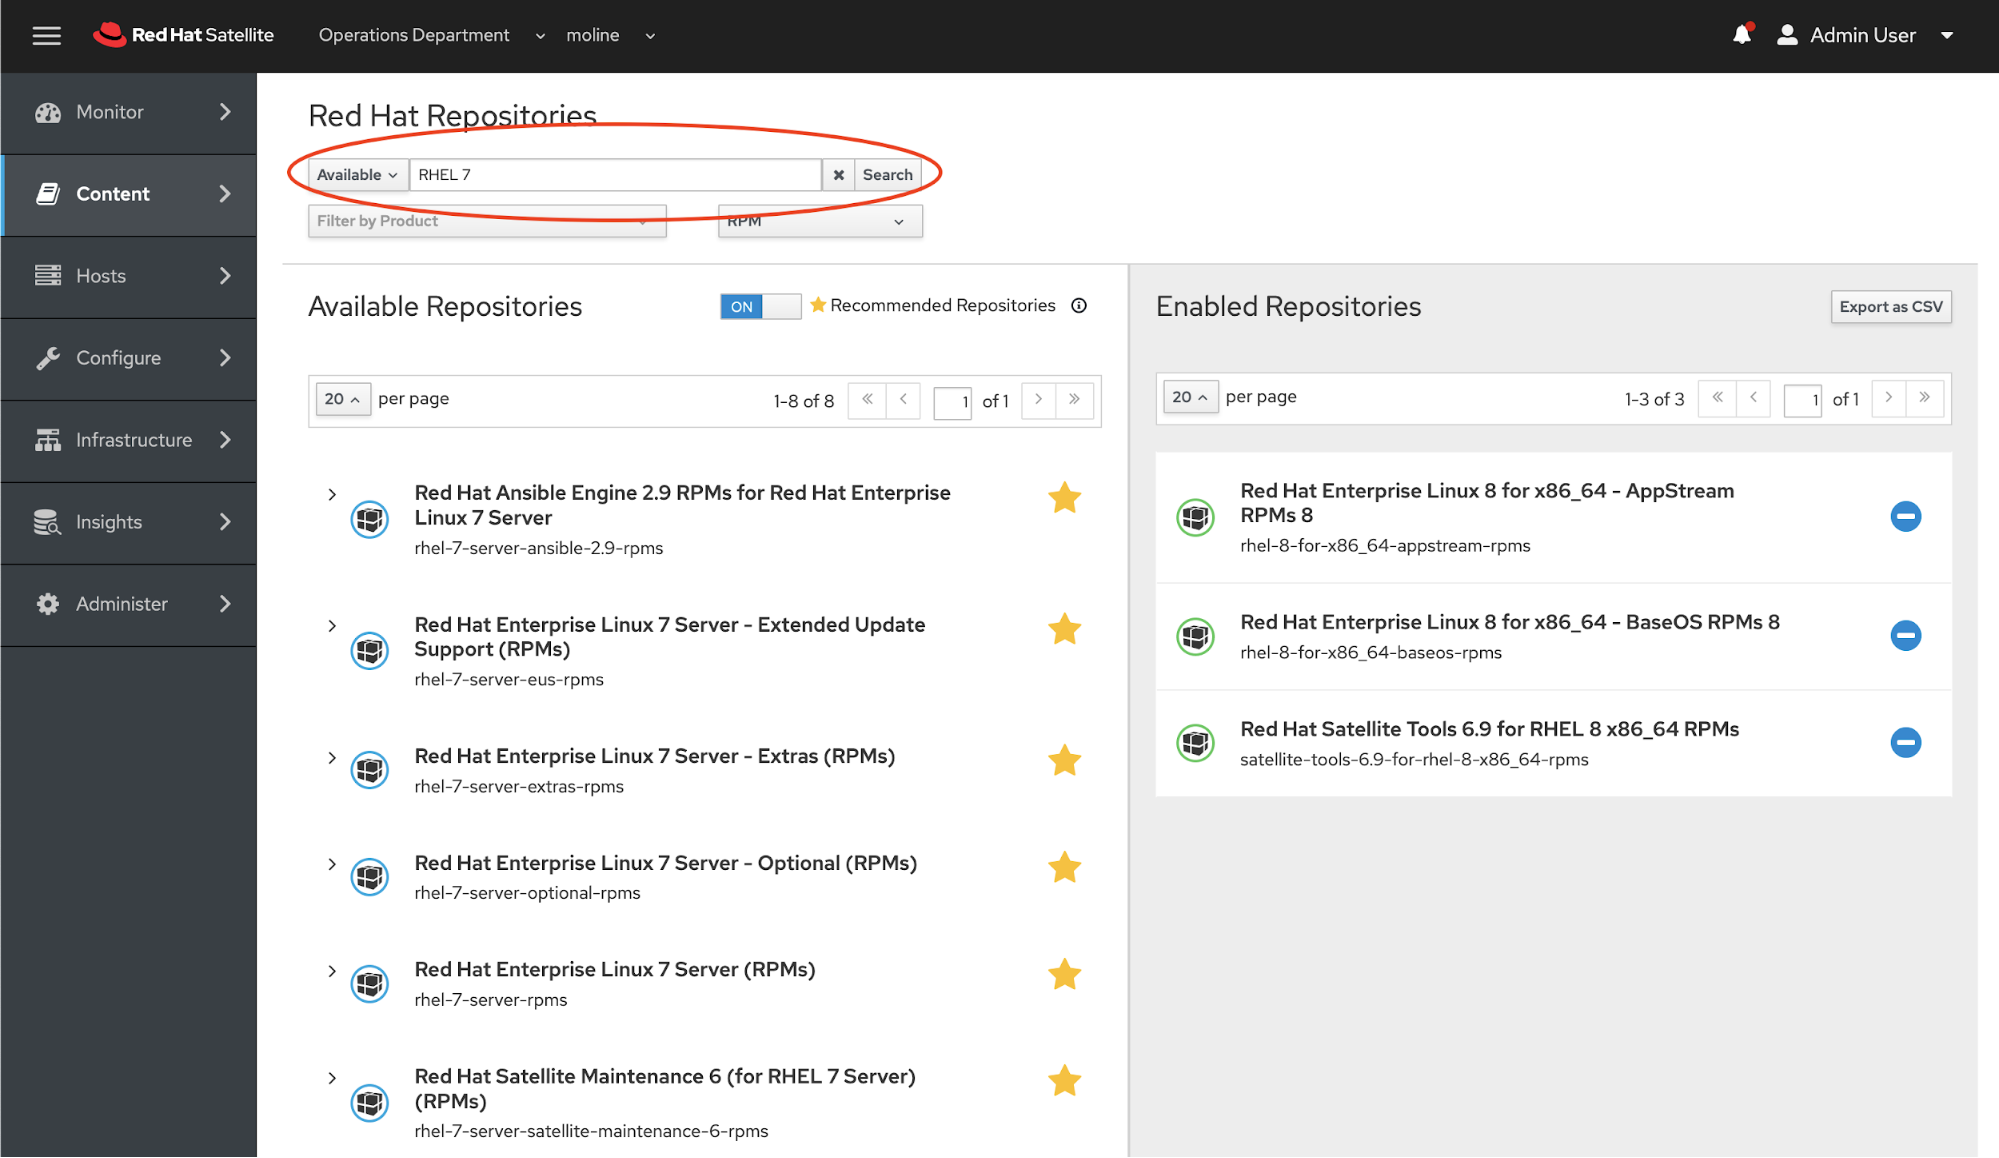
The next table shows the RHEL 7 repositories we will enable. Follow the previous steps to enable each repository.
|
Name |
Repository |
|
Red Hat Enterprise Linux 7 Server - Extras (RPMs) |
rhel-7-server-extras-rpms |
|
Red Hat Enterprise Linux 7 Server - Optional (RPMs) |
rhel-7-server-optional-rpms |
|
Red Hat Enterprise Linux 7 Server (RPMs) |
rhel-7-server-rpms |
|
Red Hat Satellite Maintenance 6 (for RHEL 7 Server) (RPMs) |
rhel-7-server-satellite-maintenance-6-rpms |
|
Red Hat Satellite Tools 6.9 (for RHEL 7 Server) (RPMs) |
rhel-7-server-satellite-tools-6.9-rpms |
We have chosen the content we need to manage for our RHEL environment. Now we need to sync that content to Satellite. We will "manually" sync the content. You can create a sync plan, but we won't be covering sync plans in this tutorial.
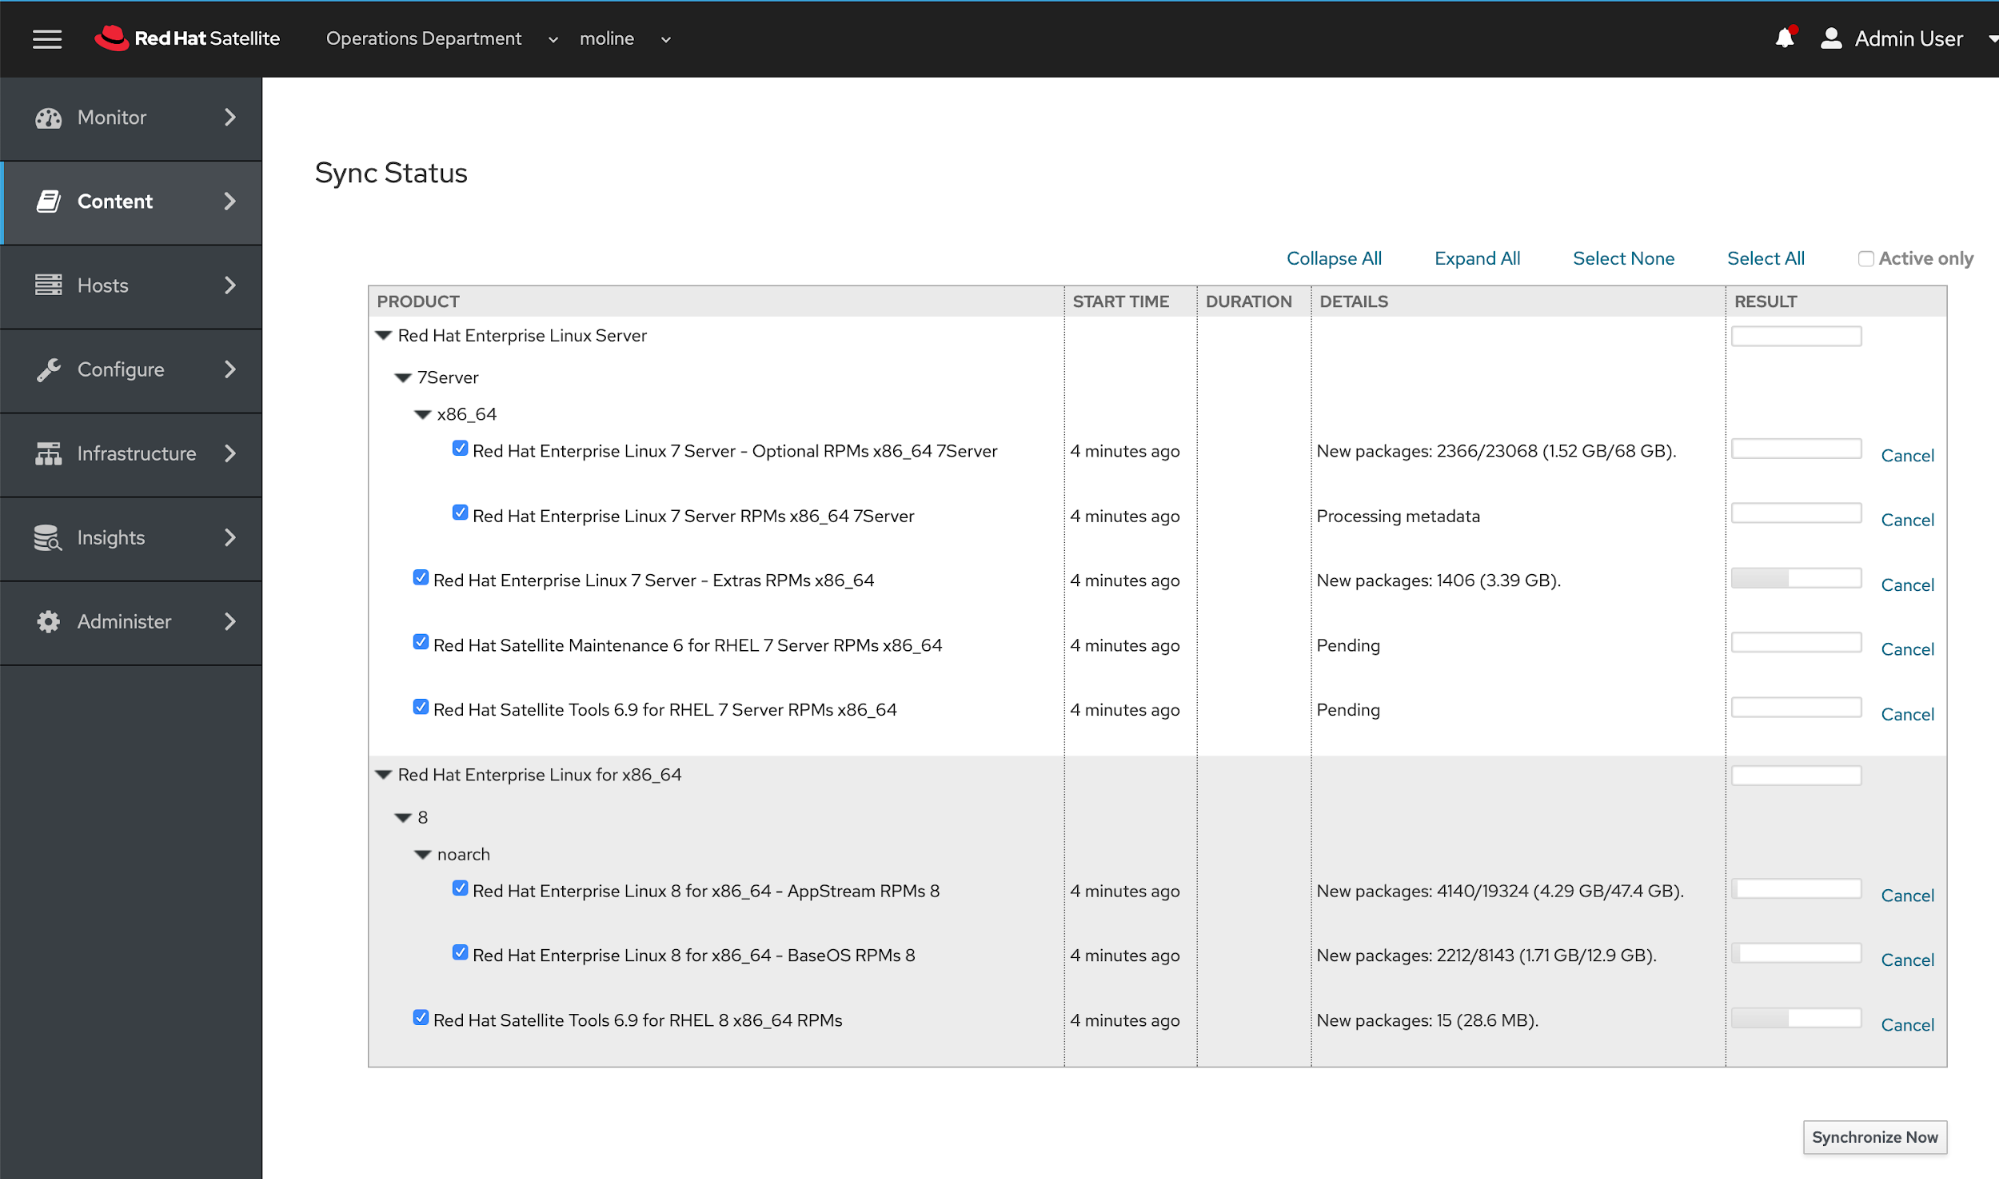
On the side menu click Content -> Sync Status
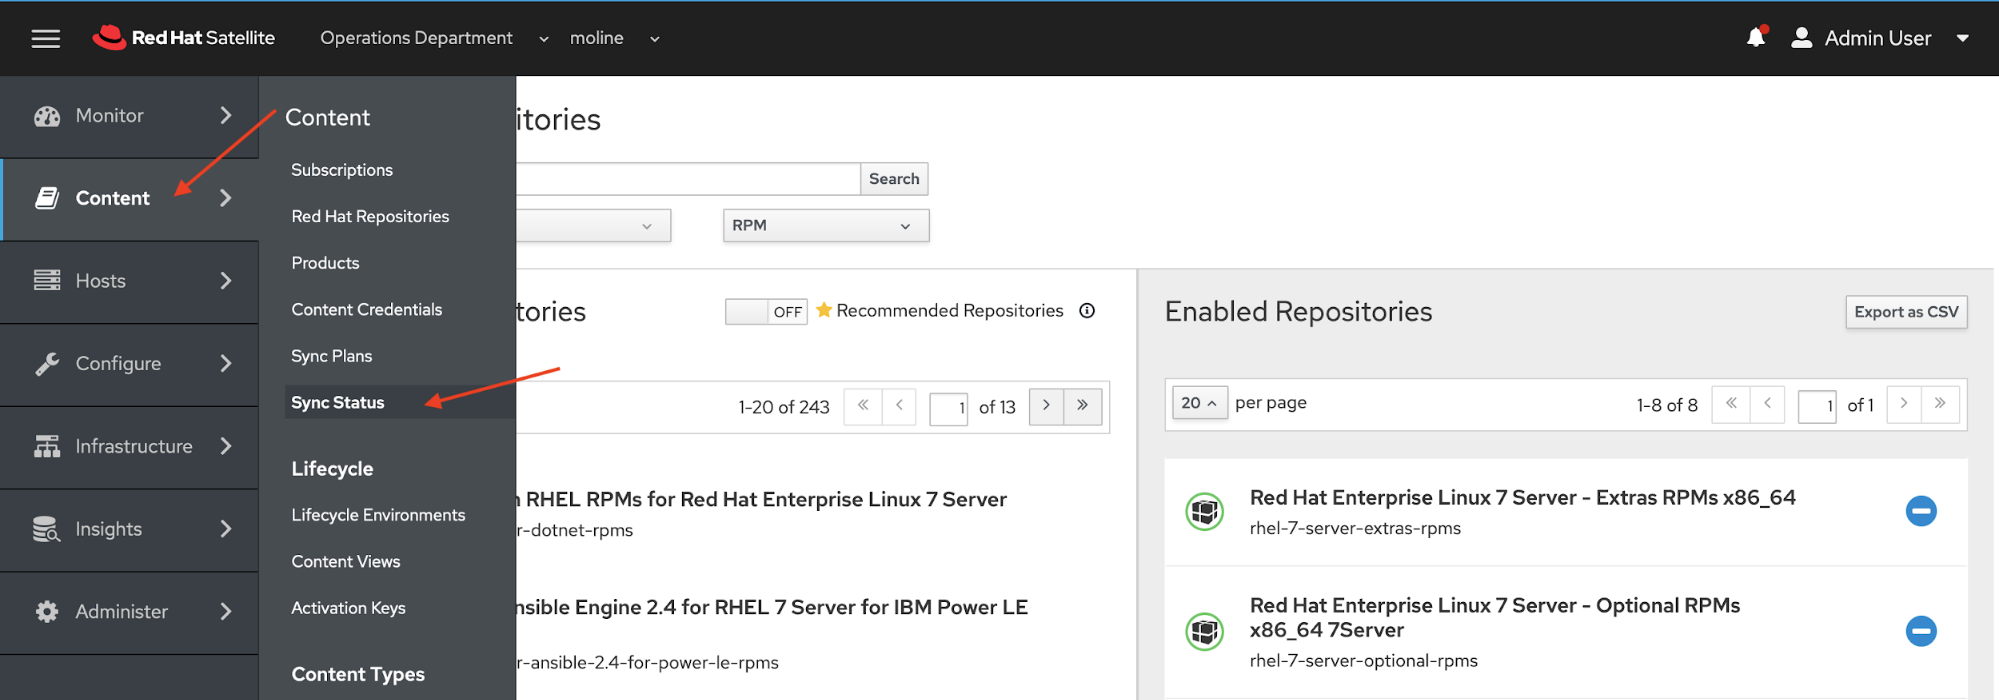
On the Sync Status page click on the Expand All and Select All links. And click the Synchronize Now button.
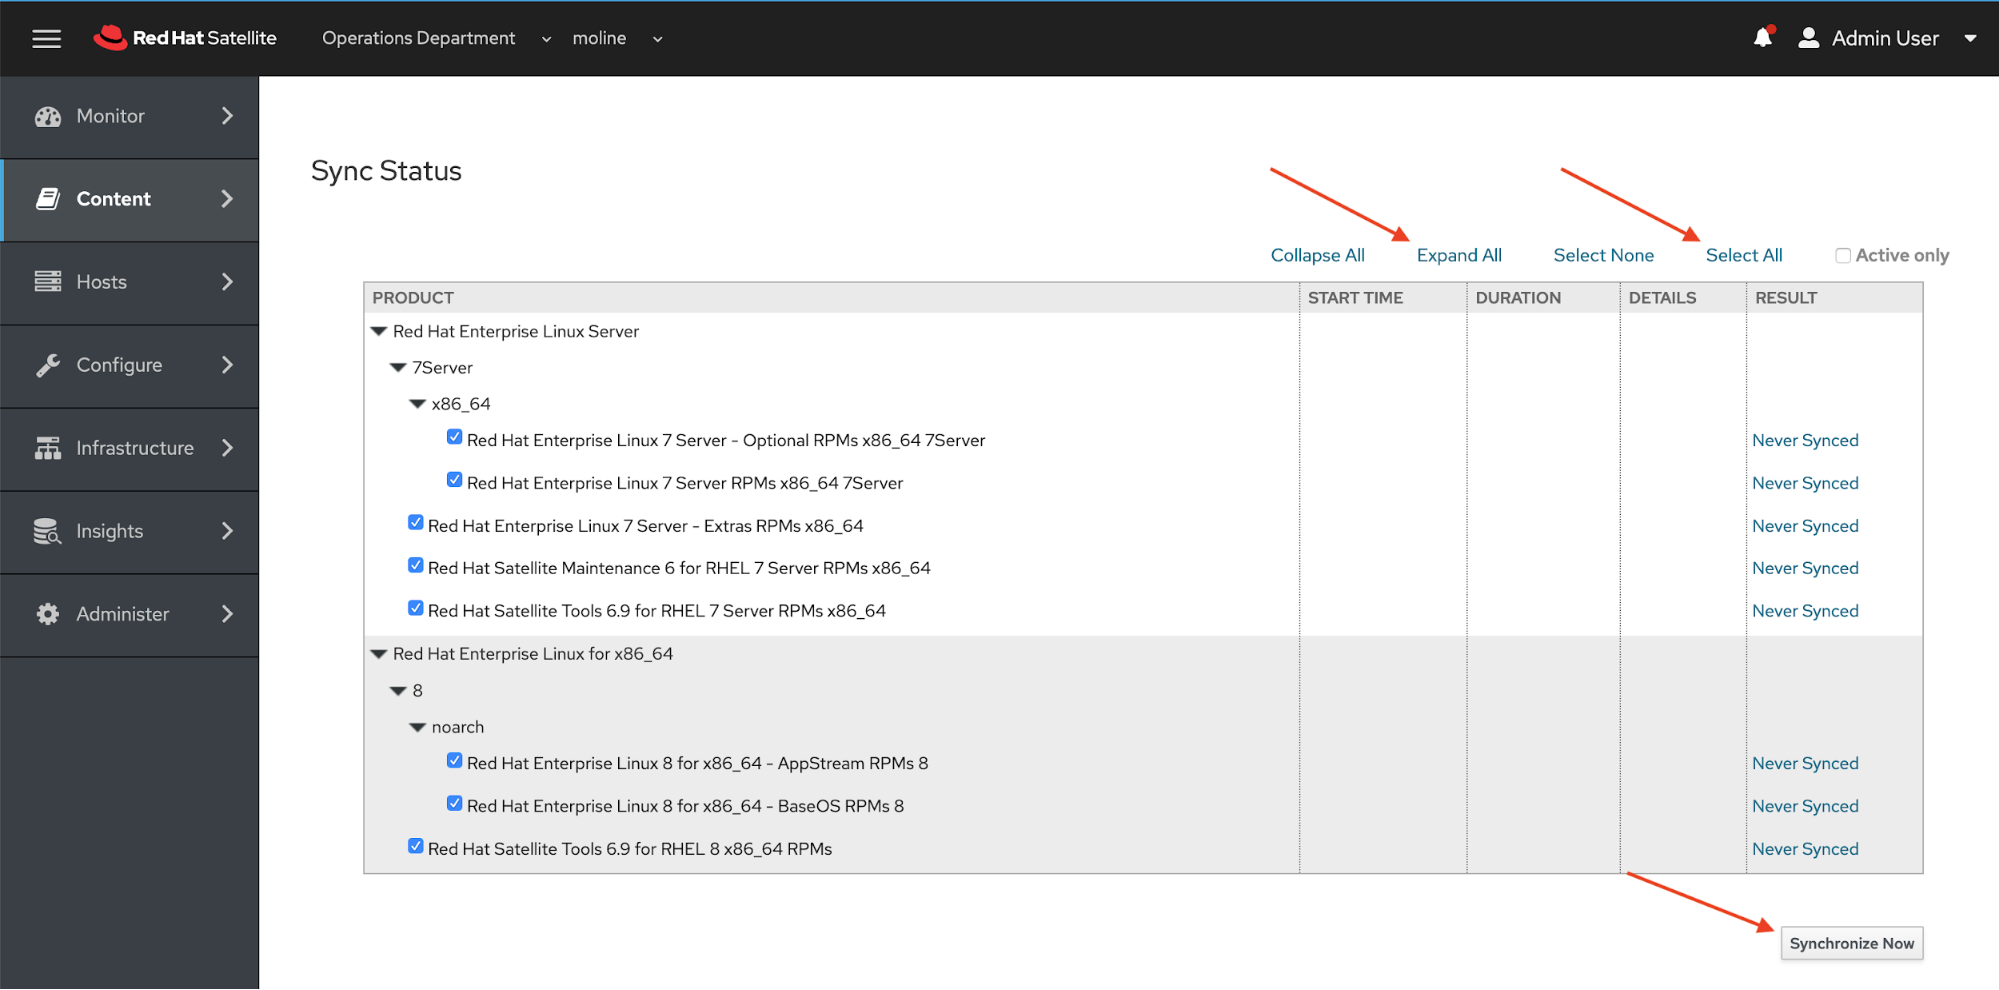
The Sync Status screen will now show the progress of syncing these repositories from the Red Hat Content Delivery Network to Satellite. Since this is the first time you are syncing content, it will take a bit of time to complete.
You will likely want to look at creating a sync plan to schedule synchronizing content during times where your network traffic is lower. When a repository has completed syncing, you will see a message next to the repo that says syncing Complete. Note: For the purposes of this lab, you may want to only sync content for RHEL 8.
Creating Content Lifecycles in Satellite
After your content has completed syncing, we will create a content lifecycle. Content lifecycles give you the ability to match RHEL errata to RHEL servers running in a particular environment to match your SDLC. You may have simple or complex lifecycles for your RHEL servers, and Satellite gives you the ability to easily create and manage RHEl server lifecycles. In the following section you will use the command line to create the lifecycle environment in Satellite.
Let's create our first lifecycle environment and link it to the Operations Department
# hammer lifecycle-environment create --description le-ops-rhel8-prem-server --prior Library --name le-ops-rhel8-prem-server --organization "Operations Department"
Environment created.
You can list the lifecycle environments with the following command.
# hammer lifecyce-environment list
If you want to only list information for a particular organization add the --organization to the command.
Next we will add a content view to the lifecycle environment. Content view allows to control the specific content made available to environments
# hammer content-view create --description cv-rhel8-prem-server --name cv-rhel8-prem-server --organization "Operations Department"
Content view created.
We want to add the repositories to the content view. For this we need the repository ID. The following command provides you with a "shorter" view of the repositories listing only the repository ID and name
# hammer repository list --fields THIN --organization-label operations
---|-----------------------------------------------------------------
ID | NAME
---|-----------------------------------------------------------------
5  | Red Hat Enterprise Linux 7 Server - Extras RPMs x86_64
6  | Red Hat Enterprise Linux 7 Server - Optional RPMs x86_64 7Server
7  | Red Hat Enterprise Linux 7 Server RPMs x86_64 7Server
2  | Red Hat Enterprise Linux 8 for x86_64 - AppStream RPMs 8
3  | Red Hat Enterprise Linux 8 for x86_64 - BaseOS RPMs 8
8  | Red Hat Satellite Maintenance 6 for RHEL 7 Server RPMs x86_64
9  | Red Hat Satellite Tools 6.9 for RHEL 7 Server RPMs x86_64
4  | Red Hat Satellite Tools 6.9 for RHEL 8 x86_64 RPMs
---|-----------------------------------------------------------------
In this example, for the RHEL 8 content view we need repository IDs 2, 3 and 4. Your ID list may be different.
# hammer content-view update --repository-ids 2,3,4 --name "cv-rhel8-prem-server" --organization "Operations Department"
Content view updated.
Next we will publish the repositories to the library. This will take a few minutes while the content is being published to the content view.
# hammer content-view publish --name "cv-rhel8-prem-server" --organization "Operations Department" --async
Content view is being published with task c050e764-25da-43b2-8a23-9122af5a9120.
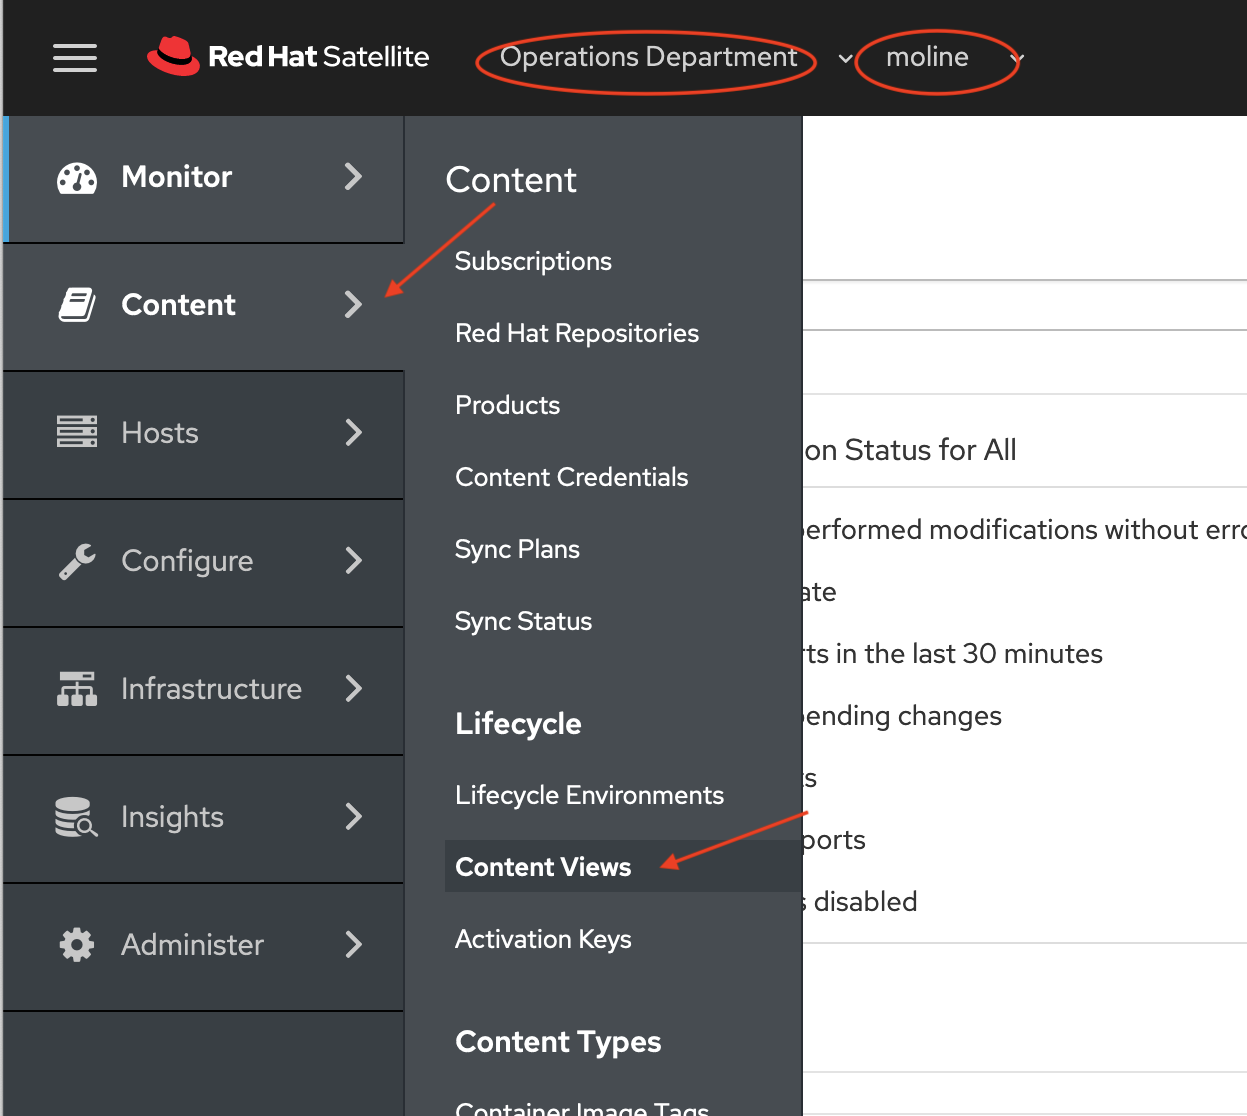
We can jump back to the Satellite console to view the content being published. On the left side menu choose Content -> Content View.
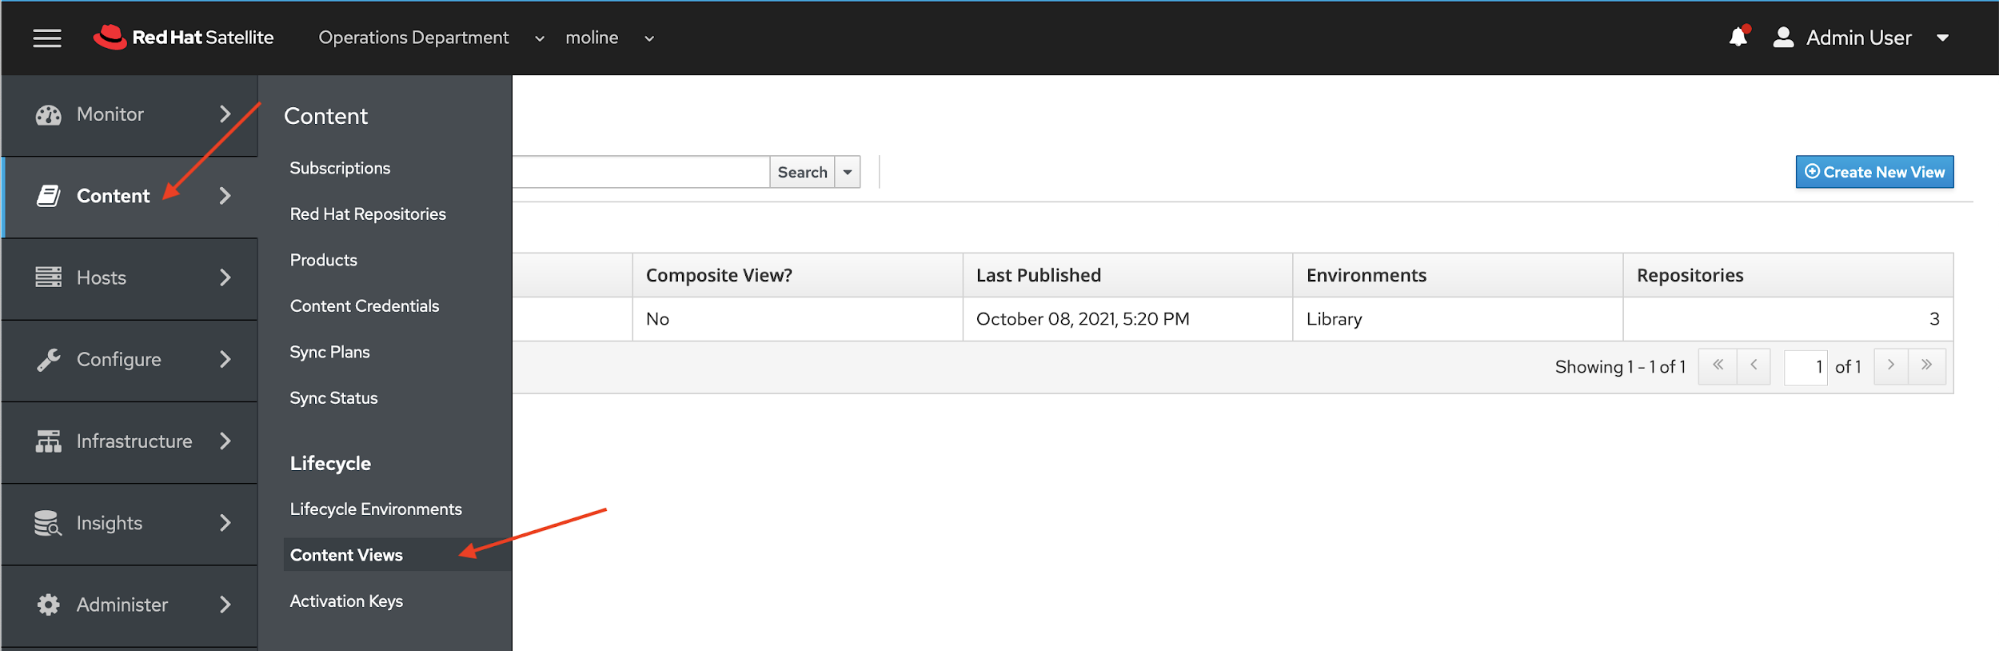
On the Content Views screen click the link Content View name.
You will now see the content being published to the Content View.
Let's promote the content view from the Library to the le-ops-rhel8-prem-server lifecycle environment from the command line.
# hammer content-view version promote \
--content-view "cv-rhel8-prem-server" \
--to-lifecycle-environment "le-ops-rhel8-prem-server" \
--organization "Operations Department" \
--async
Content view is being promoted with task bdf2dba3-c4dd-4a66-8e82-a9fbd71b4298.
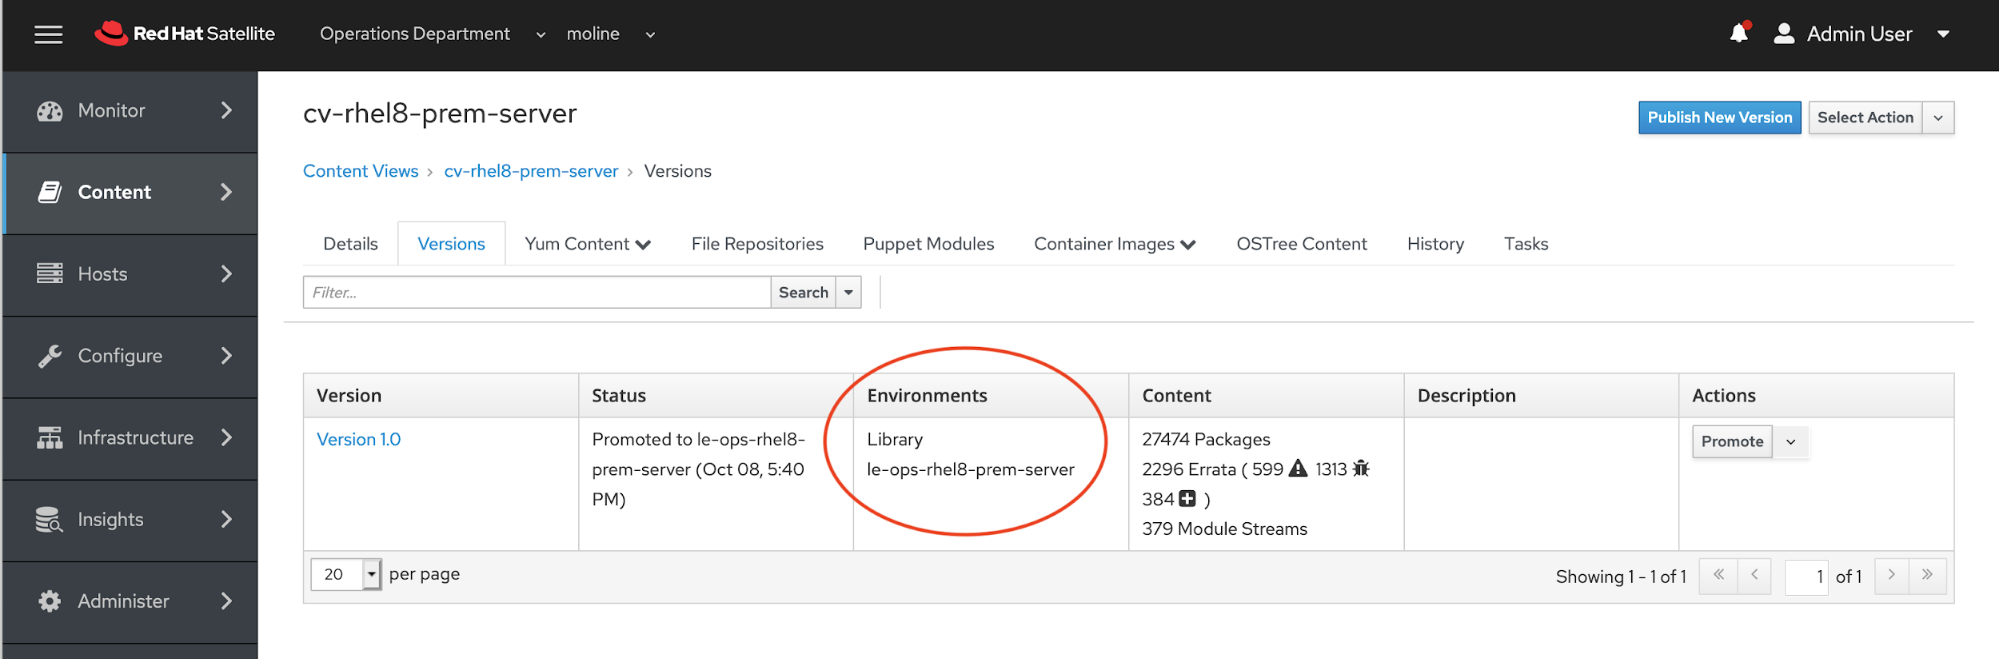
When the update has completed, you will see two environments listed in the Satellite console under Content -> Content Views. In the Content Views page in the Environments section you will see Library and le-ops-rhel8-prem-server listed.
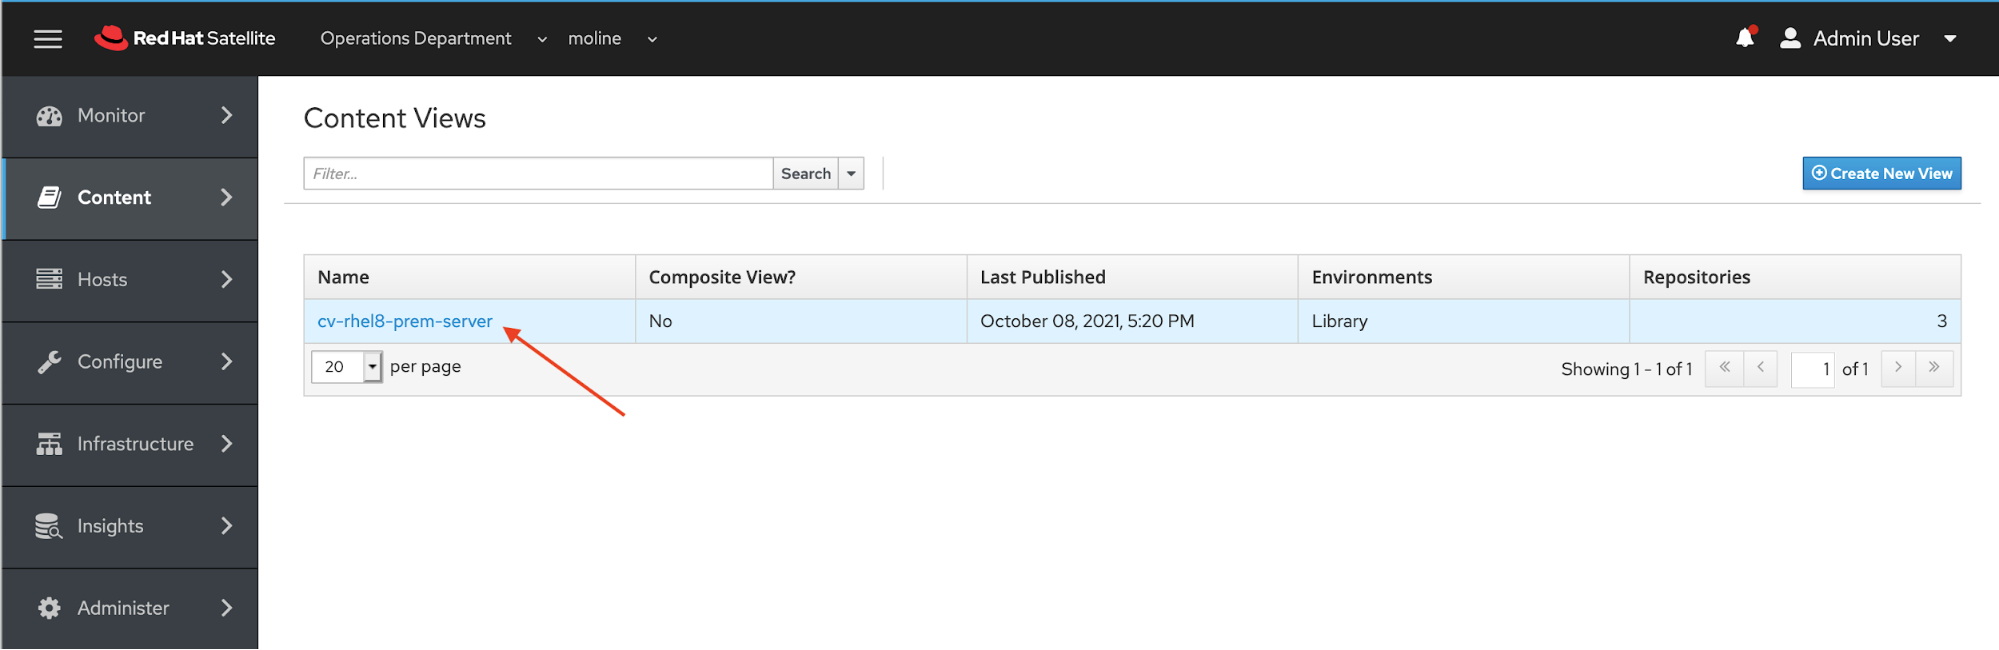
Let's go back to the Satellite console to see which life cycle environments have the cv-rhel8-prem-server content view. Make sure you have Operations Department for your organziation and moline for your location.
If you are not in the Content view, click Content -> Content View on the side menu..
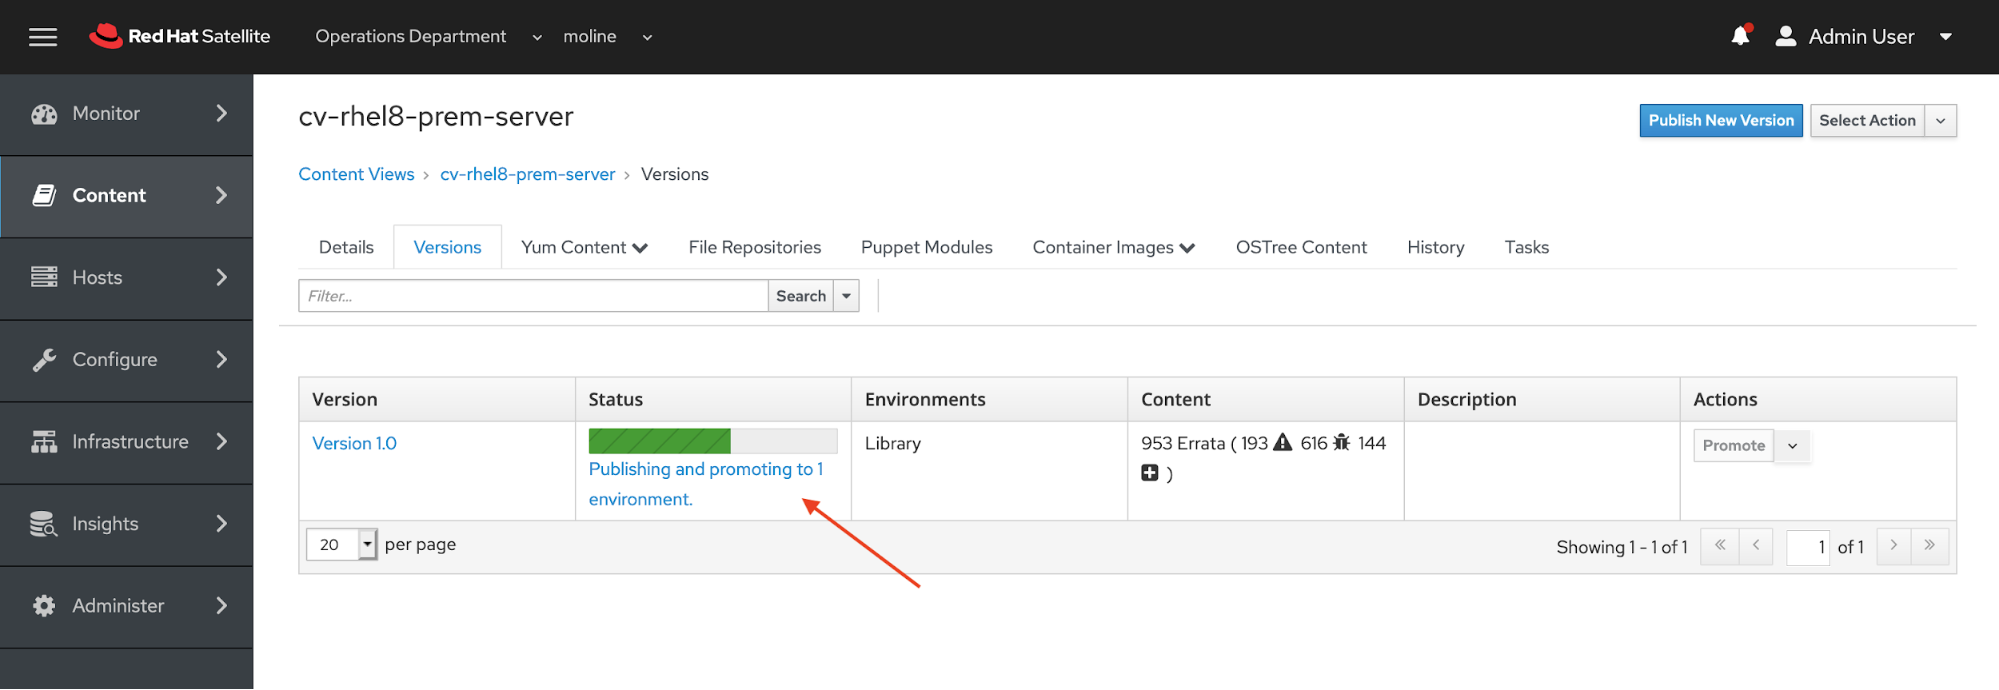
On the Content Views page, click cv-rhel8-prem-server view link.

Observe on the cv-rhel8-prem-server page in the Environments column, you will see two environments: Library and le-ops-rhel8-prem-server listed.
All the steps above of course can be completed through the Red Hat Satellite console following the paths outlined with the screen images.
Finally we will create an activation key for registering our RHEL instances with Satellite and ultimately RHSM. At the command line we will create an activation key with the following command.
 # hammer activation-key create \
  --content-view "cv-rhel8-prem-server" \
  --lifecycle-environment "le-ops-rhel8-prem-server" \
  --name "ak-ops-rhel8-prem-server" \
  --organization "Operations Department"
  Activation key created.
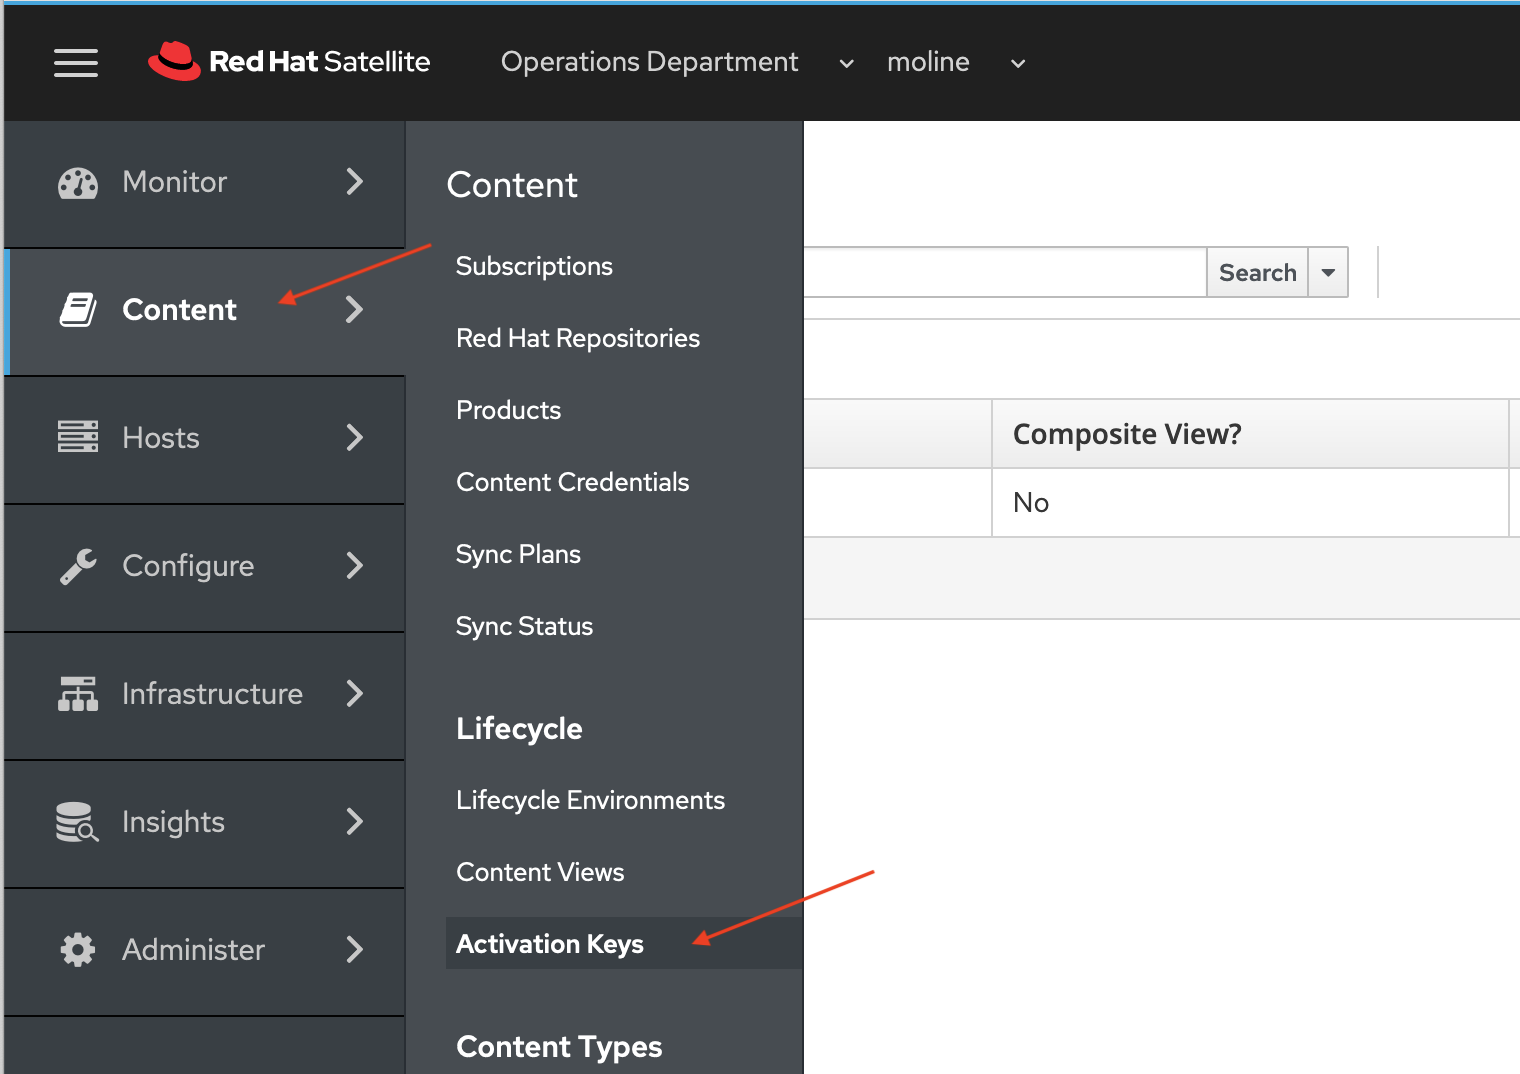
In the console we can view the Activation Key on the Red Hat Satellite console by navigating to Content -> Content Views on the side menu.
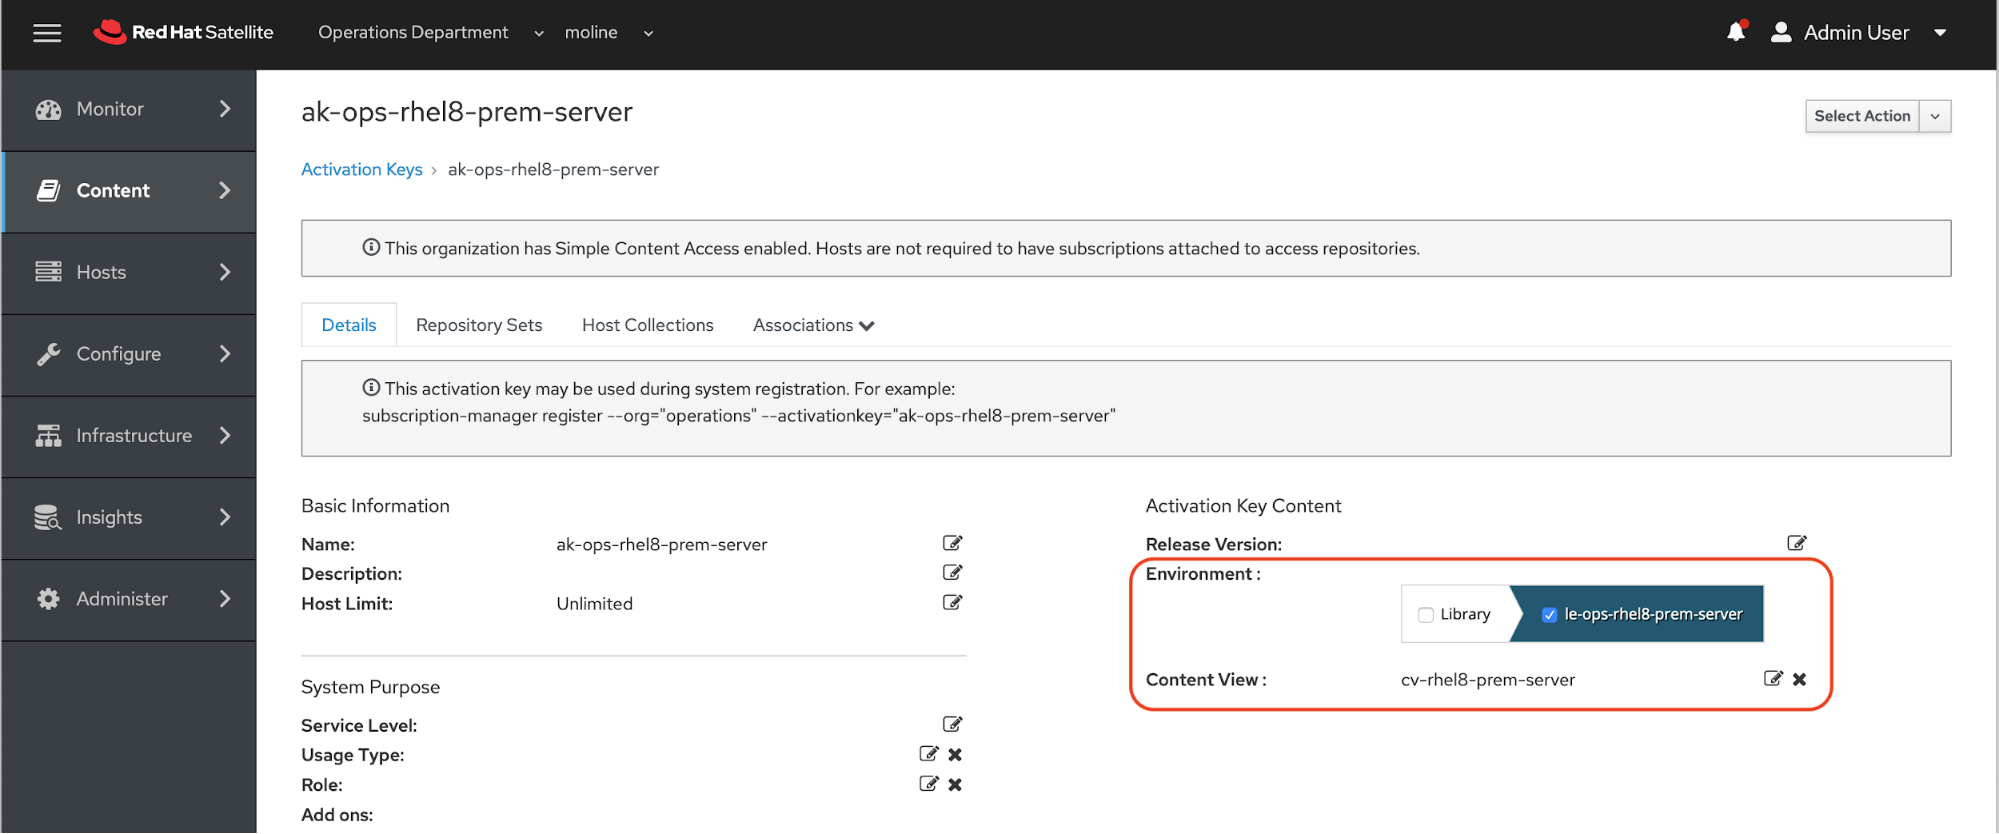
On the Activation Keys page click the link for ak-ops-rhel8-prem-server activation key.
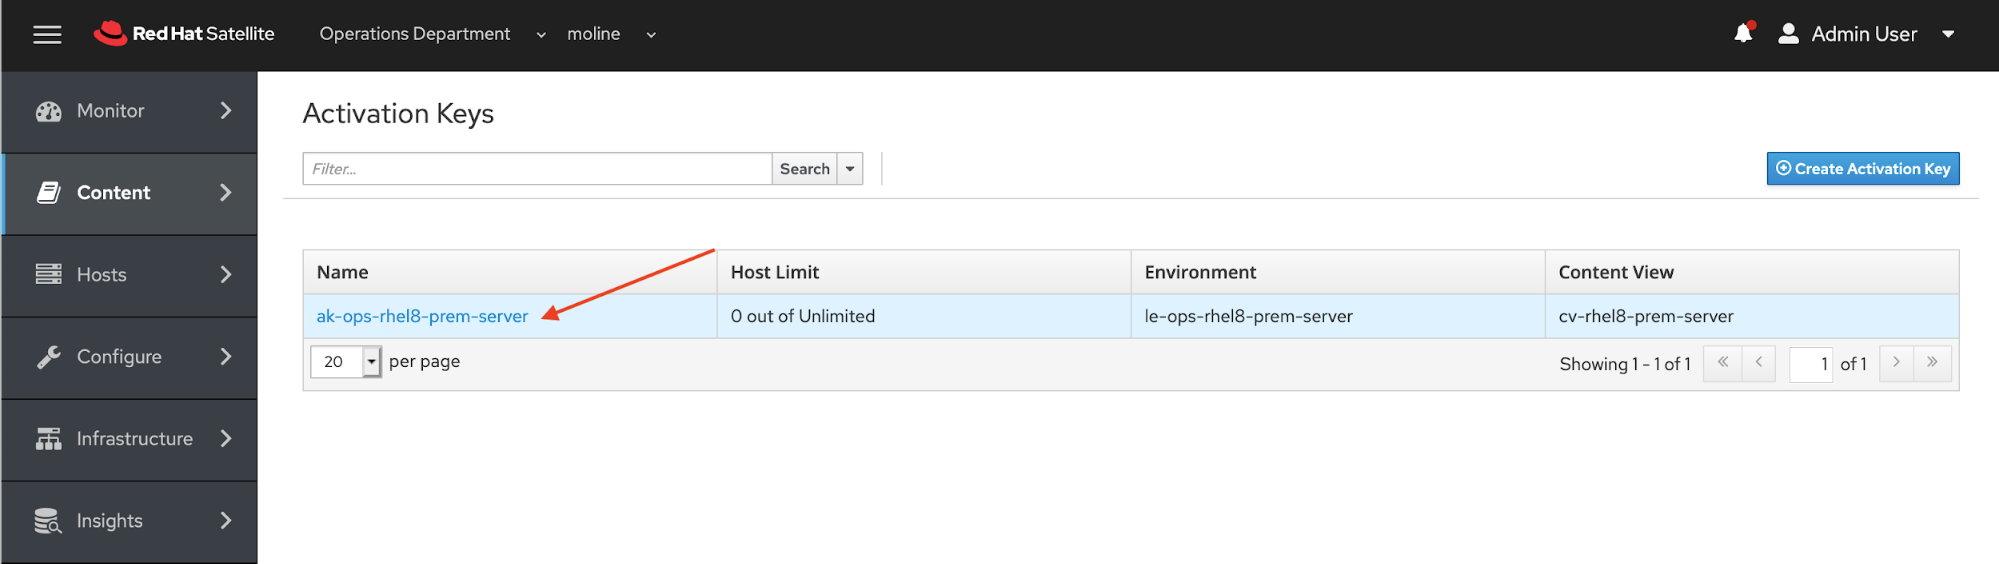
Notice that ak-ops-rhel8-prem-server activation key is assigned to le-ops-rhel8-prem-server lifecycle environment.
This is part three of a series on provisioning VMs in VMware with Red Hat Satellite.
References
- Installing Satellite Server from a Connected Network
- Simple Content Access
- Provisioning VMWare using userdata via Satellite 6.3-6.6
- Understanding Red Hat Content Delivery Network Repositories and their usage with Satellite 6
Provisioning RHEL virtual machines to vSphere from Red Hat Satellite
 In this multi-part tutorial, we cover how to provision Red Hat Enterprise Linux (RHEL) virtual machines (VMs) to a vSphere environment from Red Hat Satellite. Missed any steps in the series? Check them out:
저자 소개
Paul Lucas is a Chicagoland-based Red Hat Solutions Architect working with a variety of enterprise businesses. A 21 year technical sales veteran, Paul was previously a customer working at a benefits consulting firm, where he advised development teams on the use of Java and the then-emerging Java EE.
유사한 검색 결과
빠르게 진화하는 AI 위협, 더 빠른 대응
AI 전환점 디지털 주권 확보가 더 이상 선택이 아닌 이유
Container Roundup | Compiler
Untangling Networks | Compiler
채널별 검색

오토메이션
기술, 팀, 인프라를 위한 IT 자동화 최신 동향

인공지능
고객이 어디서나 AI 워크로드를 실행할 수 있도록 지원하는 플랫폼 업데이트

오픈 하이브리드 클라우드
하이브리드 클라우드로 더욱 유연한 미래를 구축하는 방법을 알아보세요

보안
환경과 기술 전반에 걸쳐 리스크를 감소하는 방법에 대한 최신 정보

엣지 컴퓨팅
엣지에서의 운영을 단순화하는 플랫폼 업데이트

인프라
세계적으로 인정받은 기업용 Linux 플랫폼에 대한 최신 정보

애플리케이션
복잡한 애플리케이션에 대한 솔루션 더 보기
가상화
온프레미스와 클라우드 환경에서 워크로드를 유연하게 운영하기 위한 엔터프라이즈 가상화의 미래