

Migrating a virtual machine (VM) from one platform to another is a complex task. Nevertheless, organizations are looking for a unified platform that provides the same benefits for VMs as what's available for containers. With Red Hat OpenShift Virtualization, you don't have to make the journey alone. The Assisted Installer for OpenShift supports deploying connected clusters with OpenShift Virtualization from the start, so you can begin your migration journey today and modernize at your own pace.
What is the Assisted Installer?
The Assisted Installer simplifies the process of deploying connected OpenShift clusters by providing a guided, automated experience. Instead of relying on a dedicated bootstrap machine, the installer handles cluster bootstrapping as part of the installation process, reducing complexity and time to deployment. Available through a web-based UI, or API, the Assisted Installer gives you flexibility in how you manage installations. You can also integrate it with Red Hat Advanced Cluster Management to simplify deployment and ongoing management across multiple clusters, while still retaining the option to enable OpenShift Virtualization during installation.
Virtualization-ready from day one
With the Assisted Installer, you can enable OpenShift Virtualization during the cluster installation process. While some additional configuration may still be required, this approach simplifies deployment and shortens the path to running VM workloads alongside containers.
The Assisted Installer also provides built-in pre-installation validations, checking for hardware and system requirements (CPU virtualization flags, memory, storage, and so on) before installation begins. This helps ensure that your environment is properly configured for virtualization and reduces the risk of deployment errors.
Key benefits include:
- Simplified experience: Deploy OpenShift clusters with virtualization included through a single, guided workflow.
- Confidence through validation: Automated pre-checks ensure nodes meet cluster and Day 2 operator requirements before installation continues.
- Consistency across environments: Gain a streamlined deployment experience across connected environments. Support for disconnected environments is in Developer Preview with the Agent Installer for OpenShift Virtualization.
- Faster path to modernization: Accelerate your journey to running VMs and containers on a unified OpenShift platform.
Getting started with Assisted Installer
Using the Assisted Installer, deploying a connected OpenShift Virtualization cluster is straightforward:
- Click the Create cluster to access the Assisted Installer.
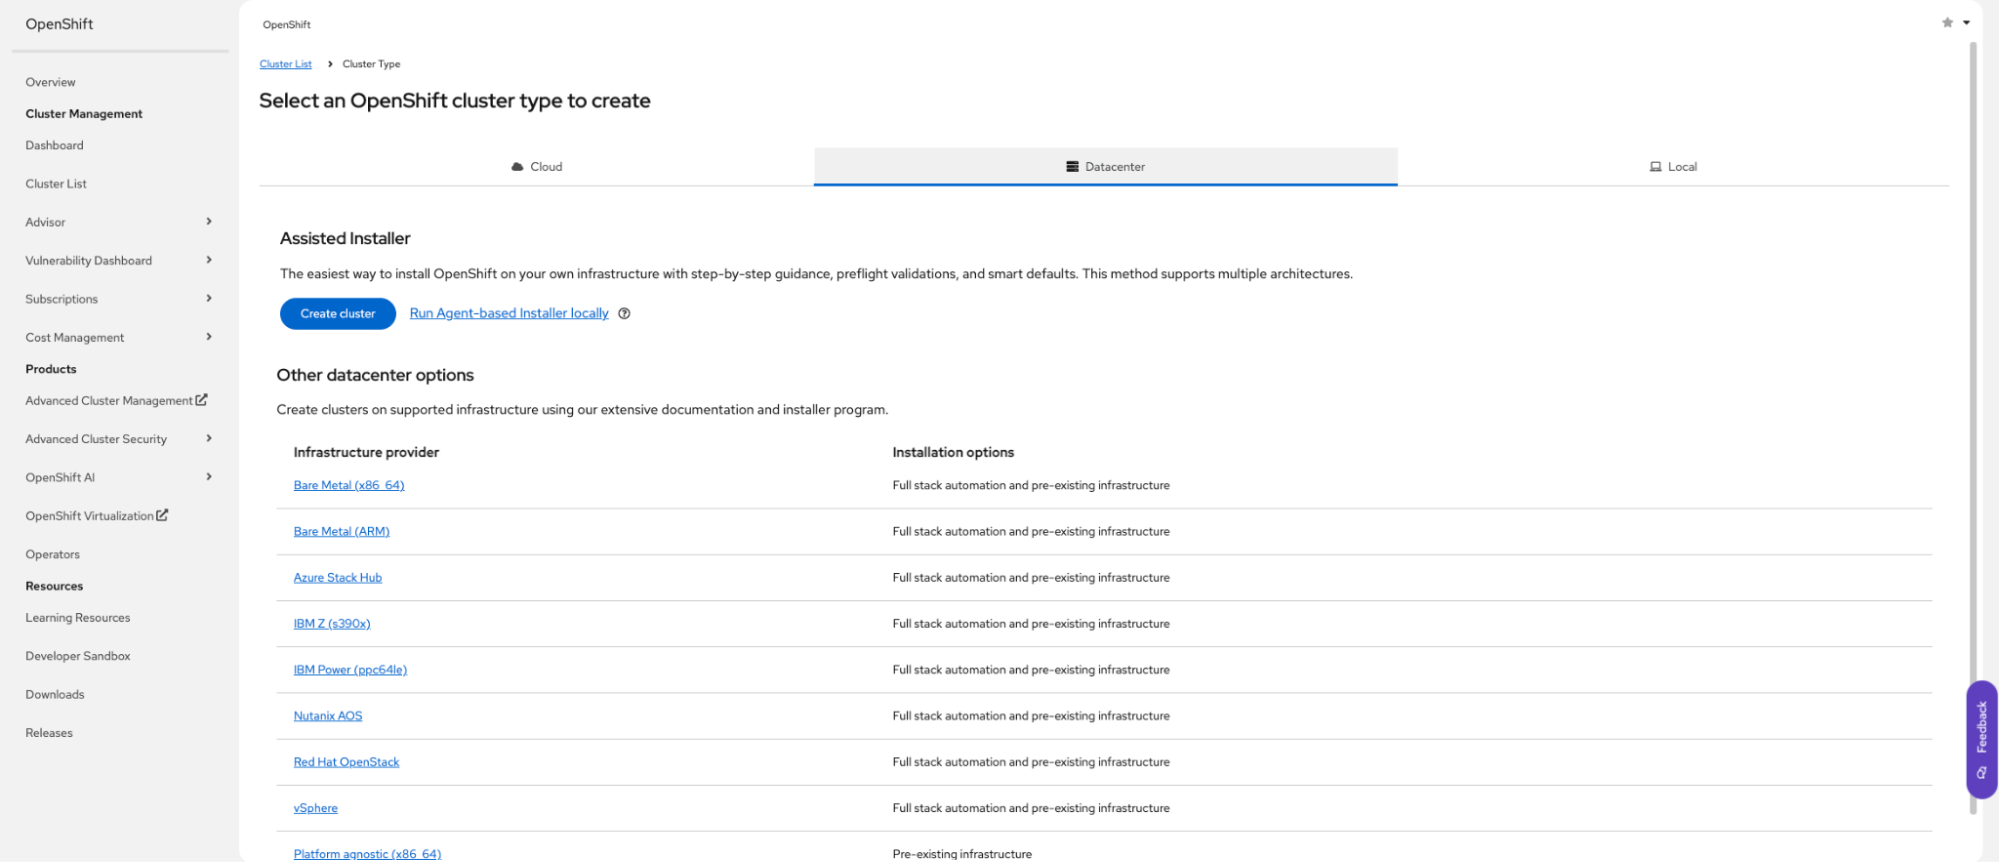
Alt text: Creating a cluster in the OpenShift web console.
- Define your cluster configuration.
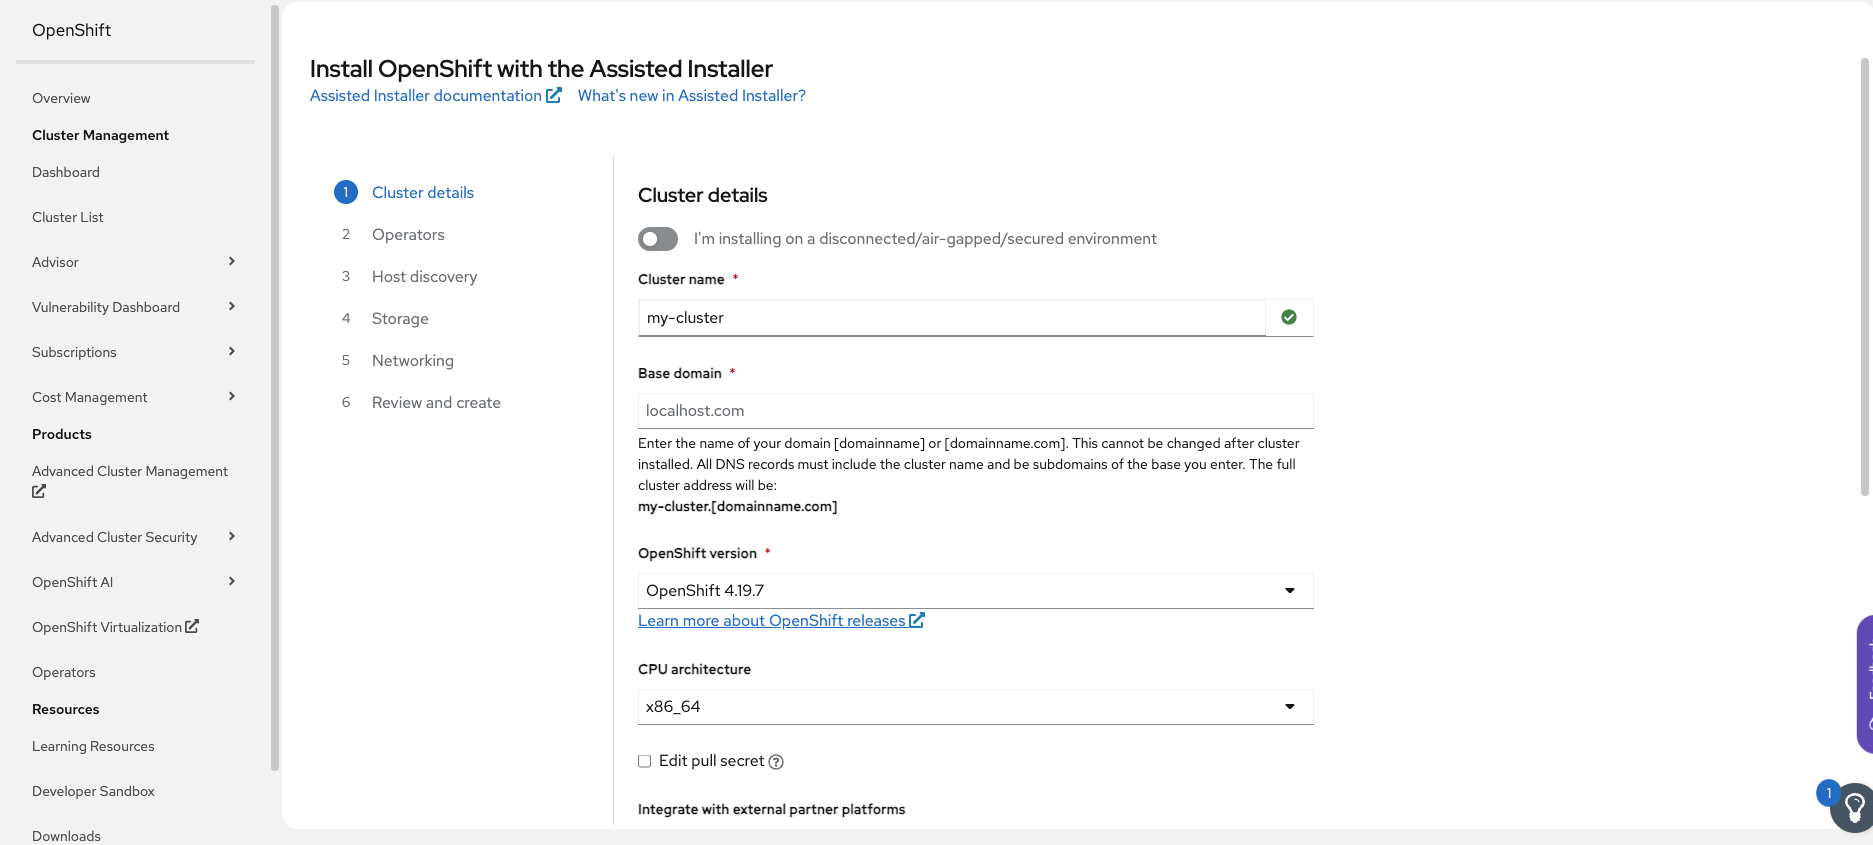
Alt text: Defining cluster details in the OpenShift web console.
- Select OpenShift Virtualization bundle, or cherry-pick operators to be installed, during setup.

Alt text: Include operators you want to install.
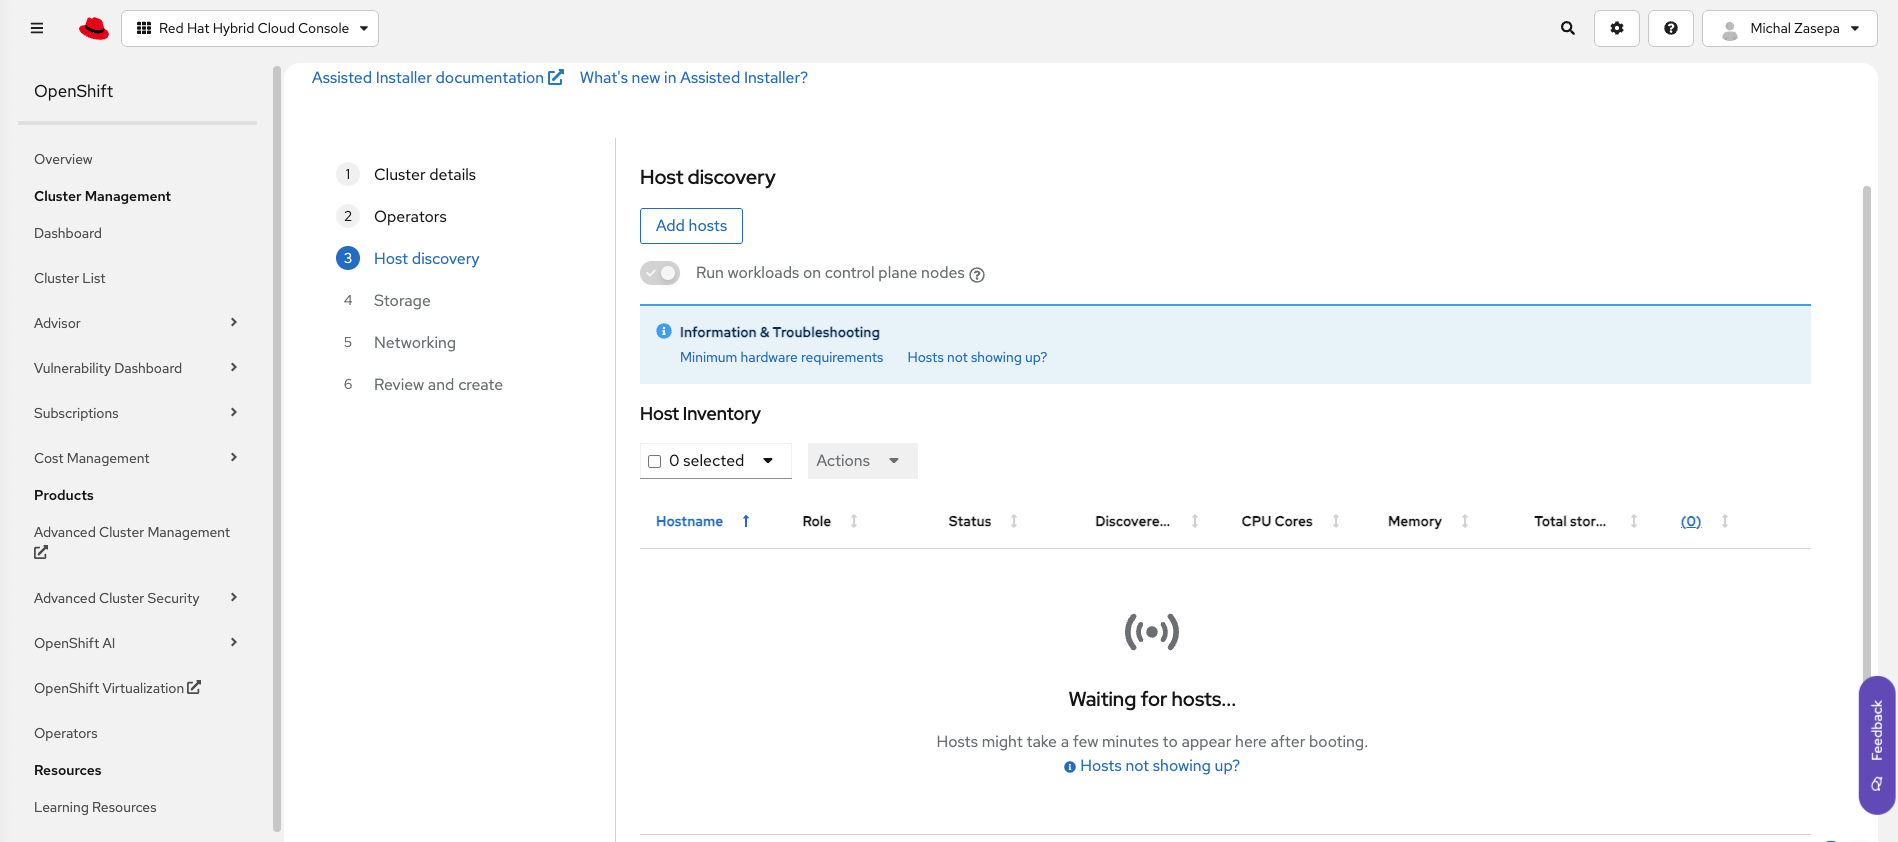
- Add your host to the new clusters using a bootable image (ISO).

Alt text: Add an ISO as your bootable image.
- The auto-assigning feature in Assisted Installer can help you select which node should be used as the control plane, and you can adjust it to your needs.
Alt text: Assisted Installer can help you choose a control plane.
- Configure the storage and network settings.
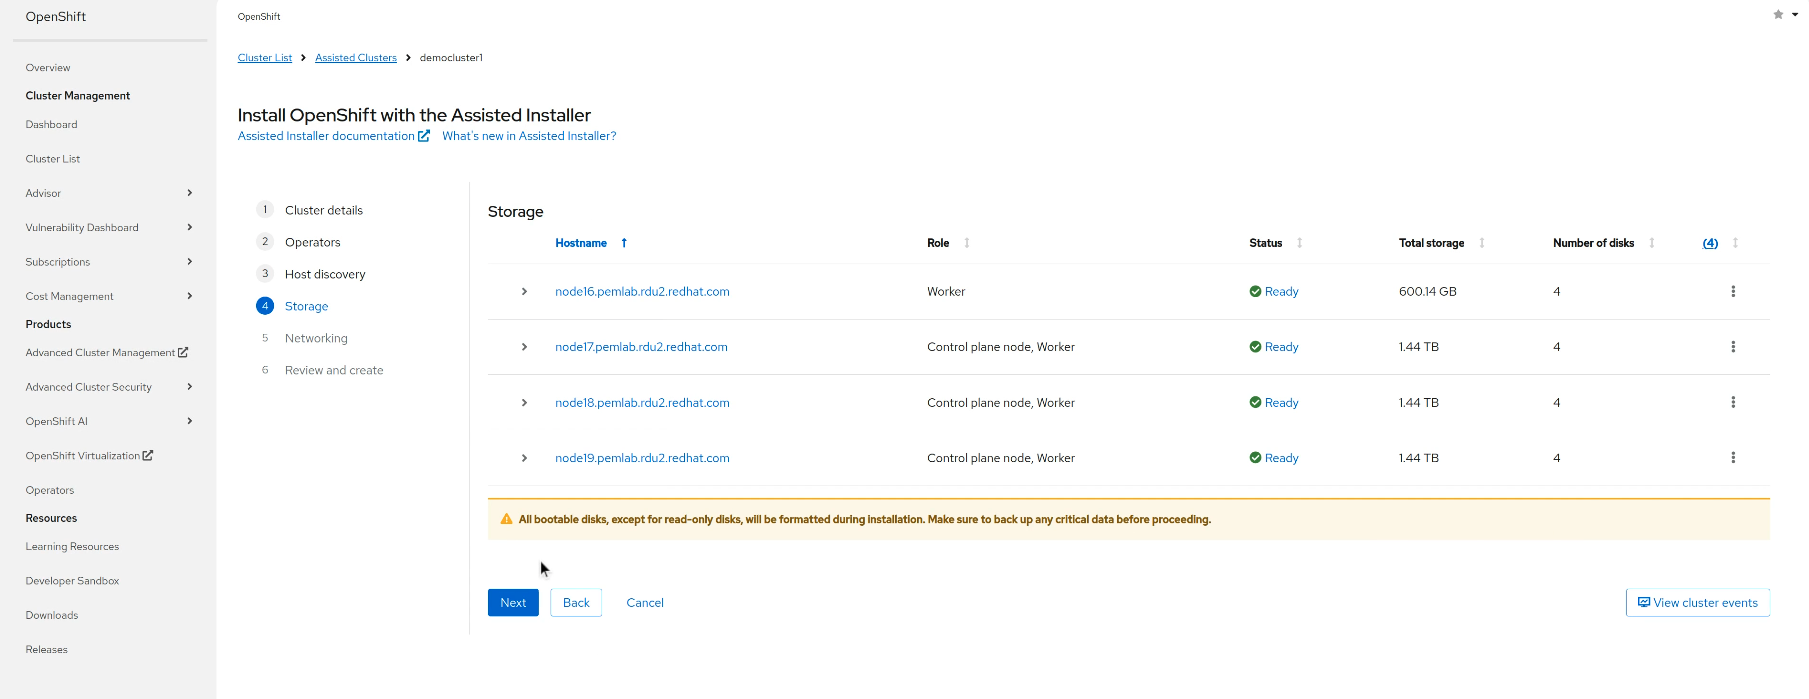

Alt text (for both images): Add your network and storage configuration.
- Run pre-install validations to confirm system readiness.
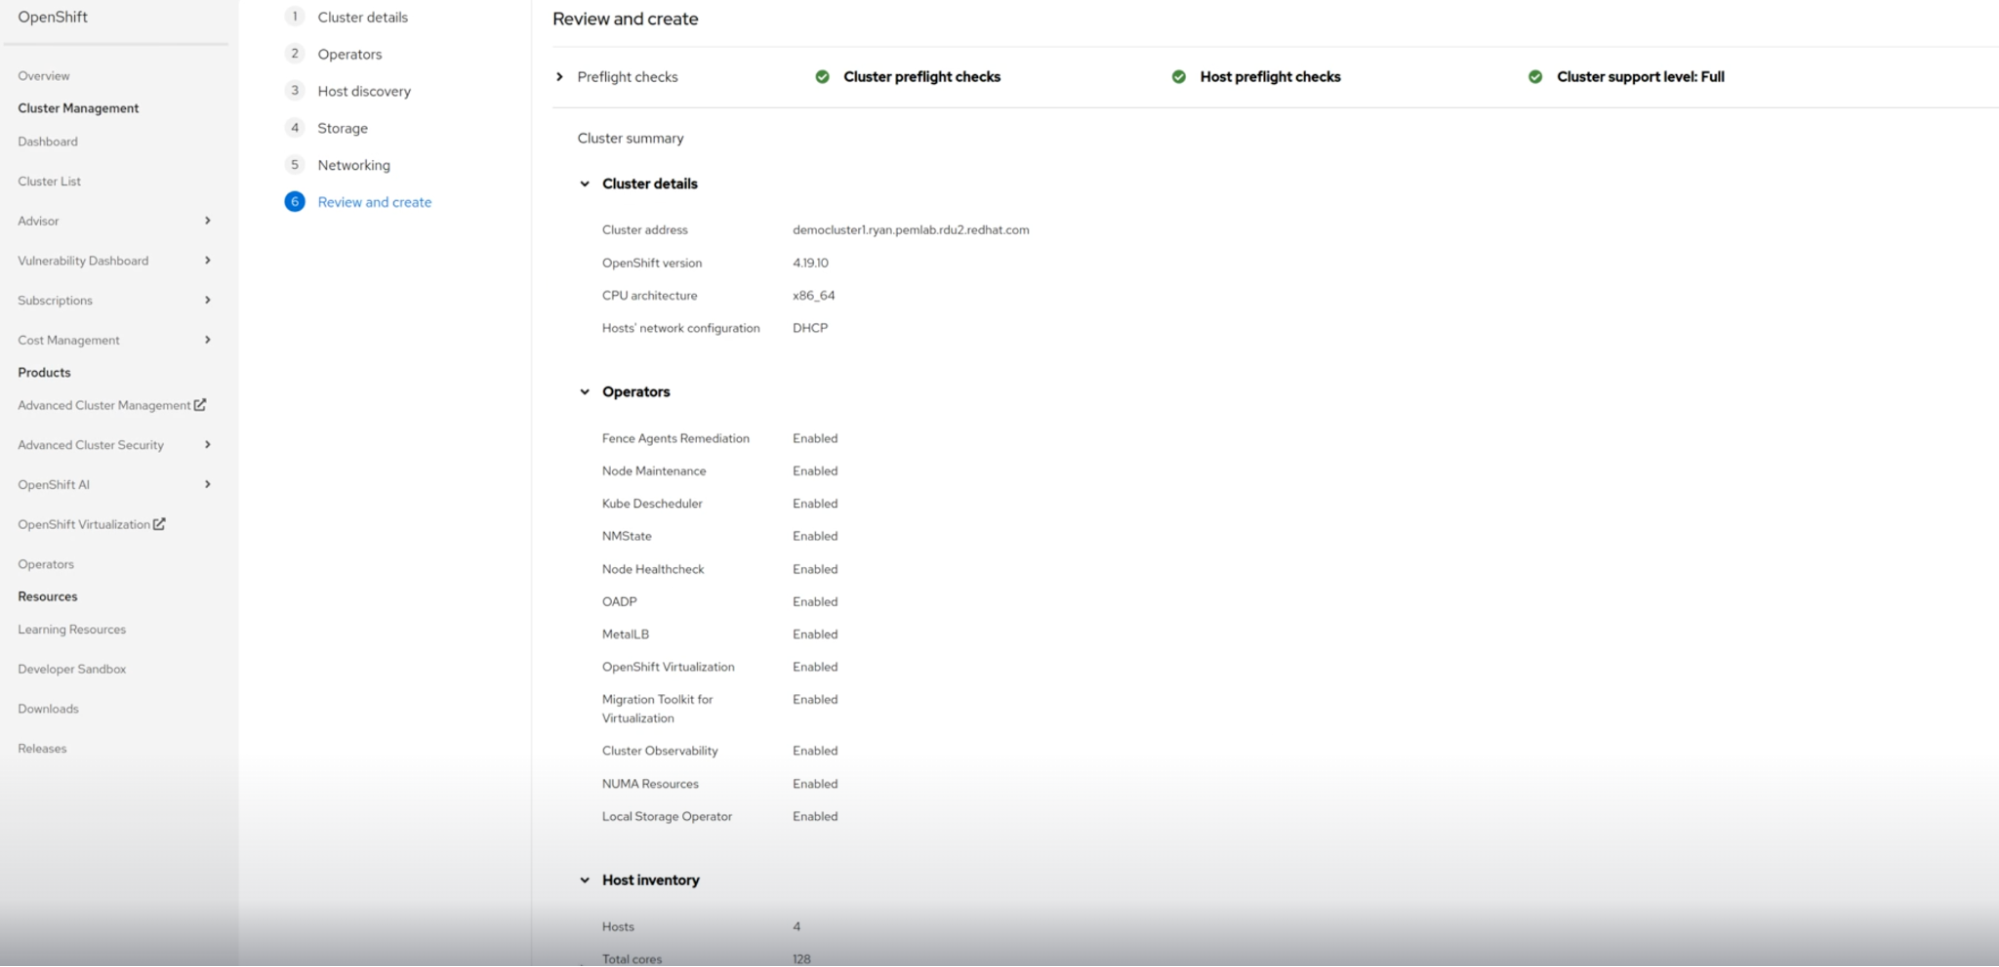
Alt text: Pre-install validations help confirm your configuration is ready.
- Launch your installation, and then log in to the deployed cluster to finish any configurations required by your application that are specific to your VM.
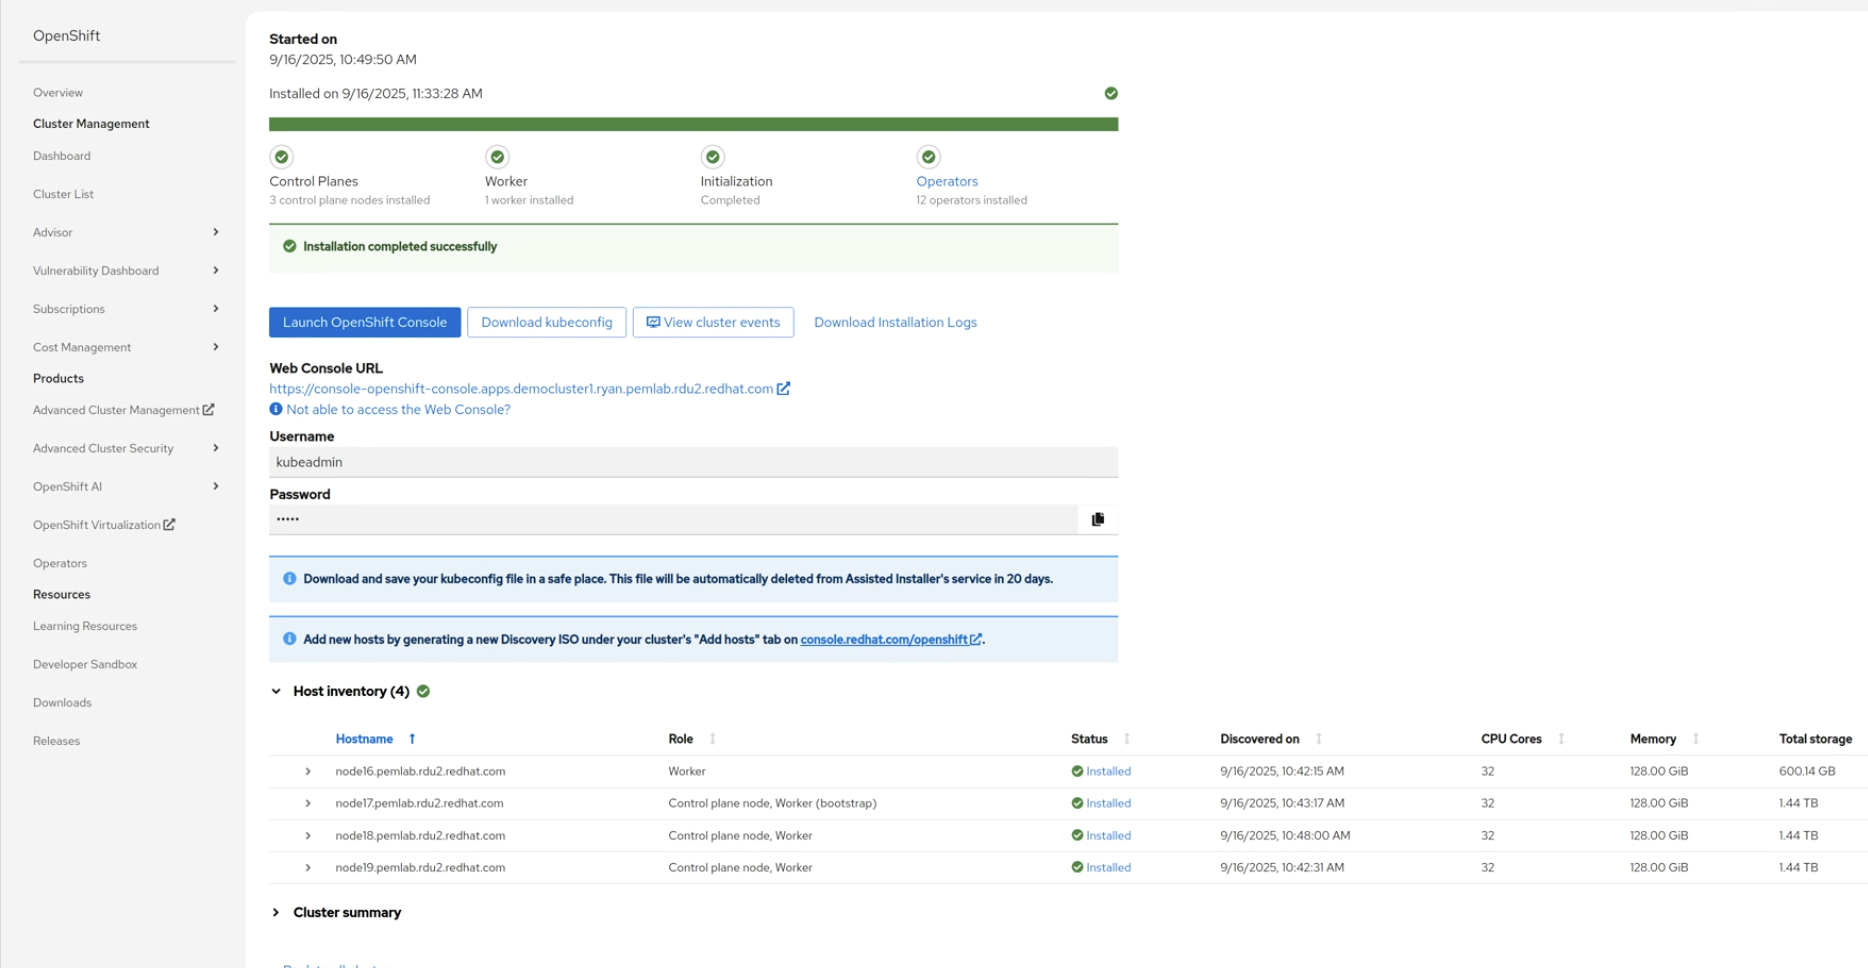
Alt text: After installation, you can configure your VM further, as required.
Migrate with confidence
The Assisted Installer is designed to help you deploy OpenShift clusters quickly and with confidence. With built-in support for OpenShift Virtualization, you can simplify operations and accelerate modernization by bringing your existing virtual machine workloads onto a cloud-native platform from day one.
Learn more about OpenShift Virtualization and the Assisted Installer:
제품 체험판
Red Hat OpenShift Virtualization Engine | 제품 체험판
저자 소개
Courtney started at Red Hat in 2021 on the OpenShift team. With degrees in Marketing and Economics and certificates through AWS and Microsoft she is passionate about cloud computing and product marketing.
유사한 검색 결과
과거의 운영 방식에서 벗어나 IT의 미래 구축
OpenShift Virtualization 알아보기: 시작하는 데 도움이 되는 7가지 학습 리소스
채널별 검색

오토메이션
기술, 팀, 인프라를 위한 IT 자동화 최신 동향

인공지능
고객이 어디서나 AI 워크로드를 실행할 수 있도록 지원하는 플랫폼 업데이트

오픈 하이브리드 클라우드
하이브리드 클라우드로 더욱 유연한 미래를 구축하는 방법을 알아보세요

보안
환경과 기술 전반에 걸쳐 리스크를 감소하는 방법에 대한 최신 정보

엣지 컴퓨팅
엣지에서의 운영을 단순화하는 플랫폼 업데이트

인프라
세계적으로 인정받은 기업용 Linux 플랫폼에 대한 최신 정보

애플리케이션
복잡한 애플리케이션에 대한 솔루션 더 보기
가상화
온프레미스와 클라우드 환경에서 워크로드를 유연하게 운영하기 위한 엔터프라이즈 가상화의 미래