Red Hat OpenShift Container Platform is usually used by developers within a company, but Red Hat customers who have Red Hat OpenShift Container Platform on-premise may in turn use it to provide PaaS services to their customers. In this case, I am occasionally asked by customers to change the OpenShift logo to their company logo.
The OpenShift documentation provides many details on how to customize the web console, which is a user interface accessible from a web browser. However, if you just want to replace the OpenShift logo it might take some time to find the information. There is another Red Hat site called “uncontained.io” with some additional documentation. One of the docs on that site explains how to replace the default logo manually. As you might expect, it is complicated. In order to simplify this process automation is needed, and Ansible is one of the best ways to do that.
There are two primary places where the Red Hat OpenShift Container Platform logo is displayed:
-
the login page
-
the web console (after login)
In this blog I will explain how to replace the Red Hat OpenShift Container Platform logo on the login page and on the web console, using Ansible scripts.
Customizing the Red Hat OpenShift Container Platform login page
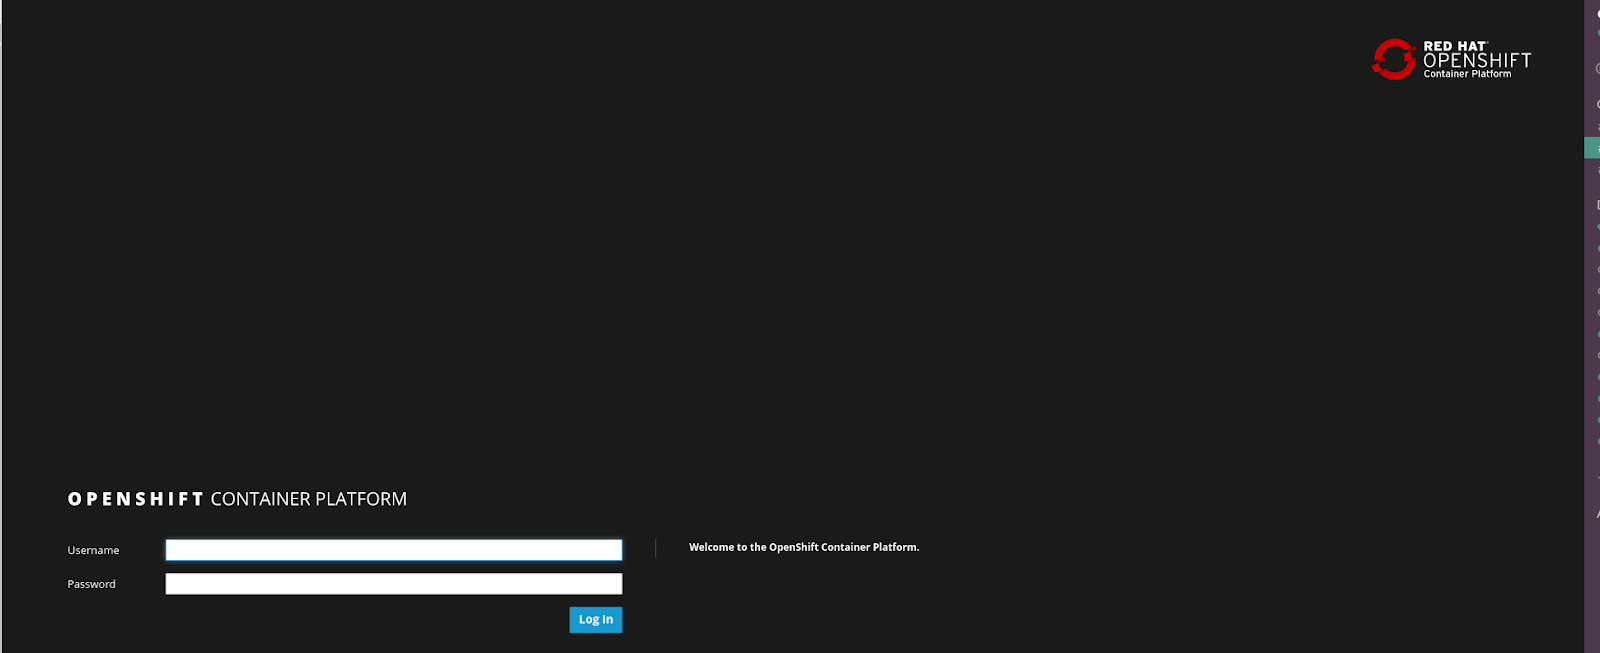
First, let’s try using the Red Hat OpenShift Container Platform docs. According to the OpenShift documentation, login-template.html can be be generated in order to change the login page. In addition, several configuration changes can be made to the master-config.yaml file. Then, the atomic-openshift-master (atomic-openshift-master-api) daemon has to be restarted. The steps sound simple, but you will see that the result is not what you were looking for.
Let’s try it
# cd
# oc adm create-login-template > login-template.html
# oc adm create-provider-selection-template > provider-selection-template.html
# vi /etc/origin/master/master-config.yaml
oauthConfig:
 ...
 templates:
   login: /root/login-template.html
   providerSelection: /root/provider-selection-template.html
# systemctl restart atomic-openshift-master
Now you can see your new login page:
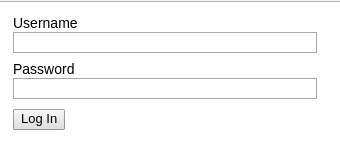
As you can see, there are only Username and Password fields on a white background. The login template only provides a plain page that you can customize to your tastes, with no logo.
However, what we want to do is to just replace the logo.
Replacing the logo on the Red Hat OpenShift Container Platform login page
Let’s try using a tool from github called openshift-toolkit.
Demo System Environment Info:
-
Red Hat OpenShift Container Platform 3.7
-
3 Masters (1 Master is also possible)
-
API Server - https://masters-37-1205.xxx.example.com:8443
We will replace the default logo 

Download openshift-toolkit repository from github
This repository is a collection of code samples to help you get started with Red Hat OpenShift
$ git clone https://github.com/redhat-cop/openshift-toolkit.git
$ cd openshift-toolkit/branding/ansible-playbook-openshift-custom-login-page
$ tree
.
├── playbook.yaml
├── README.md
├── requirements.yaml
└── result.png
This Ansible script uses Ansible Galaxy Roles (https://galaxy.ansible.com/), so this folder simply contains one playbook file (playbook.yaml), one role dependency (requirements.yaml), a README file, as well as an image.
Two Ansible Galaxy Roles are required by this playbook.
$ cat requirements.yaml
- src: Jooho.image-resize
- src: Jooho.openshift-custom-login-page
-
-
This role is used to resize the customer logo to a specific size.
-
-
Jooho.openshift-custom-login-page
-
This role configures the OpenShift master configuration to use the new login page.
-
Download the above Ansible Galaxy Roles
By default, Ansible Galaxy Roles are stored in /etc/ansible/roles, but I prefer to store them in a separate directory. Adding the -p option specifies the path to the role directory:
$ ansible-galaxy install -r requirements.yaml -p ./roles
- downloading role 'image-resize', owned by Jooho
….
- Jooho.image-resize (master) was installed successfully
- downloading role 'openshift-custom-login-page', owned by Jooho
...
- Jooho.openshift-custom-login-page (master) was installed successfully
Download the demo logo
$ wget https://www.redhat.com/profiles/rh/themes/redhatdotcom/img/Red_Hat_RGB.jpg -O ./demo_logo.jpg
Now, we have prepared everything to replace the default logo. Let’s execute the Ansible playbook.
$ ansible-playbook -i /etc/ansible/hosts -e input_img=./demo_logo.jpg ./playbook.yaml
Execute the Ansible Playbook
- i specifies the inventory host path
- e passes additional variables as key=value
Please be patient until the script is done. Note that it will take longer than you would expect the first time because it may need to install package “ImageMagick”, which helps resize an image. If ImageMagick is not already installed, the user will need sudo privileges.
When it is done, please refresh the login page.
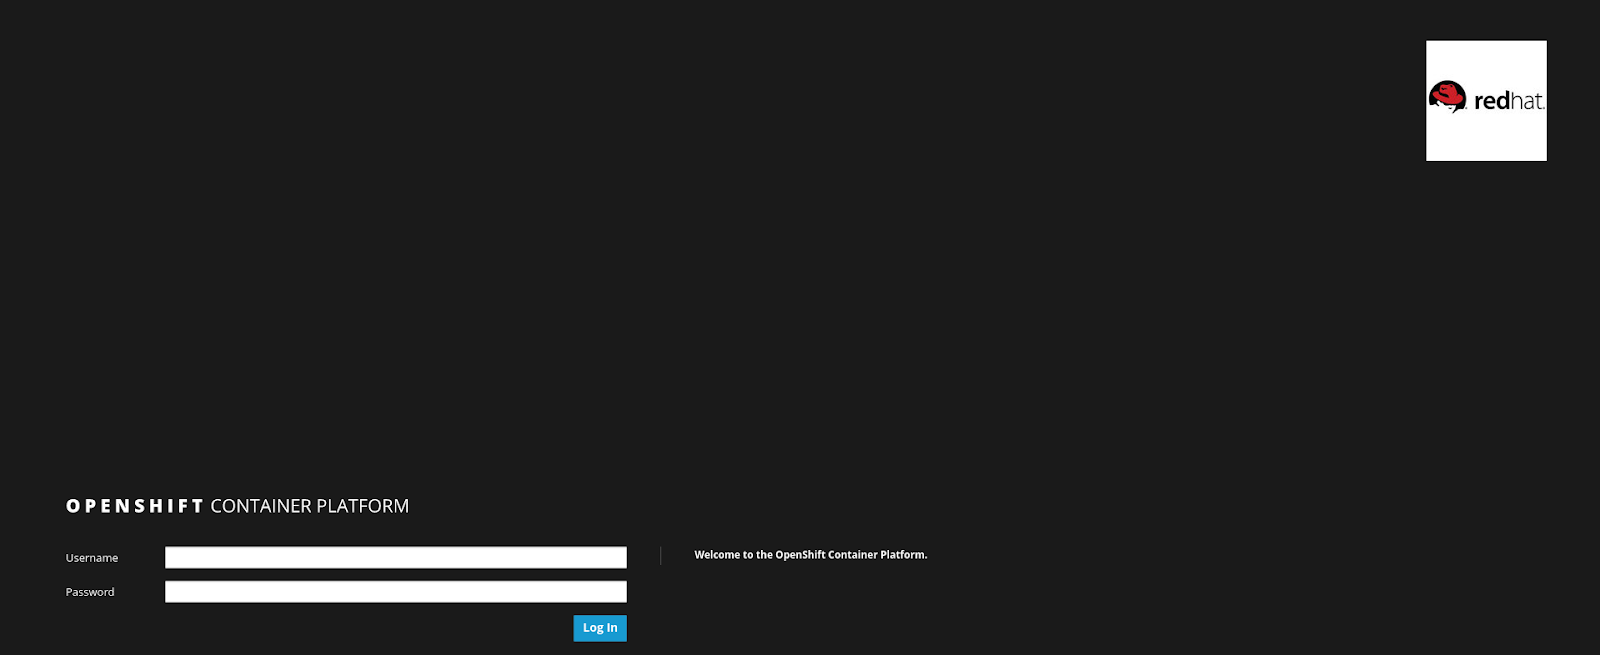
You now have a new login page with the new logo that you want, but the logo is a little bigger than you expected. The default resize is “193x144”, but the resized image is not exactly that size (193x144) because it respects the aspect ratio of the original image.
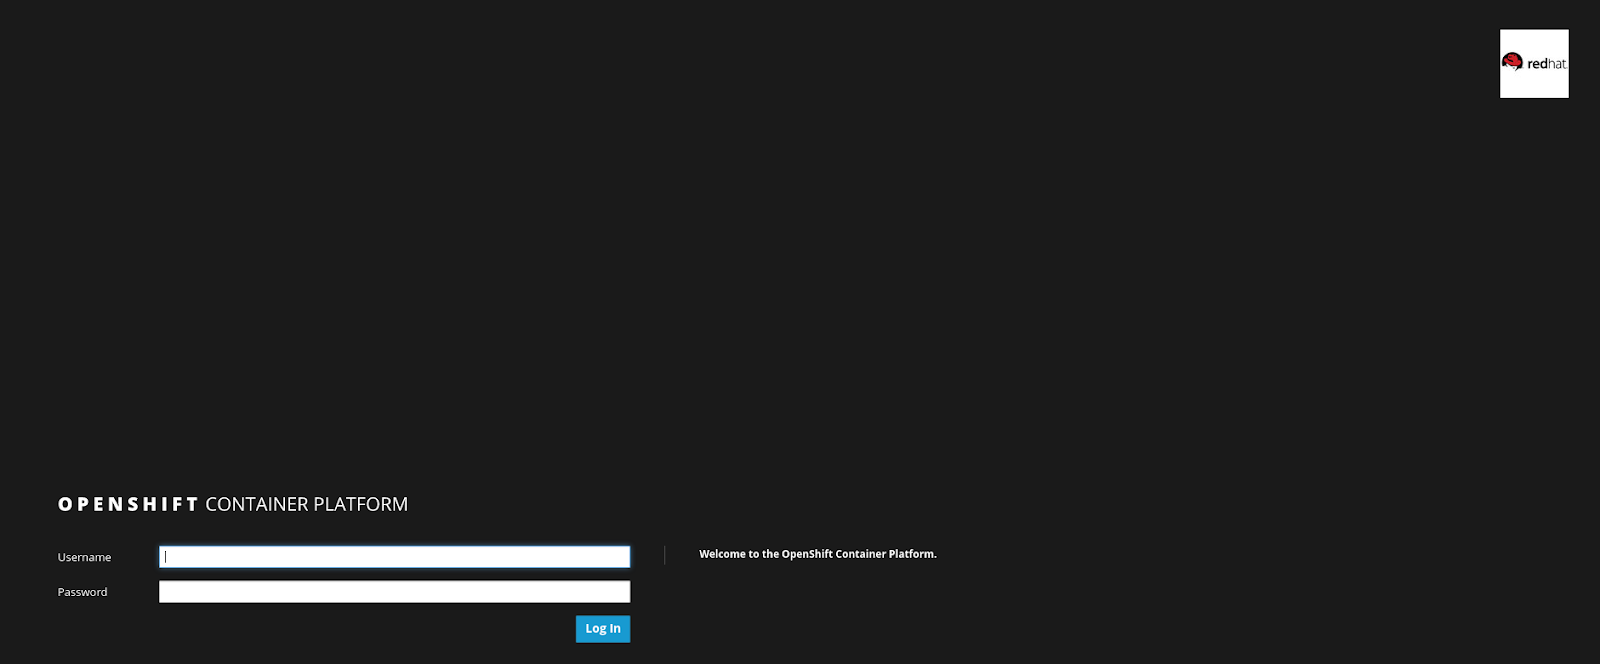
Let’s resize the image to 130x80 by passing an additional argument:
$ ansible-playbook -i /etc/ansible/hosts -e input_img=./demo_logo.jpg -e "size=130x80" ./playbook.yaml
Customizing the web console
Unlike the login page, the web console logo can be easily changed manually because Red Hat OpenShift Container Platform provides the `#header-logo` CSS class to specify the web console logo. Hence, you can upload your logo image and customize the CSS file to 3 masters. This doc also explains how to do it manually.
However, automation can make life easier so we will again use an Ansible script.
Demo System Environment Info:
-
OpenShift Container Platform 3.7
-
3 Masters (1 Master is also possible)
-
API Server - https://masters-37-1205.xxx.example.com:8443
-
Default Logo(
) to Demo Logo(
)
Move to the webconsole playbook folder
$ cd ../ansible-playbook-openshift-custom-webconsole-logo
$ tree
.
├── playbook.yaml
├── README.md
├── requirements.yaml
└── result.png
If you extracted openshift-toolkit from your home directory, the full path will be ~/openshift-toolkit/branding/ansible-playbook-openshift-custom-webconsole-logo
Two Ansible Galaxy Roles are required by this playbook.
$ cat requirements.yaml
- src: Jooho.image-resize
- src: Jooho.openshift-custom-webconsole-logo
-
-
This role is used to resize the customer logo to a specific size.
-
-
Jooho.openshift-custom-webconsole-logo
-
This role configures the OpenShift master configuration to load custom CSS and the new logo.
-
Let’s start!
Download Ansible Galaxy Roles
$ ansible-galaxy install -r requirements.yaml -p ./roles
- downloading role 'image-resize', owned by Jooho
….
- Jooho.image-resize (master) was installed successfully
- downloading role 'openshift-custom-webconsole-logo', owned by Jooho
….
- Jooho.openshift-custom-webconsole-logo (master) was installed successfully
Download the demo logo
$ wget https://store.ansible.com/static/img/Ansible_RH_AnsibleTower_White.png?v=2017.10.18 -O ./demo_logo.png
Now we have prepared everything to replace the logo. Let’s execute the Ansible playbook:
$ ansible-playbook -i /etc/ansible/hosts -e input_img=./demo_logo.png ./playbook.yaml
This is the result page. We can see at the top left corner that the logo was changed to the new one we downloaded.

Ansible is easy to use and is simple and powerful. Personally, what I love the most is that it is also agentless, which means all you need to use Ansible is SSH, which is installed by default on Red Hat Enterprise Linux (Windows needs Powershell 3.0 or later). Using Ansible, you can easily automate something that you might do routinely. In addition, you can also share it with the community through Ansible Galaxy.

Find more posts by Jooho at https://www.redhat.com/en/blog/authors/jooho-lee .
A Red Hat Technical Account Manager (TAM) is a specialized product expert who works collaboratively with IT organizations to strategically plan for successful deployments and help realize optimal performance and growth. The TAM is part of Red Hat’s world-class Customer Experience and Engagement organization and provides proactive advice and guidance to help you identify and address potential problems before they occur. Should a problem arise, your TAM will own the issue and engage the best resources to resolve it as quickly as possible with minimal disruption to your business.
Connect with TAMs at a Red Hat Convergence event near you! Red Hat Convergence is a free, invitation-only event offering technical users an opportunity to deepen their Red Hat product knowledge and discover new ways to apply open source technology to meet their business goals. These events travel to cities around the world to provide you with a convenient, local one-day experience to learn and connect with Red Hat experts and industry peers.
Open source is collaborative curiosity. Join us at Red Hat Summit, May 8-10, in San Francisco to connect with TAMs and other Red Hat experts in person! Register now for only US$1,100 using code CEE18.
Sobre o autor

Jooho Lee is a senior OpenShift Technical Account Manager (TAM) in Toronto supporting middleware products(EAP/ DataGrid/ Web Server) and cloud products (Docker/ Kubernetes/ OpenShift/ Ansible). He is an active member of JBoss User Group Korea and Openshift / Ansible Group.
Mais como este
Reforçada, pronta e sem custo: a segurança para containers evoluiu
OpenShift: integração consistente para a empresa híbrida
The Containers_Derby | Command Line Heroes
Can Kubernetes Help People Find Love? | Compiler
Navegue por canal

Automação
Últimas novidades em automação de TI para empresas de tecnologia, equipes e ambientes

Inteligência artificial
Descubra as atualizações nas plataformas que proporcionam aos clientes executar suas cargas de trabalho de IA em qualquer ambiente

Nuvem híbrida aberta
Veja como construímos um futuro mais flexível com a nuvem híbrida

Segurança
Veja as últimas novidades sobre como reduzimos riscos em ambientes e tecnologias

Edge computing
Saiba quais são as atualizações nas plataformas que simplificam as operações na borda

Infraestrutura
Saiba o que há de mais recente na plataforma Linux empresarial líder mundial

Aplicações
Conheça nossas soluções desenvolvidas para ajudar você a superar os desafios mais complexos de aplicações
Virtualização
O futuro da virtualização empresarial para suas cargas de trabalho on-premise ou na nuvem