Introduction
Greetings Shifters! Today I am going to cover how to use FileZilla as a graphical interface to transfer files between your local machine and your OpenShift gears. Rather than having to memorize the syntax of the scp or sftp commands, you can use a GUI tool to drag and drop files from your machine to the remote location. Filezilla works on Windows, Mac, and Linux. I often use it when I want to copy multiple files up to the server or download a database backup. It also has some great features that may make it your preferred means for moving files around. While all platforms can use FileZilla, this tutorial is mostly going to be focused for Windows Developers since the SFTP and SCP command line tools are not native on your systems. Here is another little helpful post by Katie talking about using OpenShift from a Windows machine.
SFTP and Public/Private keys
While FileZilla can do normal FTP (does anyone still use that on the intertubes?) we are going to use it for SFTP (secure FTP). As you should already know, all communications between your local machine and your gears happen over SSH (git pushes and direct SSH access). So the same goes for any file transfer - only over secure connections. In addition, OpenShift uses SSH keys for authentication. The basic idea is that, rather than using passwords, you have a private key on your local machine and a public key on the remote machine. When you go to authenticate to the remote machine, your local machine generates a one-time signature from your private key that can only be decrypted by the public key. If the remote machine can decrypt the signature then you are all set to log in. Remember to guard your private key because if someone gets ahold of it they can log into any machine where they know the username and you have your public key.
The problem with using FileZilla with OpenShift is that our servers (and our command line tools) all use OpenSSH private/public keys, while FileZilla uses PuTTY keys. In the instructions below I will show you how to convert your OpenSSH key into a PuTTY key. You will find that almost all Linux servers will be running an OpenSSH server so these instructions are useful outside of OpenShift.
If you are already using the PuTTY SSH client to interact with OpenShift then you should already have the proper private key. The rest of the steps will be the same, except you won't be prompted to change your key.
Steps you have already done
Before using FileZilla I am assuming you have:
- Signed up for an OpenShift account
-
Installed the command line tools OR added your public key to the OpenShift Web Console under the "Settings" Tab.
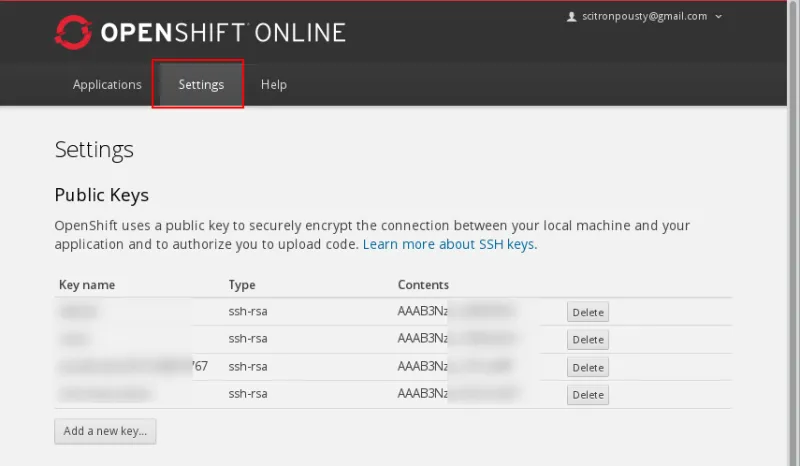
Basically you need to make sure you have remote access over SSH working from your machine.
- Downloaded and installed FileZilla for your platform.
Getting FileZilla set to go with public/private keys
Ok let's convert the key and get it set up with FileZilla. First open the settings dialog.
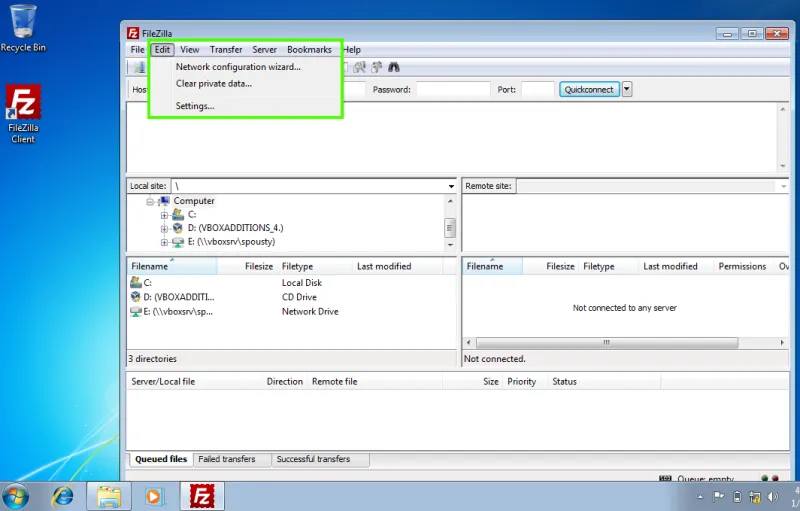
Now click on SFTP under connections in the left part of the setting dialog (green box). Then click on Add keyfile on the bottom of the dialog.

Then in the file chooser dialog, navigate to your home directory, then to the .ssh directory, in there you will see id_rsa. This is your private key that you need to convert to a .ppk format. Go ahead and select it.
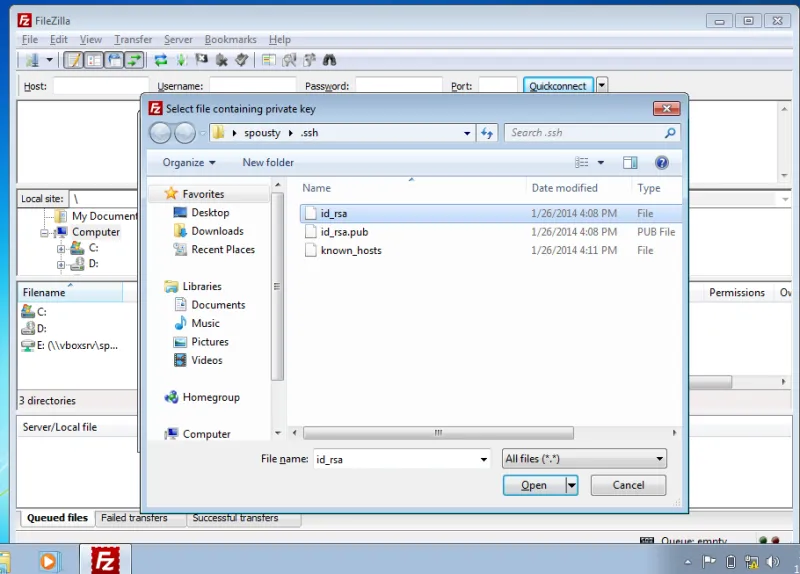
When asked to convert it, go ahead and say Yes.

Save the new file as id_rsa.ppk in your .ssh directory. When you are done you should see the new keyfile listed in your key dialog. Then you can click ok and get back to the normal dialog. Now go ahead and click on File -> site manager or click on the site manager icon on the top left.
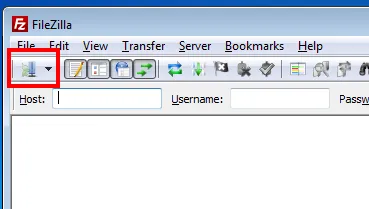
In the site manager you are going to define the connection parameters to your gear. If you need to get the ssh parameters for your gear(s) you can use the following rhc commands.
For a single gear app:
rhc app-show {appname}
To get the SSH keys in a multi-gear app
rhc app-show {appname} --gears
Once you have clicked on the site manager. First click on the New Site button.
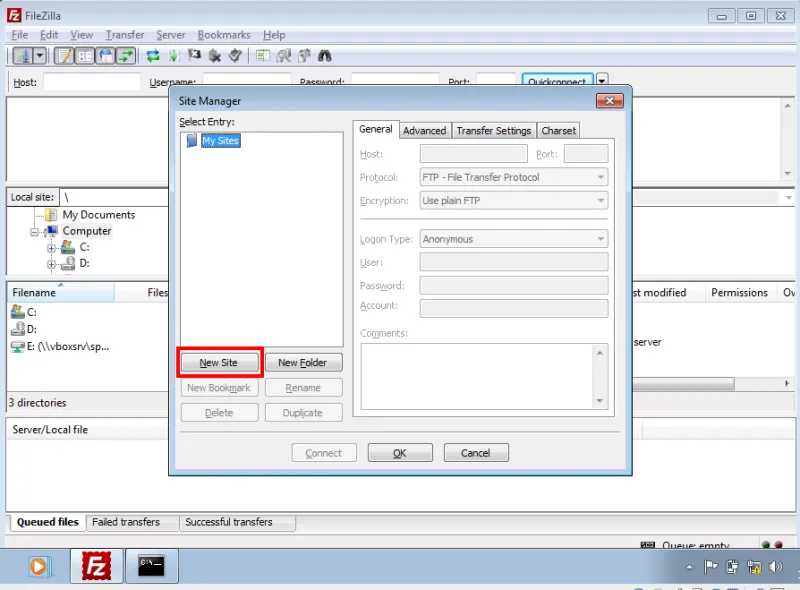
Then fill out the dialog with the information for your gear. The new site name can be anything you want so you can remember what it points to. The host field should be filled out with the contents of the ssh string to the right of the @ (usually the URL of the app). Change the protocl to SFTP. The login type is normal with the user being the UUID for your application. I have blanked out the password field but even if it is filled in, FileZilla will use the SSH keys for authentication. By pressing connect you will also save your settings for the site.

On the first connection it will ask if you want to save the key identifying the host and you should answer yes. It is up to you if you want to save it for always or authenticate it each time.
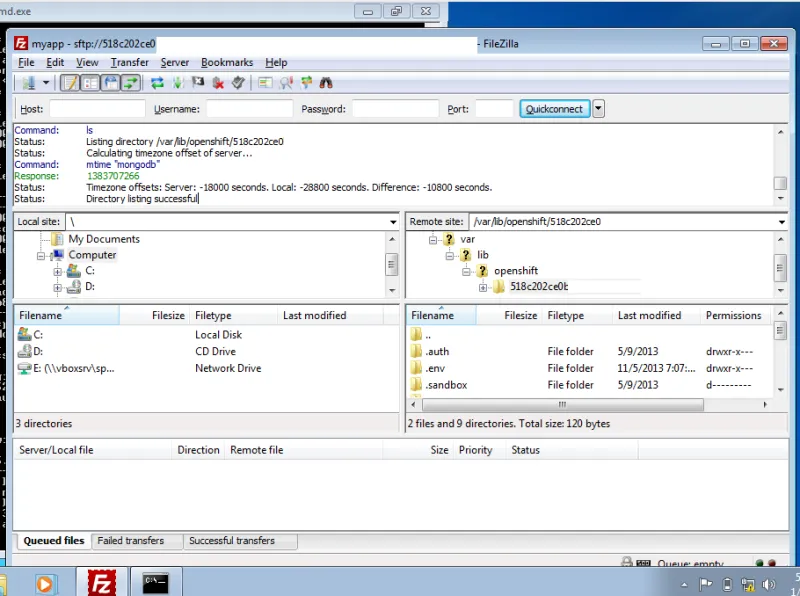
When the connection is completed you will have a drag and drop interface for transferring files. The white box on the top is the log output. The left window is the view of your local machine and the right view is the gear. So you can take files (or directories) and just move them between the two sides to transfer them. The bottom box shows you the status of the transfers.
And with that you are ready to move files back and forth between your local machine and your OpenShift gears. Have fun moving the megabytes!
Next Steps
- Get an OpenShift account and host your web apps on the Free Plan today
- Promote your awesome app in the OpenShift Application Gallery by applying today.
- Ask an OpenShift question and get help on StackOverflow
