
Some doubts may arise about where to start or which tool to use when thinking about how to monitor the Openshift Cluster using an external monitoring solution..
With that in mind, here’s how to monitor your Openshift 4.x infrastructure using Zabbix.
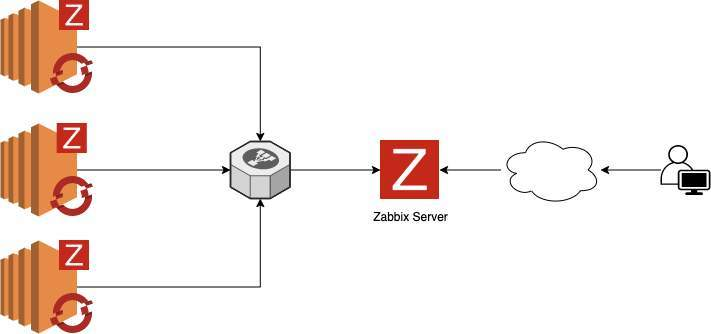
To install the Zabbix agents in our Openshift Cluster, we will use the Zabbix Operator. In this scenario, we will use the agent installation via operator and configure it to send the collections to an external Zabbix Server. The diagram shows how it will work the data flow from Openshift to Zabbix
Zabbix Server Installation
- The first step is to update the server and install httpd:
$ dnf update -y && dnf install @httpd -y
$ sed -i 's/^SELINUX=.*/SELINUX=permissive/g' /etc/selinux/config
$ systemctl enable --now httpd
$ systemctl status httpd
-
The next step is to install and configure the MariaDB database:
$ dnf -y install mariadb mariadb-server
$ systemctl start mariadb
$ mysql -u root -e "CREATE DATABASE zabbix character set utf8 collate utf8_bin;"
$ mysql -u root -e "GRANT ALL PRIVILEGES ON zabbix.* TO zabbix@'localhost' IDENTIFIED BY 'StrongPassword';"
$ mysqladmin flush-privileges
Note: If the database server is separate from the zabbix server, replace localhost with the zabbix server IP, example:  zabbix@'1.2.3.4 '
- In this step, we will install the Zabbix Server:
# Install zabbix repository
$ dnf -y install https://repo.zabbix.com/zabbix/5.0/rhel/8/x86_64/zabbix-release-5.0-1.el8.noarch.rpm
# Install packages needed
$ dnf -y install zabbix-server-mysql zabbix-web-mysql zabbix-apache-conf zabbix-agent
# Restore database schema
$ zcat /usr/share/doc/zabbix-server-mysql*/create.sql.gz | mysql -u zabbix -p zabbix
# Adjust the database parameters
$ vim /etc/zabbix/zabbix_server.conf
# Parameters
DBName=zabbix
DBUser=zabbix
DBPassword=StrongPassword
# Adjust timezone if necessary
$ vim /etc/php-fpm.d/zabbix.conf
# Parameters
php_value[date.timezone] = America/Sao_Paulo
# Adjust php.ini
$ vim /etc/php.ini
# Parameters
  memory_limit 128M
  upload_max_filesize 8M
  post_max_size 16M
  max_execution_time 300
  max_input_time 300
  max_input_vars 10000
# Restart and Enable Services
$ systemctl restart zabbix-server zabbix-agent httpd php-fpm mariadb
$ systemctl enable zabbix-server zabbix-agent httpd php-fpm mariadb
# Now we will access our graphical interface to complete the installation process, go to:
http://<< IP ADDRESS or FQDN >>/zabbix
# In the welcome screen, click Next step

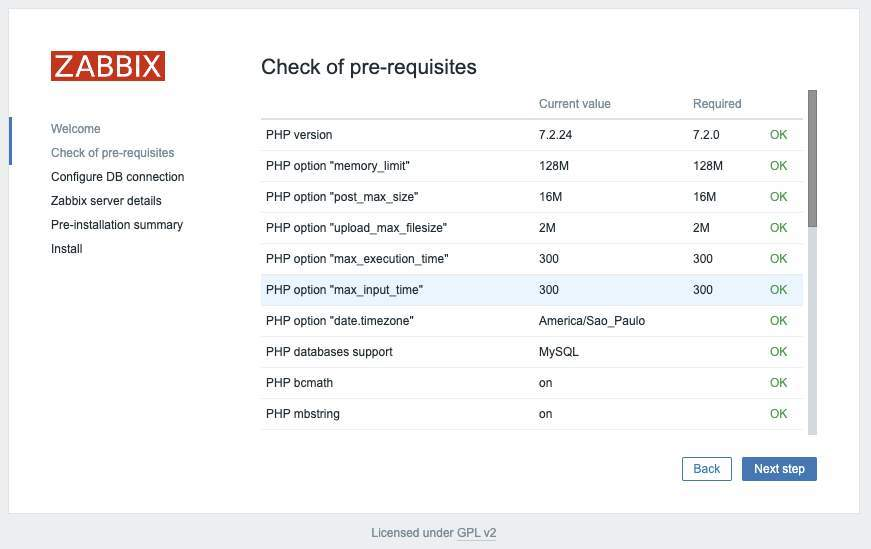
# Check that all prerequisites have been met and click Next step
# Enter the database credentials and click Next step

# The name field is optional; click Next

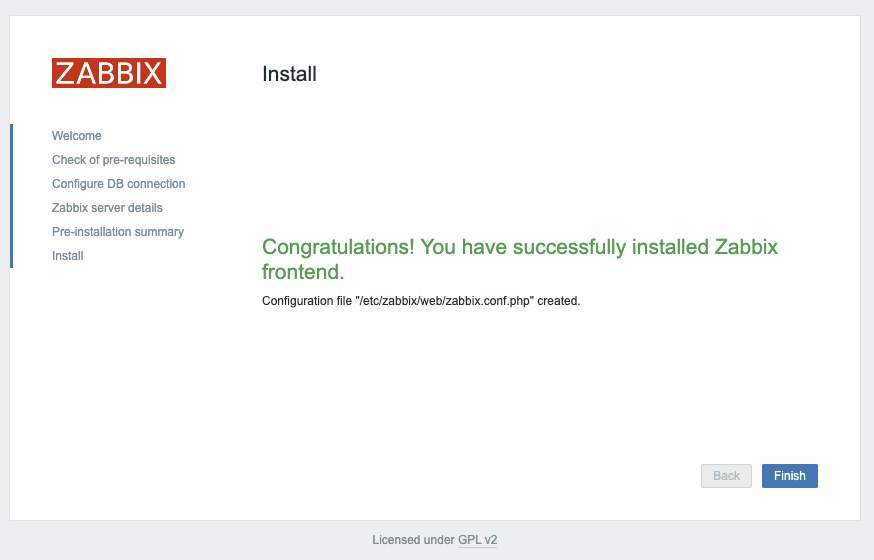
# Validate, click in Next and Finish
Zabbix Server Configuration
# On the login screen, use the credentials below:
U: Admin
P: zabbix

For security reasons, change the password for the Admin user.
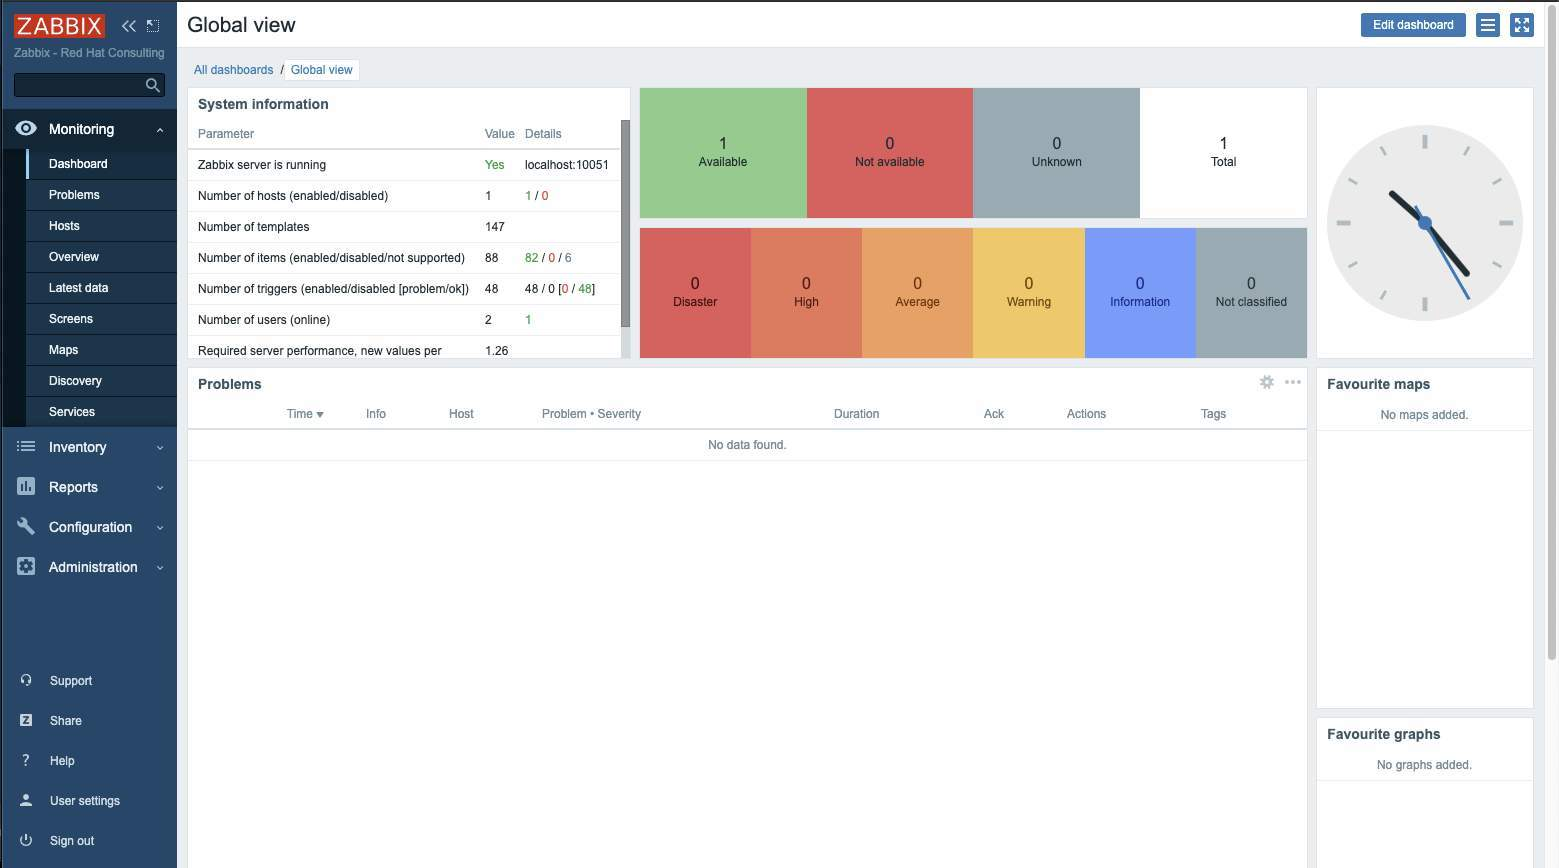
# OK, now we can view our default dashboard:
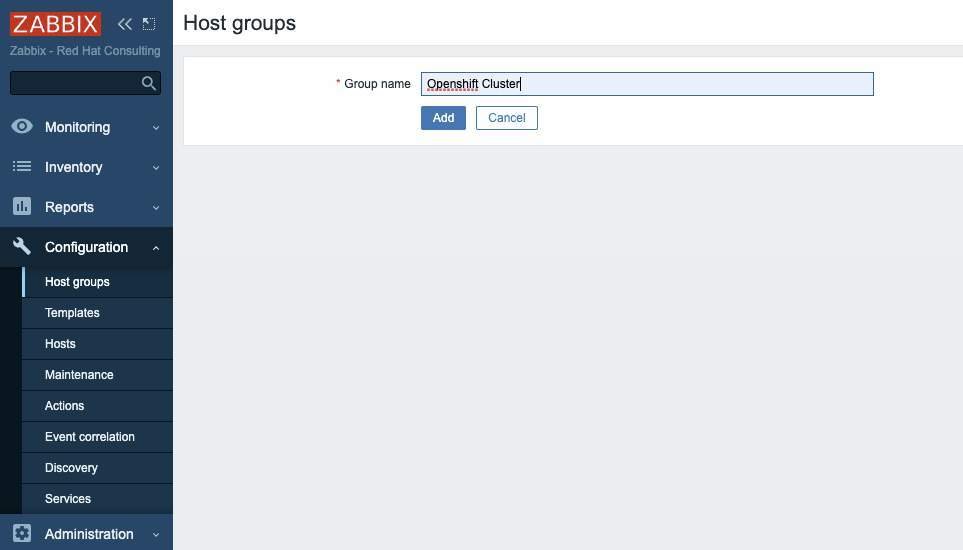
# Now let's create a host group to organize the Openshift servers:
Click in Configuration > Host Groups > Create host group, set the group name, and click in Add
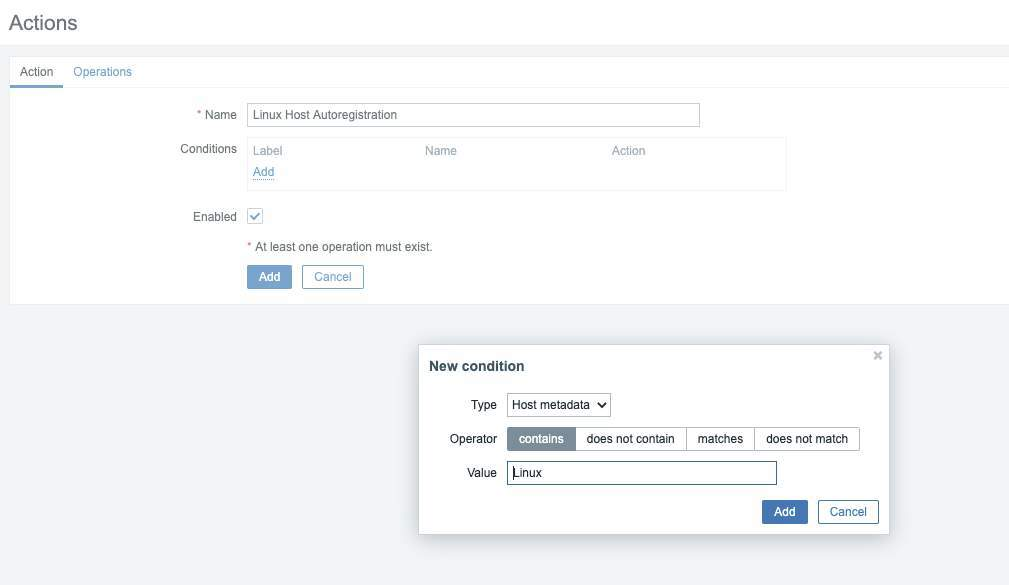
# Now we are going to configure the agents self-registration so that our nodes can be registered in zabbix automatically.
To do this, in the side menu, go to Configuration > Actions > in the upper tab select Autoregistrion actions > and click Create action

# Define the name of our action, in condition, click Add
Type: Host metadata
Operator: contains
Value: Linux
# On the Operations tab, click Add and add the operations below:
Operation type: Add to host group
Host groups:  Name of Host Group

# Add new Operations:
Operation type: Link to template
Templates: Template OS Linux by Zabbix agent active

With this configuration, each new active agent will be automatically registered within the "OpenShift Cluster" group and will receive the template "Template OS Linux by Zabbix agent active"
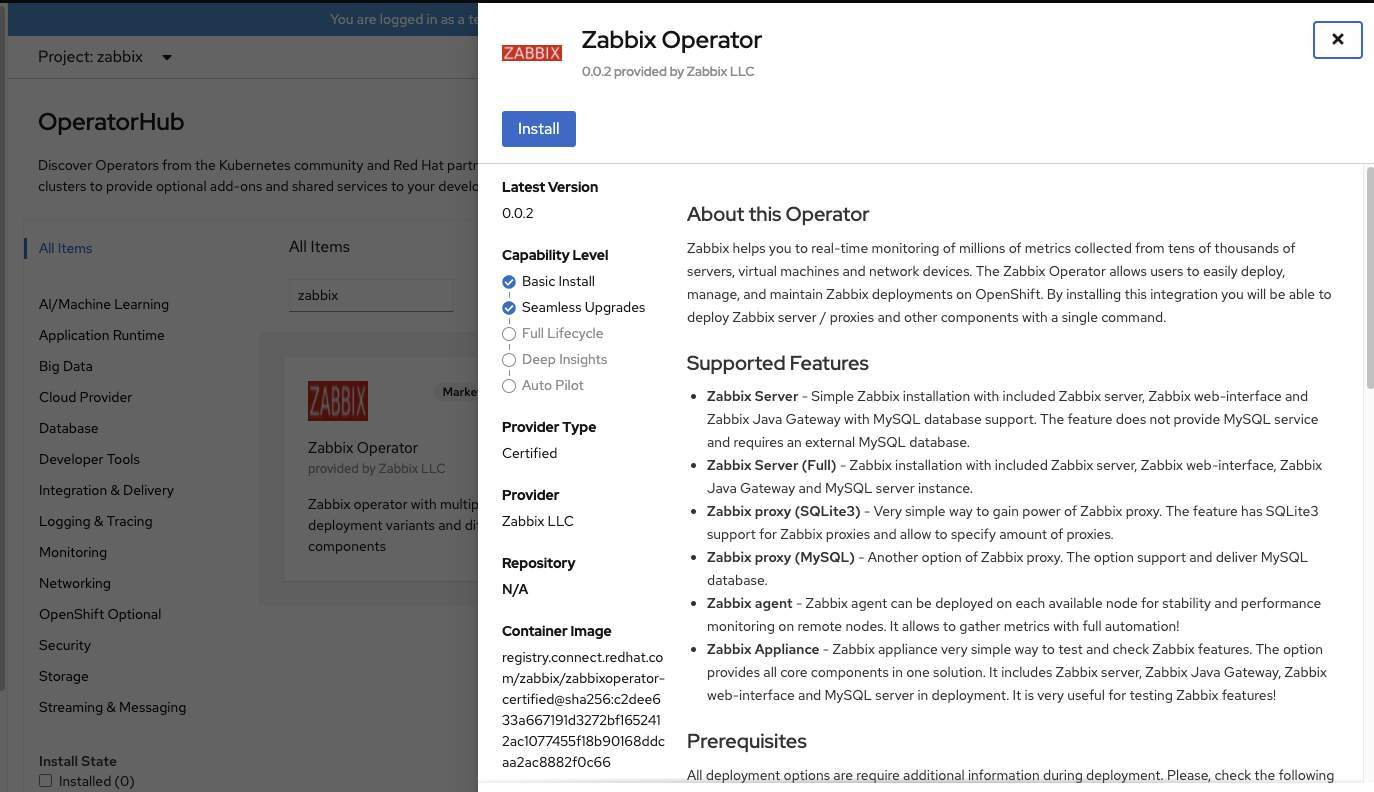
Zabbix Operator Installation
# Now on Openshift, we will install and configure the Zabbix Operator.
In OperatorHub, search for Zabbix, select and click Install:
# Click Install again:

# Wait for the installation to complete and click on Zabbix Operator name:

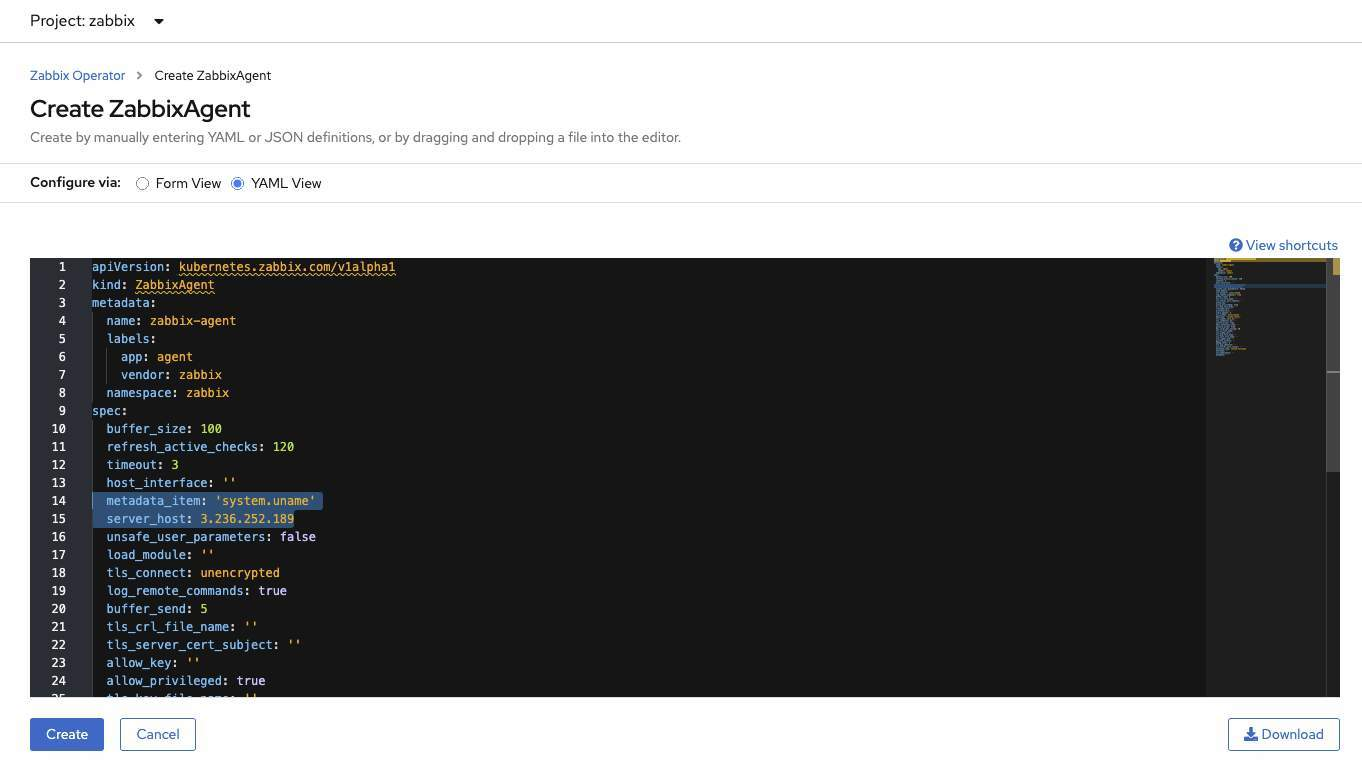
# Find the Zabbix Agent tab and click Create ZabbixAgent > Select YAML View and adjust the parameters below and click Create:
metadata_item: 'system.uname'
server_host:  <IP or FQDN Zabbix Server>
Zabbix Operator Configuration
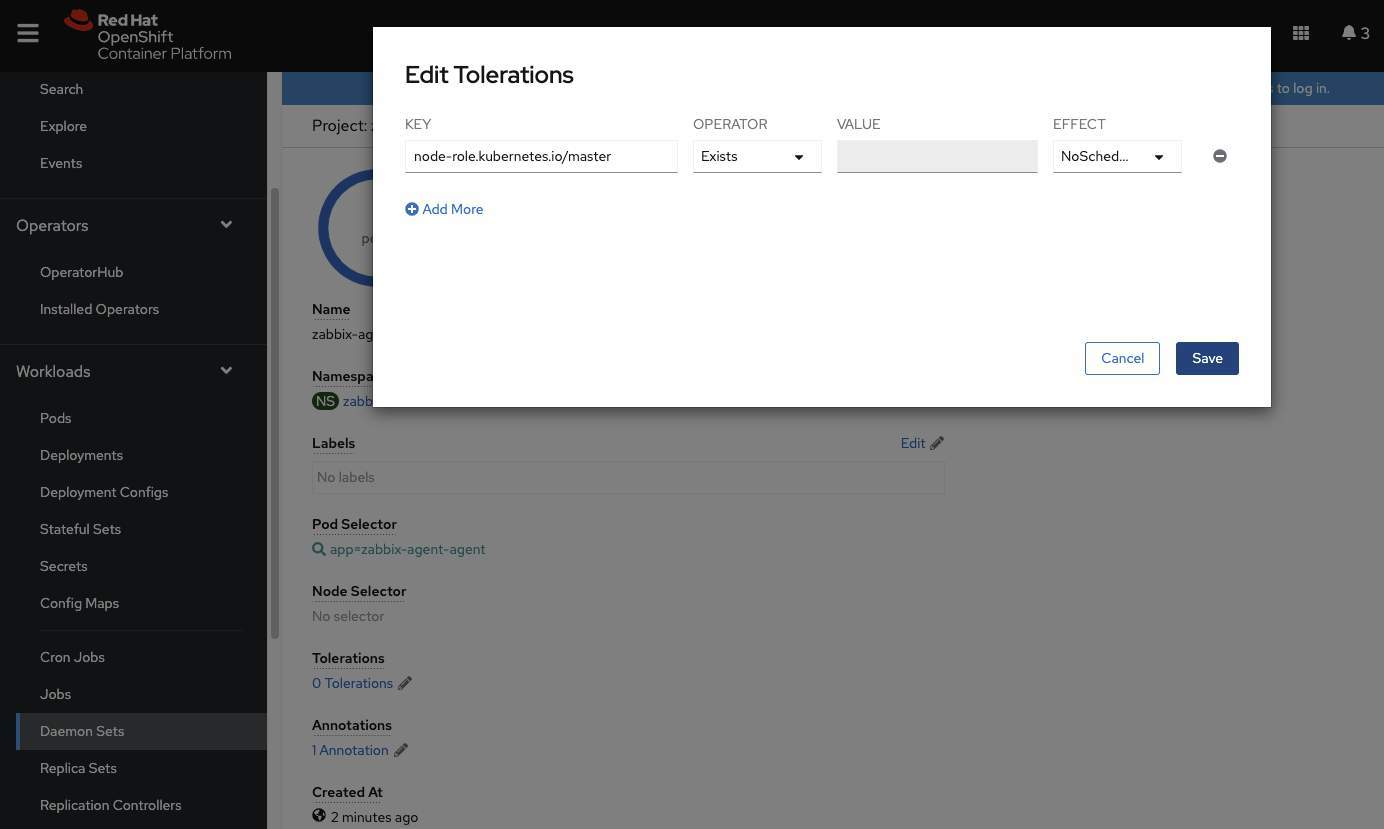
# Now, In Zabbix project, select Daemonset > click in zabbix-agent-agent > click in Tolerations and add the toleration below for create pods on Master Nodes:
KEY: node-role.kubernetes.io/master
OPERATOR: Exists
EFFECT: NoSchedule
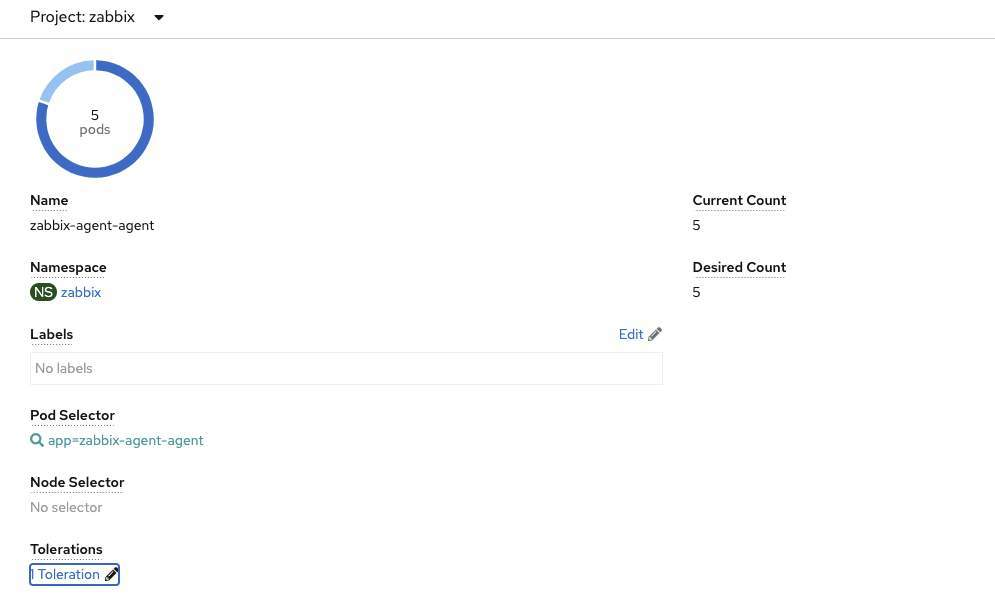
# Now we can see the daemonset being scaled to 5 pods (3 masters and 2 workers)
# We will list the pods just to check the names and their status:
oc get pods -o wide -n zabbix

# Now on Zabbix, go to Configuration > Hosts.
If everything is correct, we will be able to view our created hosts:

# For easy viewing, click on the host name and add "Visible name" to the host name within OpenShift and click Update:

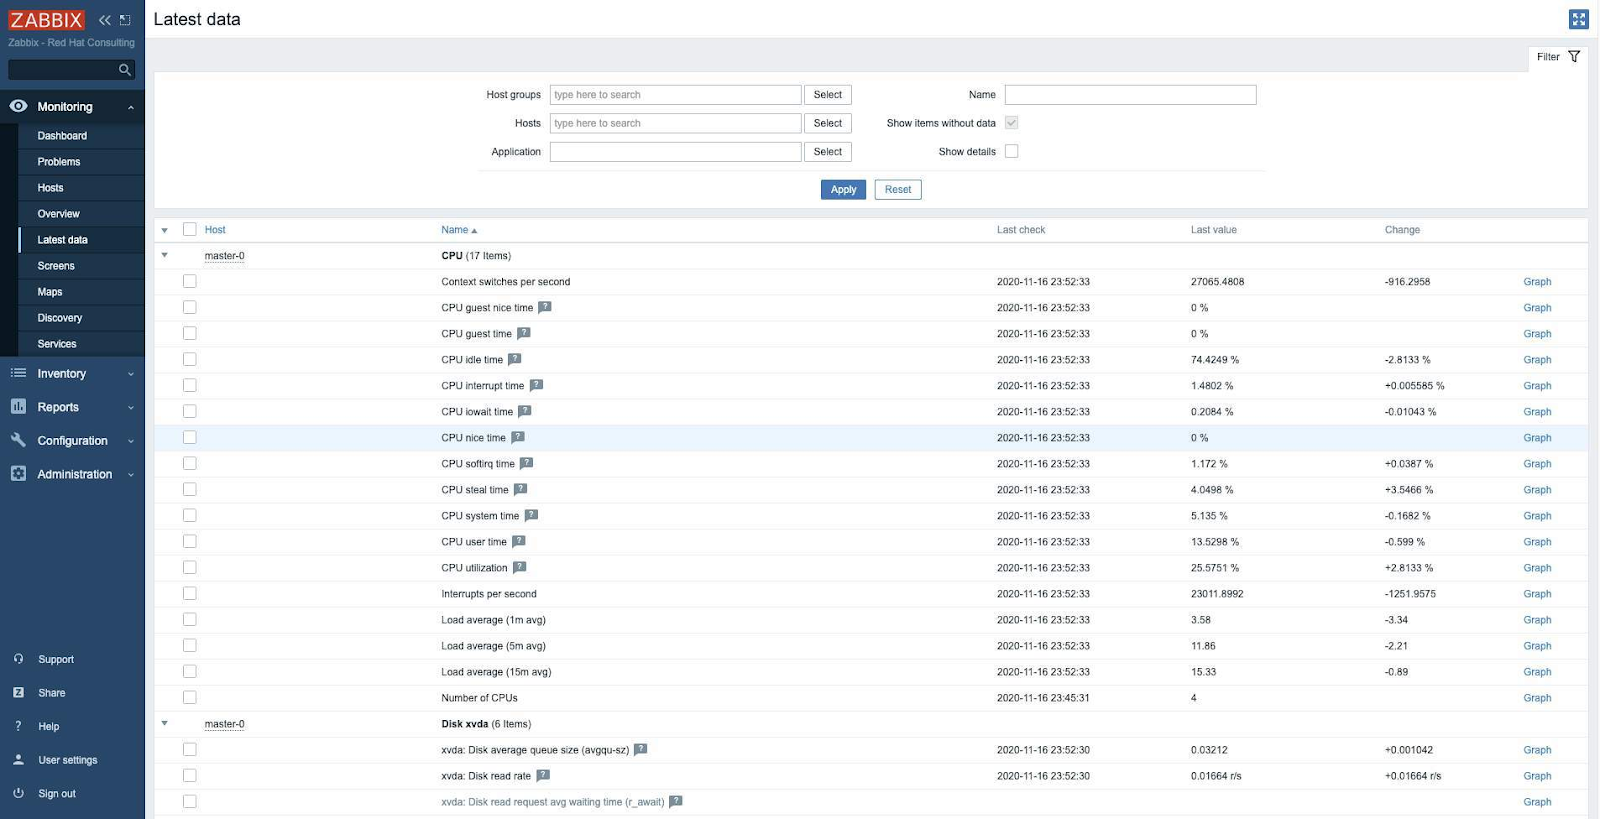
# To identify whether hosts are already sending data to our Zabbix Server, click on Monitoring > Latest data
On this screen, we can see which items are being collected and their values with the date of the last collection:
There, now our cluster is already active with functional monitoring:

Remembering that in this scenario, we are monitoring only the infrastructure of our OpenShift Cluster.
The tests were performed using OpenShift 4.6.1 and Zabbix 5.0
Conclusion
In this article, we saw how it is possible to monitor the unchanging infrastructure of Openshift using the Zabbix Operator and by sending consumption data (such as cpu, load, memory, network, disk space) we can create alerts setting thresholds for warnings, allow proactive action before the scenario is critical.
Sull'autore
Altri risultati simili a questo
Smetti di gestire il passato e inizia a costruire il futuro dell'IT
Potenziata, pronta e a costo zero: l’evoluzione della sicurezza dei container
Avoiding Failure In Distributed Databases | Code Comments
You Can't Automate The Fire | Code Comments
Ricerca per canale

Automazione
Novità sull'automazione IT di tecnologie, team e ambienti

Intelligenza artificiale
Aggiornamenti sulle piattaforme che consentono alle aziende di eseguire carichi di lavoro IA ovunque

Hybrid cloud open source
Scopri come affrontare il futuro in modo più agile grazie al cloud ibrido

Sicurezza
Le ultime novità sulle nostre soluzioni per ridurre i rischi nelle tecnologie e negli ambienti

Edge computing
Aggiornamenti sulle piattaforme che semplificano l'operatività edge

Infrastruttura
Le ultime novità sulla piattaforma Linux aziendale leader a livello mondiale

Applicazioni
Approfondimenti sulle nostre soluzioni alle sfide applicative più difficili
Virtualizzazione
Il futuro della virtualizzazione negli ambienti aziendali per i carichi di lavoro on premise o nel cloud