Over the past few months, we have heard more and more about edge scenarios and how Red Hat OpenShift allows deployment models that match—in terms of sizing and hardware footprint—with this mode of operation.
Among these possibilities, we have often written about the single-node deployment mode, with a single OpenShift instance acting as both the control plane and worker node.
This deployment mode is valid when high reliability isn’t required and when the resources at our disposal are limited, either because of space or hardware unavailability issues or the workloads that are to be executed aren't as crucial where redundant replicas are needed.
Even if the operating modes of our applications do not require high availability, however, they may still need dedicated persistent storage with snapshot capability and automatic provisioning.
This can be either to hold transient data that needs to be subsequently pre-processed before being sent to the data center or to hold data that may need to be kept on-site before it can be sent, due to network unavailability as in disconnected/isolated sites.
For this purpose, in OpenShift 4.12, there’s an operator called logical volume manager (LVM) storage. It’s explicitly designed for OpenShift single-node deployments and is based on the upstream topoLVM project. LVM allows us to use devices connected to our machines as logical volumes. If you are unfamiliar with LVM, you can learn more about what it is and how it works here.
Through LVM storage, it is possible to use one or more storage devices connected to the OpenShift server to create a volume group. The majority of the space in the volume group is used to manage a single thin pool, which will then be used for the logical volumes corresponding to the storage required by the cluster. A small part is kept free for data recovery operations.
With the LVM storage operator, as opposed to the Local Storage Operator, each device is made available to the cluster, forming a pool from which logical volumes will be generated and presented as PersistentVolumes to OpenShift
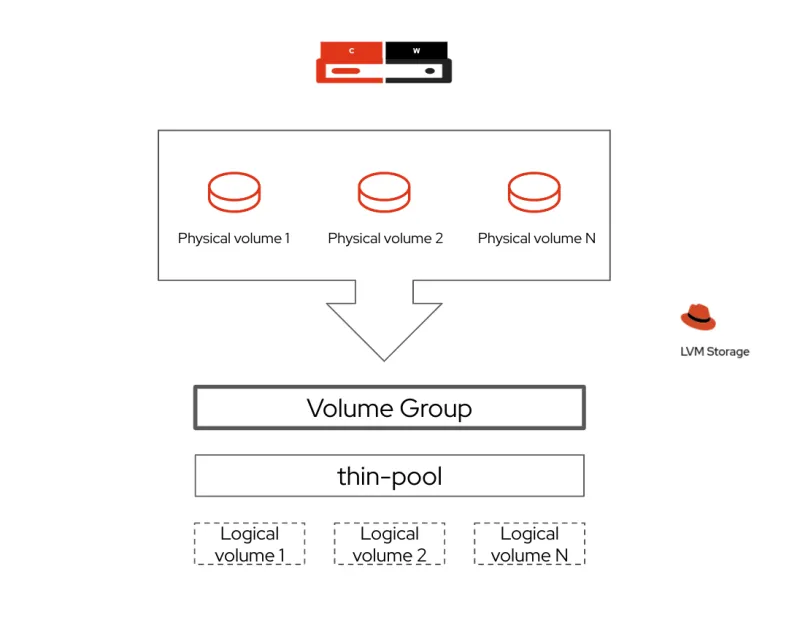
Taking advantage of these features, the LVM storage allows us to dynamically provide block and filesystem-type storage with RWO (ReadWriteOnce) access mode. This mode fits perfectly in our single-node setup, providing mount and access to persistent volumes only to workloads residing on the same node.
To configure the CoreOS node to use device storage, and to configure the volume group that will then be used, the operator consumes a custom resource called LVM cluster that contains all the necessary information, including the name of the volume group that will be created and the rate of space to be allocated as well as the tolerance buffer to allocate to avoid overprovisioning.
It is important to note that the discovery of storage devices connected to the server is done automatically, so it is not necessary to specify or know in advance which devices will be used.
Logical volume manager storage in action
Now that we have a little more information about the operator and the logic behind it, it's time to see it in action by running the setup together.
What you will need:
- A single-node OpenShift setup
- One or more storage devices available on the OpenShift node
- Roughly 10 minutes of your time
The logical volume manager storage is available in Red Hat Operator Hub, so it is searchable and installable directly from OpenShift, by going to Operators > Operator Hub and searching for the operator.
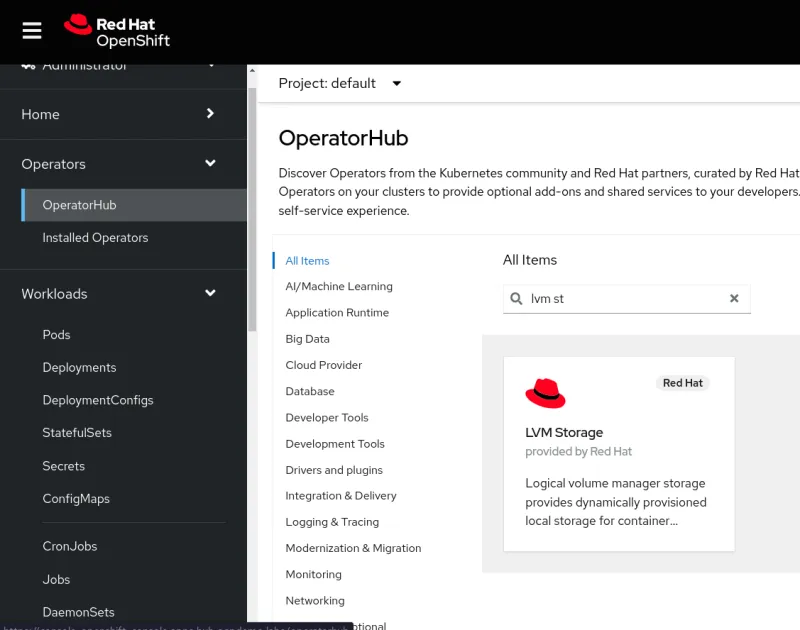
To install it, click on the icon, press Install, and leave all fields unchanged.

Once the operator setup is complete, you can check its installation status by going to Operators > Installed Operators.
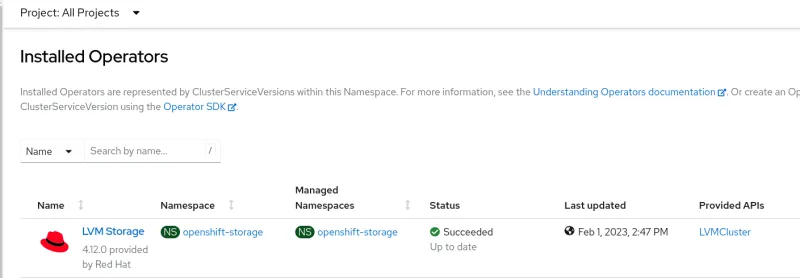
As you can see in the image below, in order to complete the configuration, we are asked to create an additional resource, which is the LVMCluster.
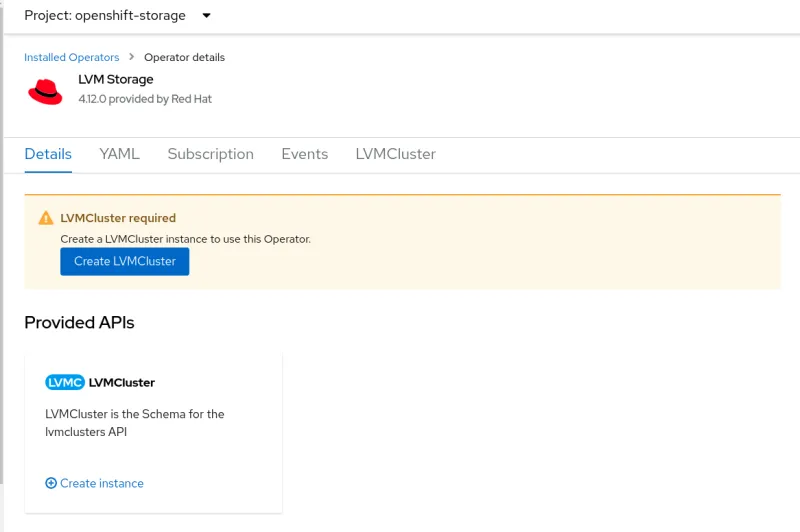
Click on Create LVMCluster to generate the custom resource that the operator will use to perform the necessary configurations on the node and generate the volume group from which the logical volumes will then be detached.
For the purpose of our test, it will be sufficient to proceed with the standard values, and we can click on Create.
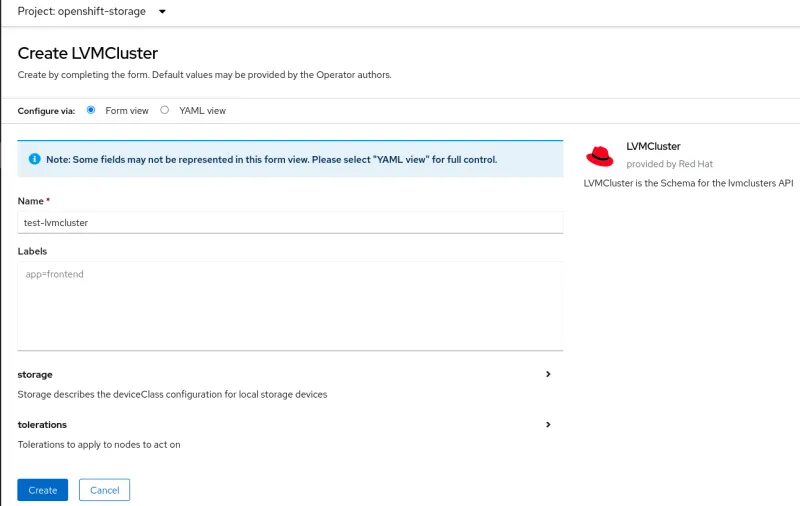
After a few seconds, you will see that the operator has created a storage class called lvms-vg1. This can be referenced in your deployments so that it can be used to create the associated persistent volume.

If you are curious to see what happened under the hood, you can go to Compute > Nodes, select your node and click on Terminal to open a shell provided by a debug pod.
From inside the shell, run this command to get access to the host binaries:
chroot /host
Now you can look at the LVM configuration on the host, using the following commands to show the volume groups and the logical volumes and pools
vgs
lvs

You are now ready to start using persistent storage within OpenShift. To do this, we will use a simple deployment of a pod using a persistent volume.
We’re going to generate a PersitentVolumeClaim (PVC), create a pod that uses it, and then check back on the node to see what happened.
To create the PVC, we need to go to Storage > PersistentVolumeClaims, select the default project, click on Create PersistentVolumeClaim, and set the name my-pvc and the size to 1 GiB.
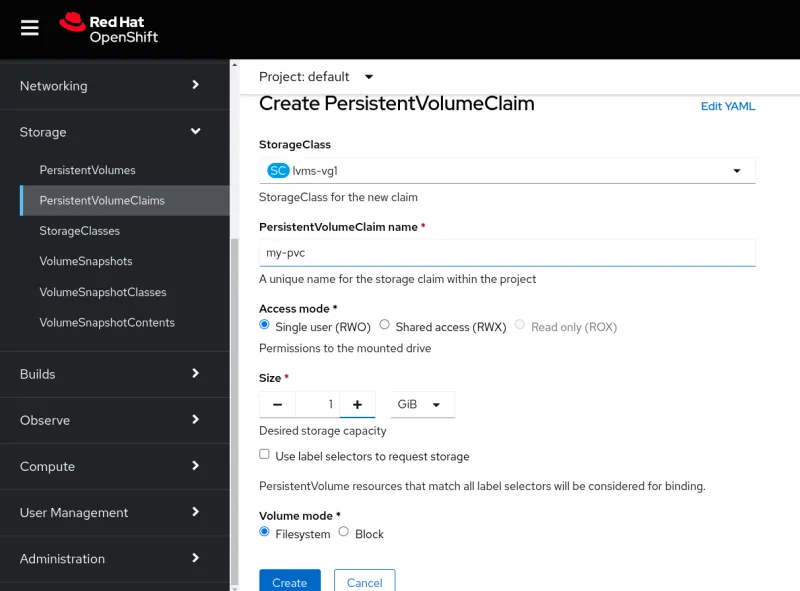
Now we need a pod that uses the storage we have set up. For this, we go under Workloads > Pods and click on Create Pod.
We can copy and paste the following YAML definition to trigger the creation of the pod, which will be up and running in a few seconds, with the storage hooked up:
apiVersion: v1
kind: Pod
metadata:
 name: my-pod
spec:
 volumes:
   - name: my-volume
     persistentVolumeClaim:
       claimName: my-pvc
 containers:
   - name: my-container
     image: registry.access.redhat.com/ubi9/httpd-24
     ports:
       - containerPort: 8080
         name: "http"
     volumeMounts:
       - mountPath: "/my-dir"
         name: my-volume
We can verify that after the pod starts, the PersistentVolumeClaim is now in the Bound status and the relative PersistentVolume has been created:
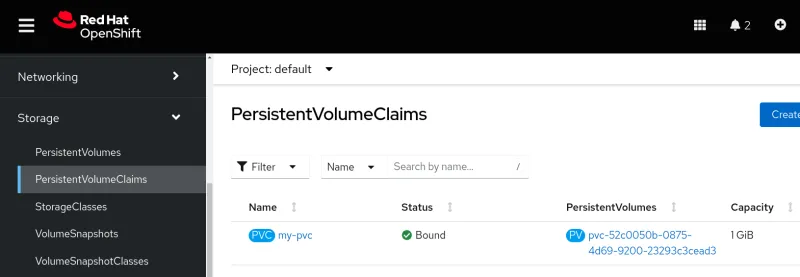

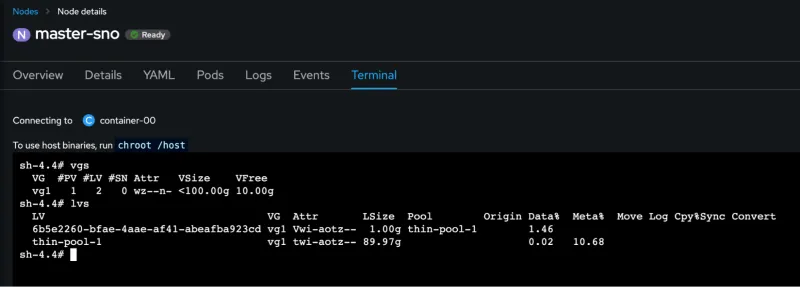
If we go to the node to check what has changed, we will see that by re-executing the commands we saw earlier, we can see that the logical volume that has been created.
So by going into the Compute > Nodes section and selecting our SNO (single-node OpenShift) node, under the Terminal tab we can run the following commands:
chroot /host
vgs
lvs
The result below shows that a new logical volume has been created out of the existing pool, with the exact size of our persistent volume.
Monitoring PVC usage
By using the LVM integration and metrics on the node, the LVM storage is able to provide real-time usage statistics about the provisioned persistent volumes.
Get a quick overview of the statistics by going into the Storage > PersistentVolumeClaims section and selecting the freshly created PVC.
On the main page, we will get insights about the PVC size and usage, as well as additional details about the storage class, persistent volume and access/volume modes.

Conclusion
Even with small-footprint OpenShift deployments, storage can be a crucial aspect to consider. LVM storage helps provide reliable storage with snapshotting capabilities in a straightforward way.
Considering that it can be installed using Red Hat Advanced Cluster Management policies to provide the operator and the LVMCluster resource, this is a great fit for configuring storage at scale on your single-node OpenShift deployments at the edge.
Learn more
关于作者
Alessandro Rossi is an EMEA Senior Specialist Solution Architect for Red Hat Enterprise Linux with a passion for cloud platforms and automation.
Alessandro joined Red Hat in 2021, but he's been working in the Linux and open source ecosystem since 2012. He's done instructing and consulting for Red Hat and delivered training on Red Hat Enterprise Linux, Red Hat Ansible Automation Platform and Red Hat OpenShift, and has supported companies during solutions implementation.
