Have you ever wished you could better organize the inventory and define who can access what systems when using Insights? Inventory Groups is a new feature in Red Hat Insights that allows administrators to organize systems by groups and define which users can access them.
Key concepts of Inventory Groups
- Using inventory groups is not mandatory, therefore your systems can remain ungrouped in the inventory.
- A system can only be part of 1 inventory group.
- A group can be used solely to group systems together to better organize the inventory, or in combination with Identity & Access Management (RBAC) to restrict user access.
Why use Inventory Groups
- Filtering and managing your system inventory across applications
- Allowing or restricting access to groups of systems for specific users
How to use Inventory Groups to restrict user access on systems
Overall steps
Restricting user access with inventory groups consist of the following:
- Create and populate an inventory group
- Create or modify a custom user role
- Create or modify a custom user group
- Override the built-in Default access group
Our scenario
In the example below, we will walk you through how you can leverage the Inventory Groups feature to restrict user access on a specific subset of systems. In this Scenario we have two teams who manage infrastructure all rolled into the same organization:
- Team A
- Team B
Each of these teams manage infrastructure within their own groups within their company and do not have access to each other’s infrastructure. Due to this, it is important that their management tooling provides a similar level of controls to comply with their internal processes.
For the sake of simplicity, we are assuming that the configuration for Team A was already taken care of, so will focus on the steps required for restricting access to systems belonging to Team B:
- None of the users of Team B are Org Admin within Red Hat Insights.
- We will grant users of Team B with read and write access to the specific systems they are responsible for.
- After the changes, users of Team B will only be able to see and apply changes to systems they owned and will not be able to see other systems of the inventory.
- By design, Org Admin users will always be able to access all the systems and all inventory groups.
Create the inventory group
1. Navigate to the Inventory section of Red Hat Insights and click on the Groups section
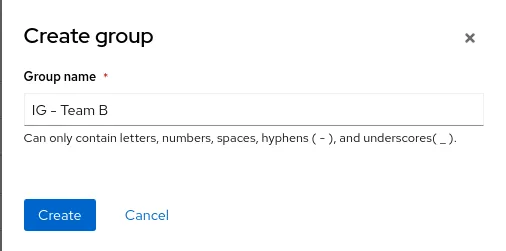
2. Create a new inventory group by clicking on the blue Create group button
3. In our scenario, we will name the inventory group IG - Team B
4. Assign the proper systems to the inventory group
After the creation of the group, click on the group itself to bring its details

Click on the Add systems button
Select the systems to be added to the inventory group, you may use a filtering query, and then click on Add systems to complete the operation.
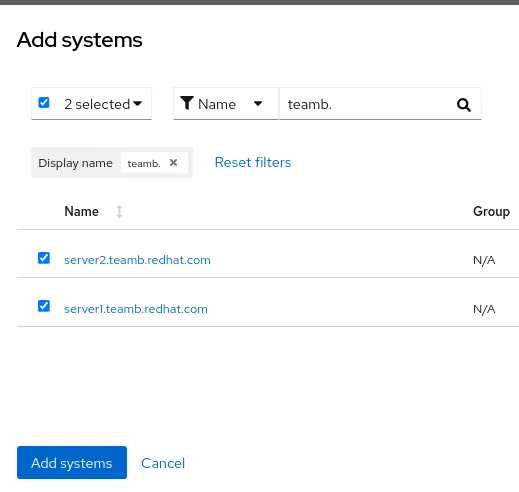
At this point we have just created and populated the inventory group for Team B. So in addition to the group for Team A, the inventory should look like this:
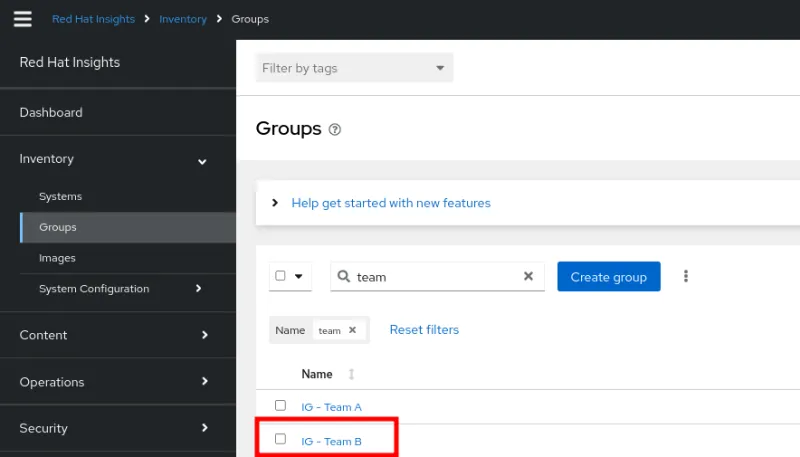
With these inventory groups, it’s now possible to navigate within Insights and use the filtering options to show systems from specific inventory groups.
Validate our configuration
Now that our inventory groups are created and systems are assigned, we can validate the configuration in the Inventory. Each system displays the group it is assigned to in the Inventory view. The Group filter can be used to filter the Inventory to display systems belonging to a specific inventory group(s).

The Group filter can be used in other applications displaying system inventory. For example Advisor > Systems, Patch > Systems, Vulnerabilities > Systems, Compliance > Systems and Malware > Systems all offer the Group filtering capability.
Configure the user access
Now that we have taken care of the inventory aspect, the next steps need to be done in the Identity & Access Management section of Red Hat Insights.
The Identity & Access Management section can be accessed by clicking on the cogwheel located on the upper right of Red Hat Insights.

Create and configure new custom role
A custom user role is actually where the permissions on the inventory group object will be defined
1. Click on the Roles section
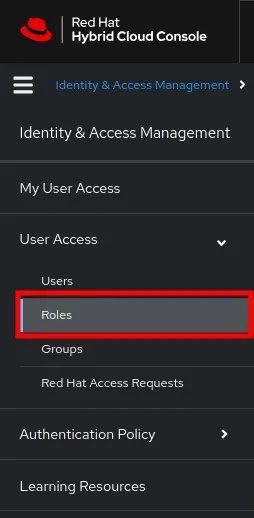
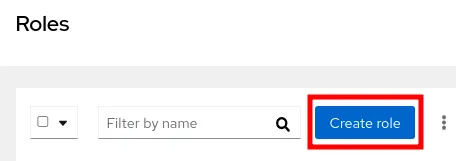
2. In the Roles section, click on Create role
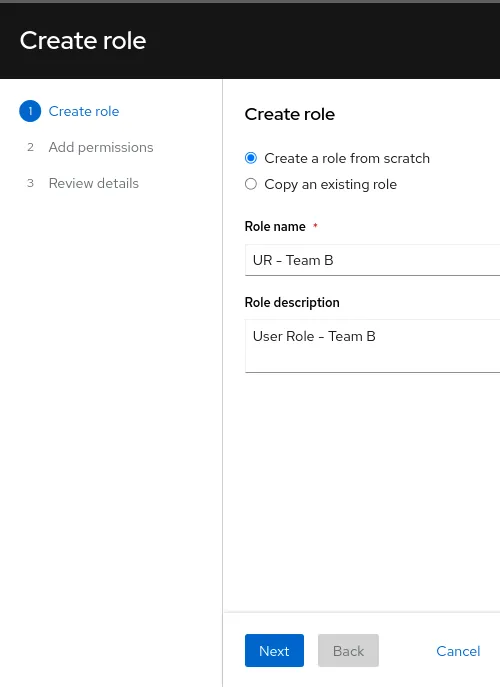
3. Follow the role creation wizard to populate with the following
Role name and description
- Role name: UR - Team B
- Role description: User Role - Team B
Add permissions
Use the Application filter to only see the inventory permissions
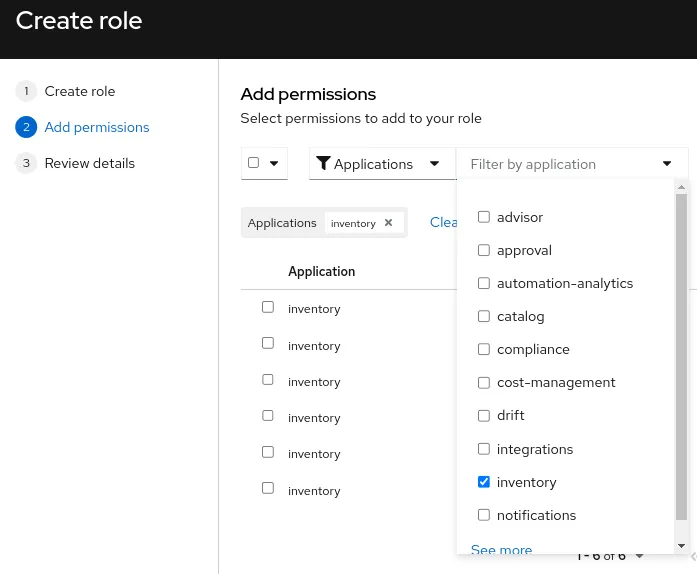
In our scenario, we want to grant complete access to both the inventory group object itself and the systems inside it, so we are selecting the 4 following permissions:
- inventory:hosts:read
- inventory:hosts:write
- inventory:groups:read
- inventory:groups:write

More details on the permissions can be found in the Viewing and managing system inventory documentation
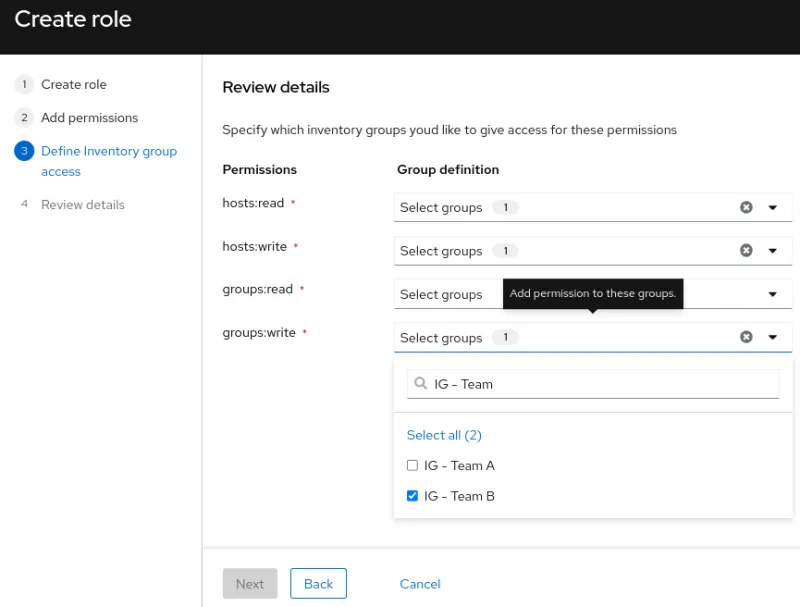
Define inventory group access
For each of the permission added previously, define which inventory group it should be applied to. In our case, all permissions will be applied to IG - Team B
Review details
The configuration of the custom role UR - Team B will look like the following:

Click on the Submit button to complete the creation of the role
Create and configure a new user group
A user role cannot be assigned directly to a user, it has to be added to a user group first, and then specific user(s) can be added to this user group
1. Click on the Groups section of User Access
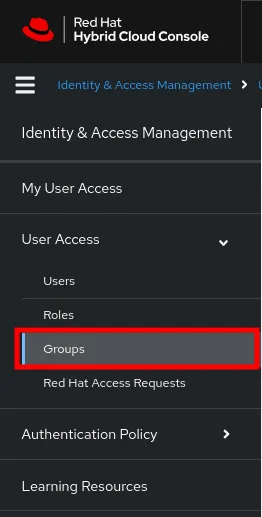
2. In the Groups section, click on Create group

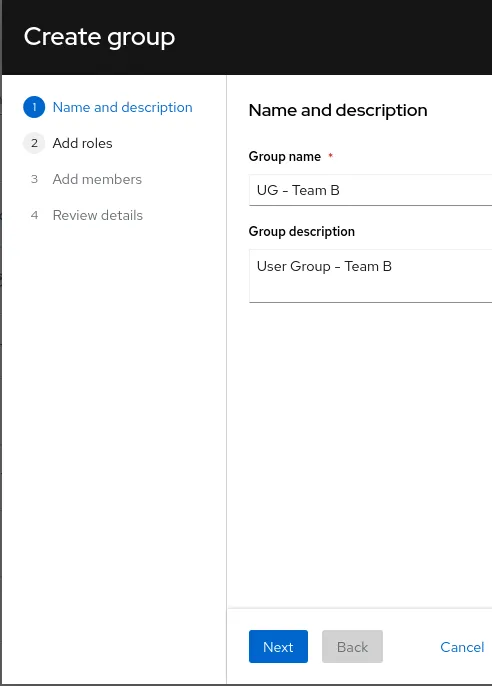
3. Follow the group creation wizard to populate with the following
Group name and description
- Group name: UG - Team B
- Group description: User Group - Team B
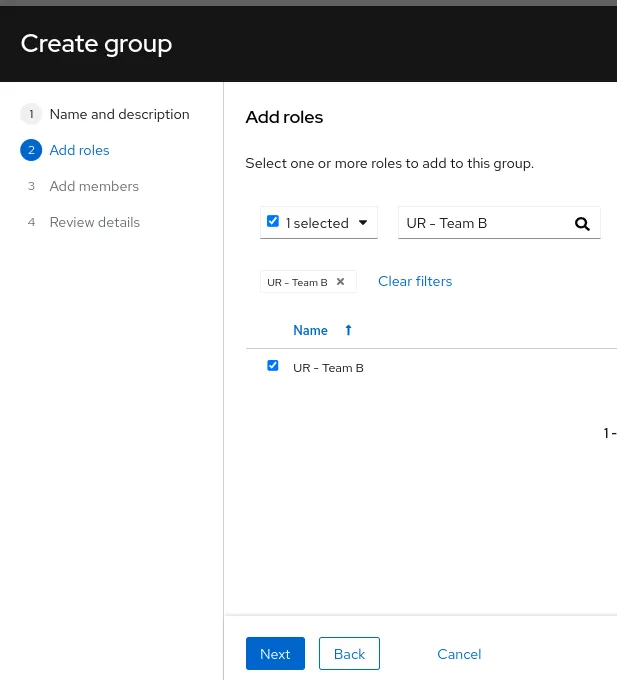
Add roles
- Use a filtering query to search for the previously created role: UR - Team B
- Then select the role and click Next
Add members
- This is where you finally select which user(s) will inherit the permission defined in the user role and granted via the current user group

Note: Only non-Org Admin users are selected. While it causes no harm to add Org Admin users to this user group, it is not necessary since they will have access regardless.
Review details
- The configuration of the new user group will look like the following
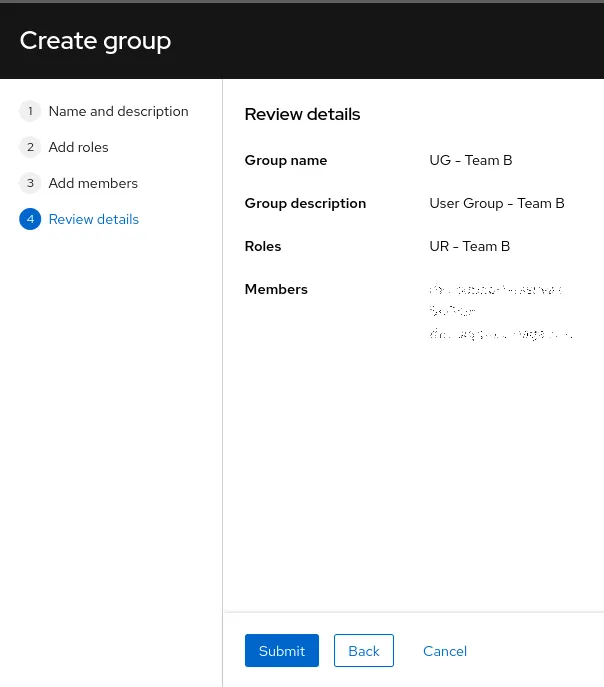
Click on the Submit button to complete the creation of the user group
Override the Default access user group
By default, all users inherit permissions to the entire inventory via the Inventory Hosts Administrator role granted via the Default access user group.
At this point, we need to override the Default access user group to remove the Inventory Hosts Administrator role from all users. This change will have no effect on the Org Admin users as they inherit Default admin access which includes Inventory Hosts Administrator role.
1. Click on the Groups section of User Access

2. Click on the Default access user group to bring its details
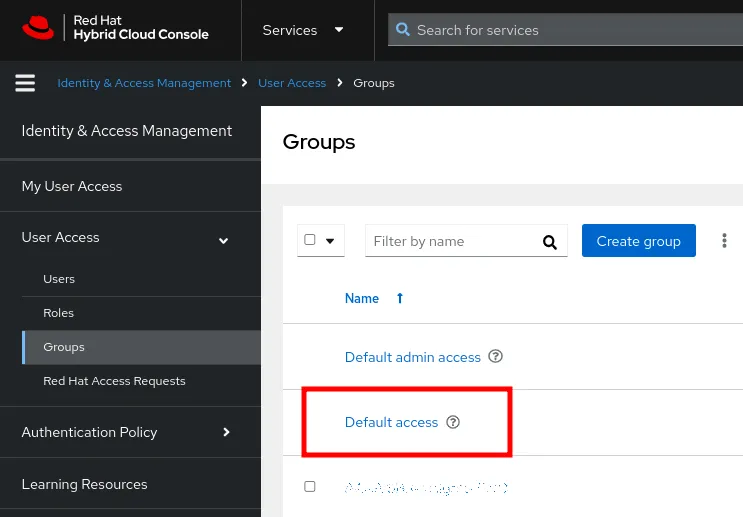
3. Remove the Inventory Hosts Administrator role from the group


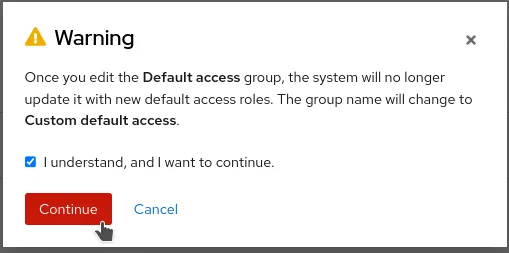
4. Editing the Default access group will automatically change its name to Custom default access.
- Click on Continue to complete the change
- Once all the changes are completed, the users of Team B will only have access to their systems.
- Because we removed the inventory permissions granted to everyone via the Default access user group, users who are not part of Team B will not be able to see any systems.
- Org Admin users will maintain the access to all systems.
Conclusion
With Inventory groups, you will be able to quickly and efficiently organize your inventory of systems into different groups. The defined groups can be used as filters in the inventory itself, and in all other applications providing a list of systems. Going further, Inventory groups can be used to allow and restrict access to specific users. This is achieved using Role Based Access Control (RBAC) and associating Inventory groups to permissions for a given Role.
Learn more
- Get an overview: Episode 10 of the Modernizing RHEL Management livestream series focuses on inventory groups.
- Watch a demo: Red Hat Insights Inventory Groups feature to group systems and use with Role Based Access Control (RBAC) is described in this walk-through video.
- Read the product documentation: For more details, additional scenarios, and limitations, check out the docs.
저자 소개
Christian Marineau is a Senior Product Manager for Red Hat Insights. He joined Red Hat in 2016 with a professional background of 12 years in system administration and DevOps for complex environments. He is currently focusing on the Red Hat Insights Remediation service and client tools for Red Hat Enterprise Linux. In his spare time, he enjoys the company of dogs, playing hockey and skiing.
채널별 검색
오토메이션
기술, 팀, 인프라를 위한 IT 자동화 최신 동향
인공지능
고객이 어디서나 AI 워크로드를 실행할 수 있도록 지원하는 플랫폼 업데이트
오픈 하이브리드 클라우드
하이브리드 클라우드로 더욱 유연한 미래를 구축하는 방법을 알아보세요
보안
환경과 기술 전반에 걸쳐 리스크를 감소하는 방법에 대한 최신 정보
엣지 컴퓨팅
엣지에서의 운영을 단순화하는 플랫폼 업데이트
인프라
세계적으로 인정받은 기업용 Linux 플랫폼에 대한 최신 정보
애플리케이션
복잡한 애플리케이션에 대한 솔루션 더 보기
가상화
온프레미스와 클라우드 환경에서 워크로드를 유연하게 운영하기 위한 엔터프라이즈 가상화의 미래
