
I remember when I carried around a set of DVDs with different operating system disks. Eventually, that became a stack of flash drives with the installers. Nowadays, I don't need to worry about that as much because I utilize the Red Hat Enterprise Linux (RHEL) image builder tool to manage my operating system lifecycle.
You've heard us talk a lot about the future of RHEL and the installation experience. Overhauling your server lifecycle process may as well start at the very beginning with image creation. Image builder supports multiple formats and destinations.
So, how do you decide which tool to use? What formats should you keep updated? Let's break it down step-by-step:
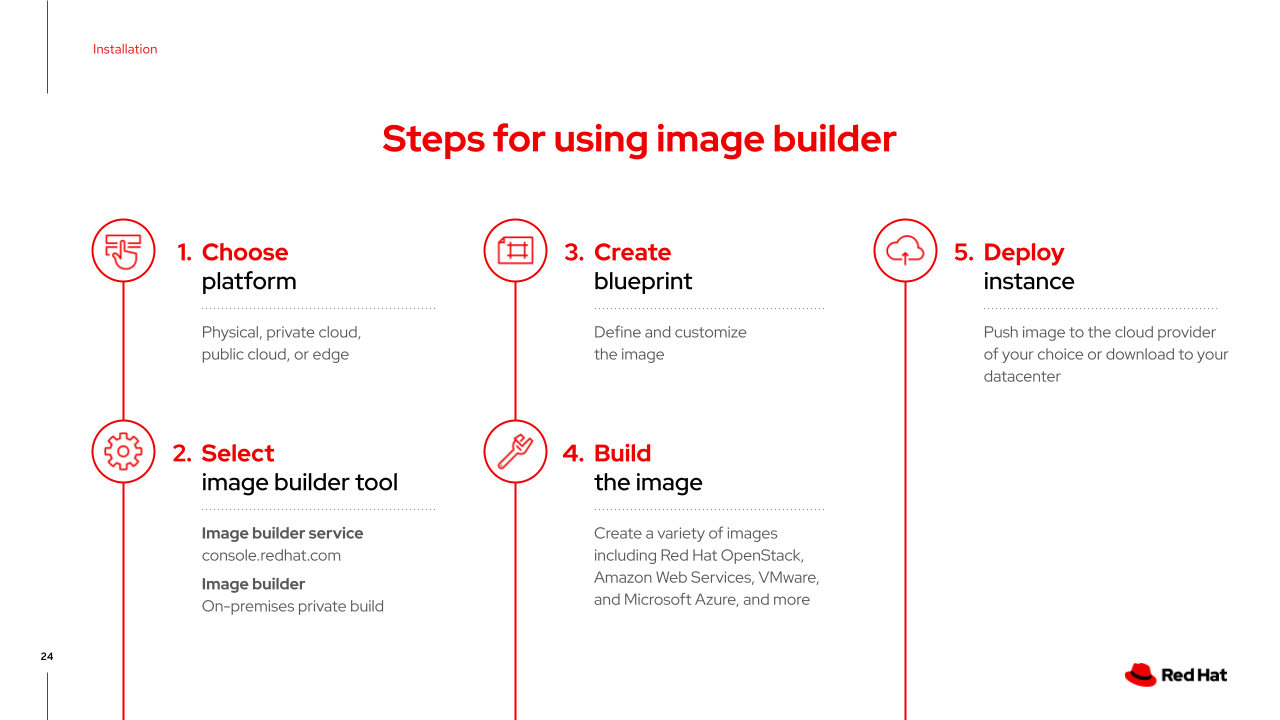
1) Choose a platform
Before you start deciding what packages to install or how many gigabytes to make your /tmp partition, you need to ask yourself a few questions.
The main question is: Where will this workload be run? Physical, public or private cloud, or edge?
- Is this for a data warehouse running on a storage-dense physical server?
- Is this an IoT collection point on a light pole somewhere?
- Is this a Word Press site with minimal resource requirements running on AWS?
The answer to these questions will help you through the first step. Which platform will my workload run on? From here, you can correctly provision users' accounts for the cloud or bare metal servers.
2) Select your image builder tool
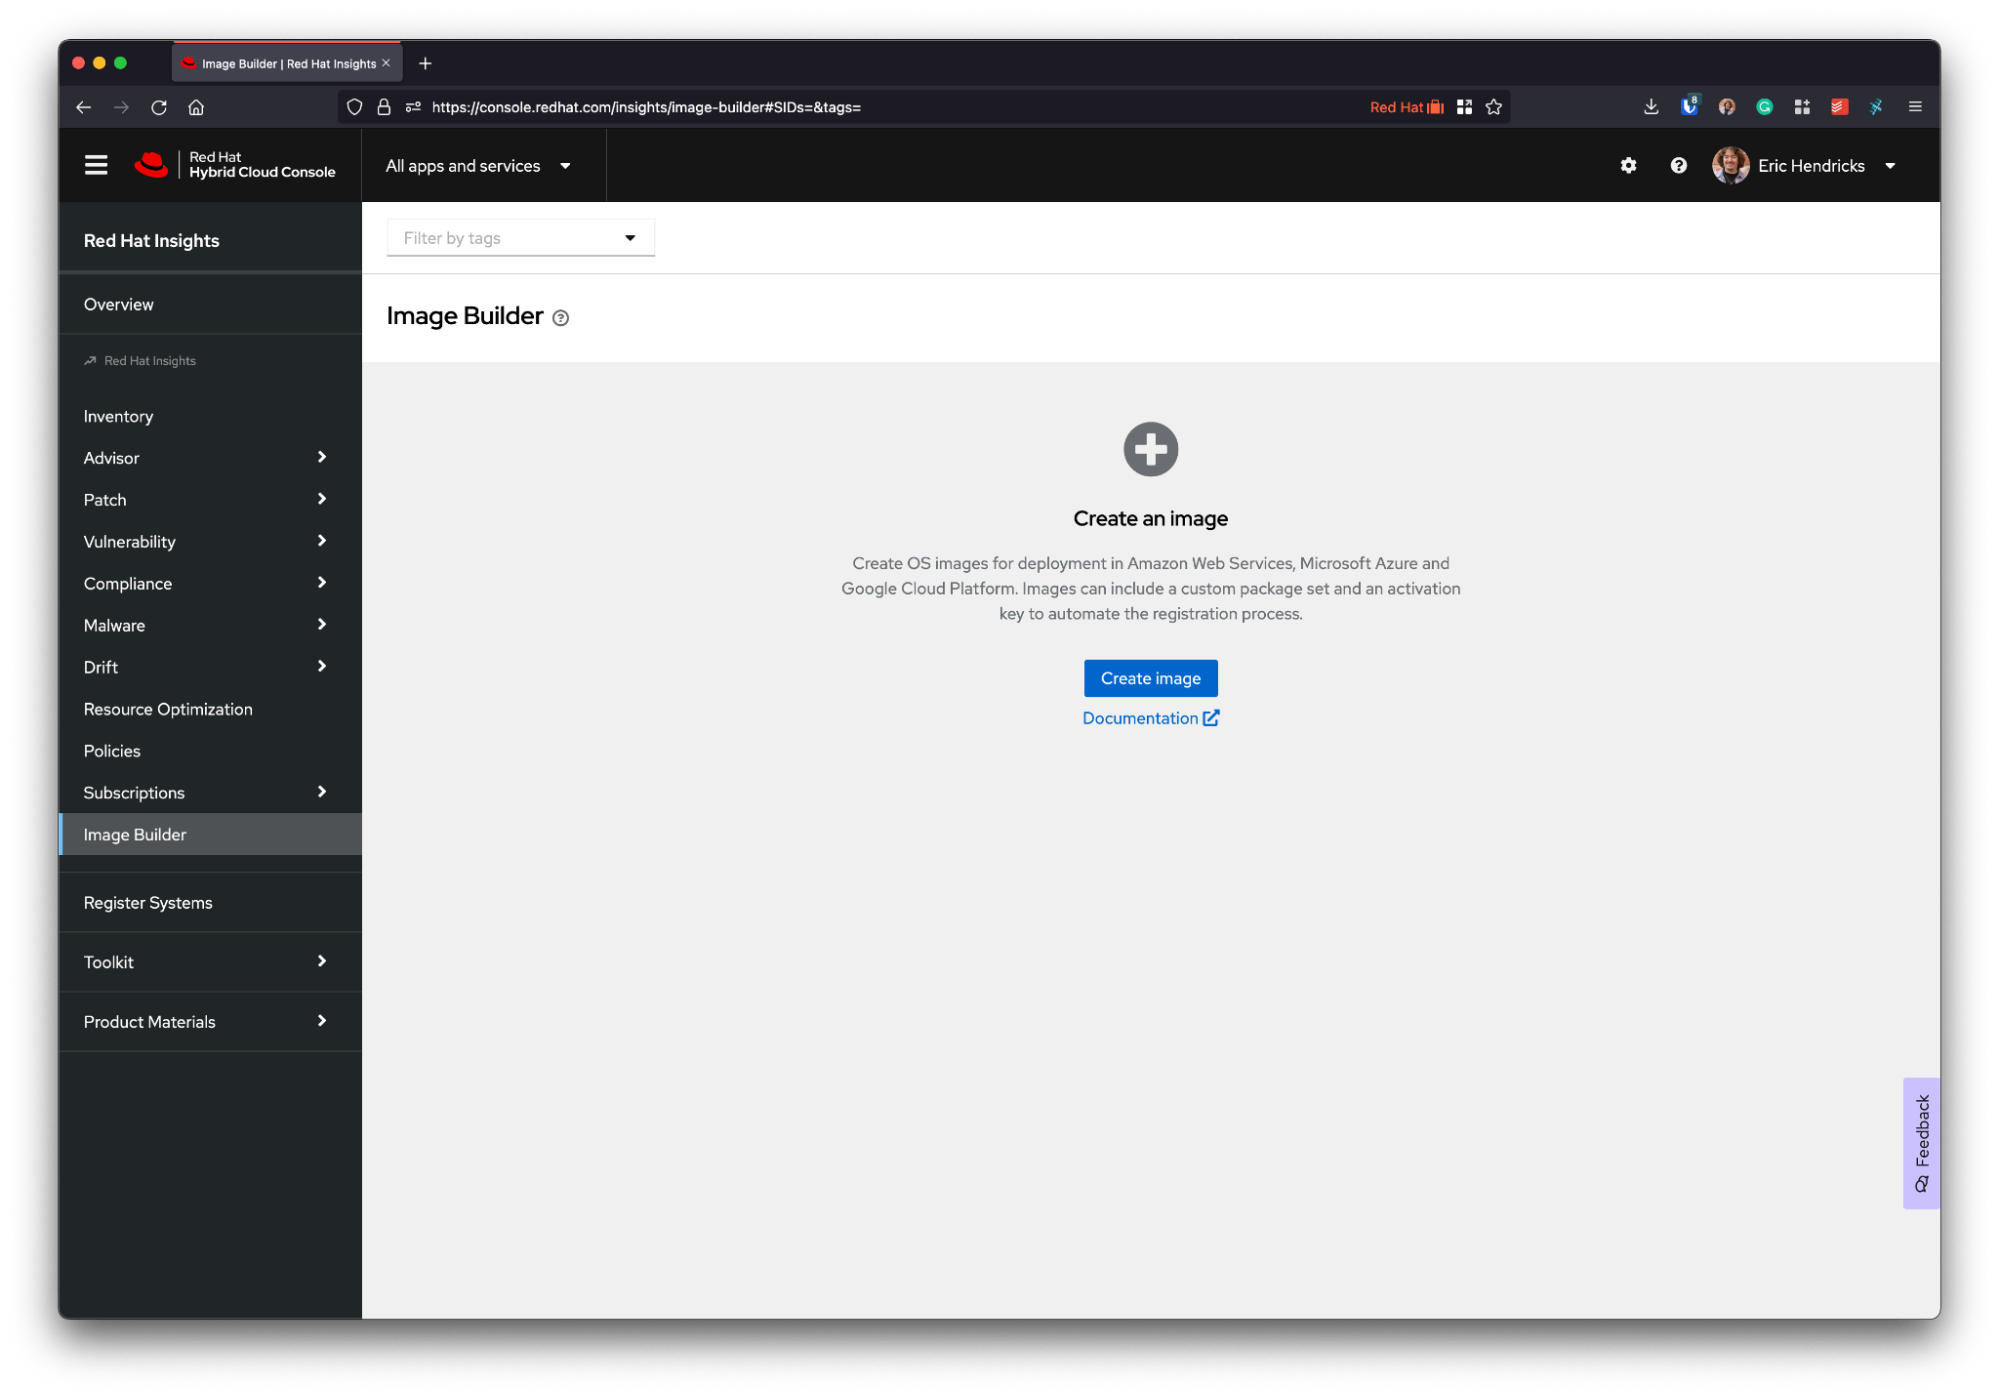
Now that you know what your workload is and what the platform will be, you can choose which of the two tools to use:
- Image builder service (https://console.redhat.com/insights/image-builder)
- On-premise, private build
Technically, there are three tools: the service, the private web UI and the private command line tool. How do you decide?
If you plan on a public, multicloud deployment, it will make sense to take advantage of the service. However, if you are 100% on-premises, why not use the on-prem tool?
One caveat: The service tends to get new features faster because the on-premise tools are only updated during minor RHEL releases (every six months).
3) Create a blueprint
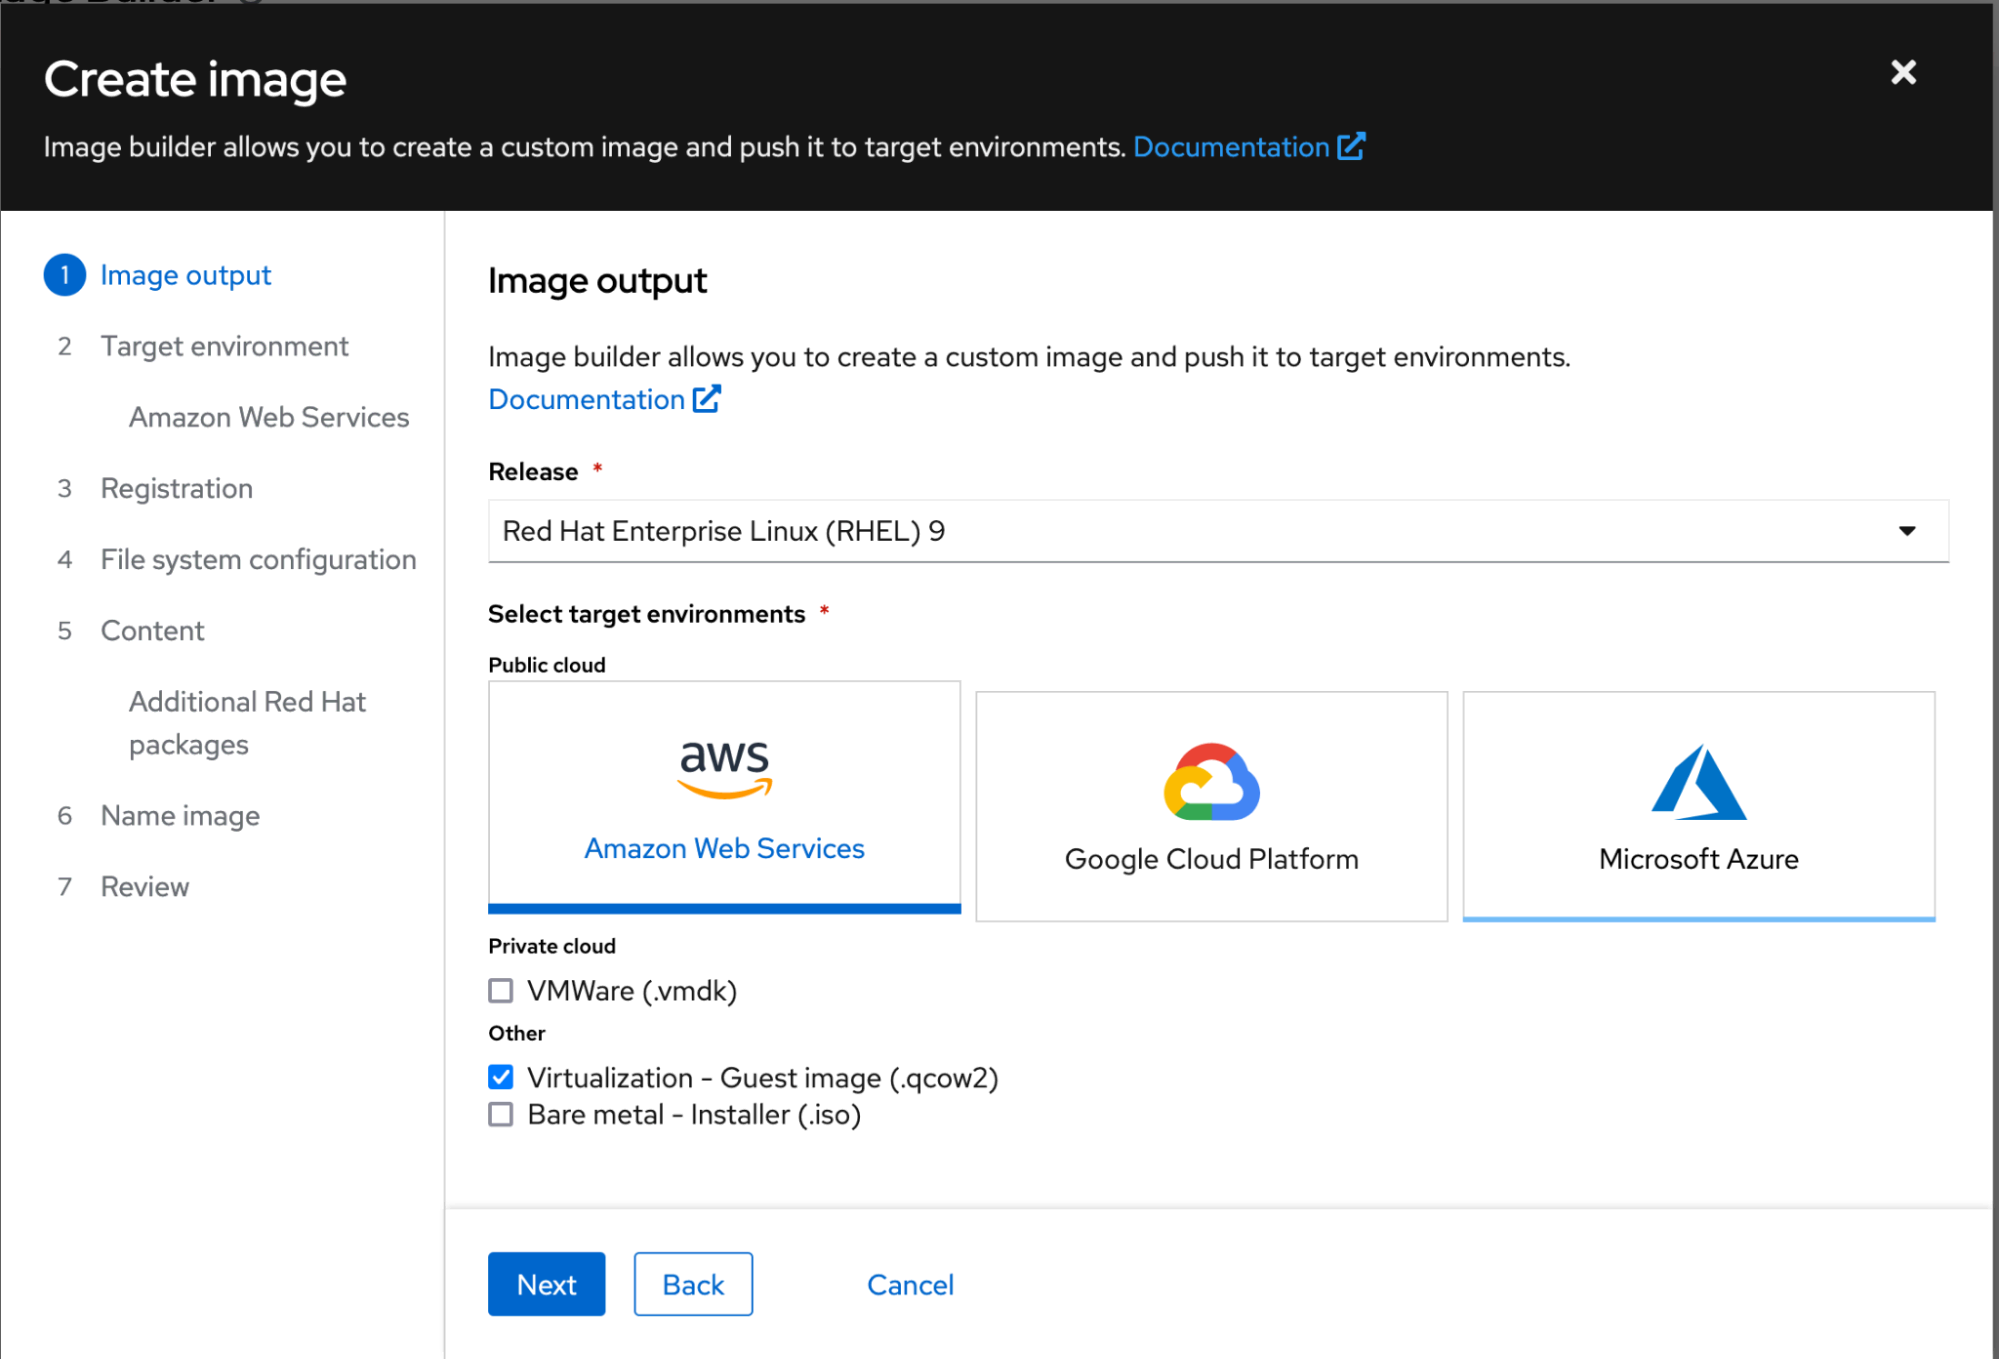
Now that you know the what and the where, it is time to start building a blueprint. This process varies considerably based on your needs. Here is the basic rundown:
First, choose your destination(s).
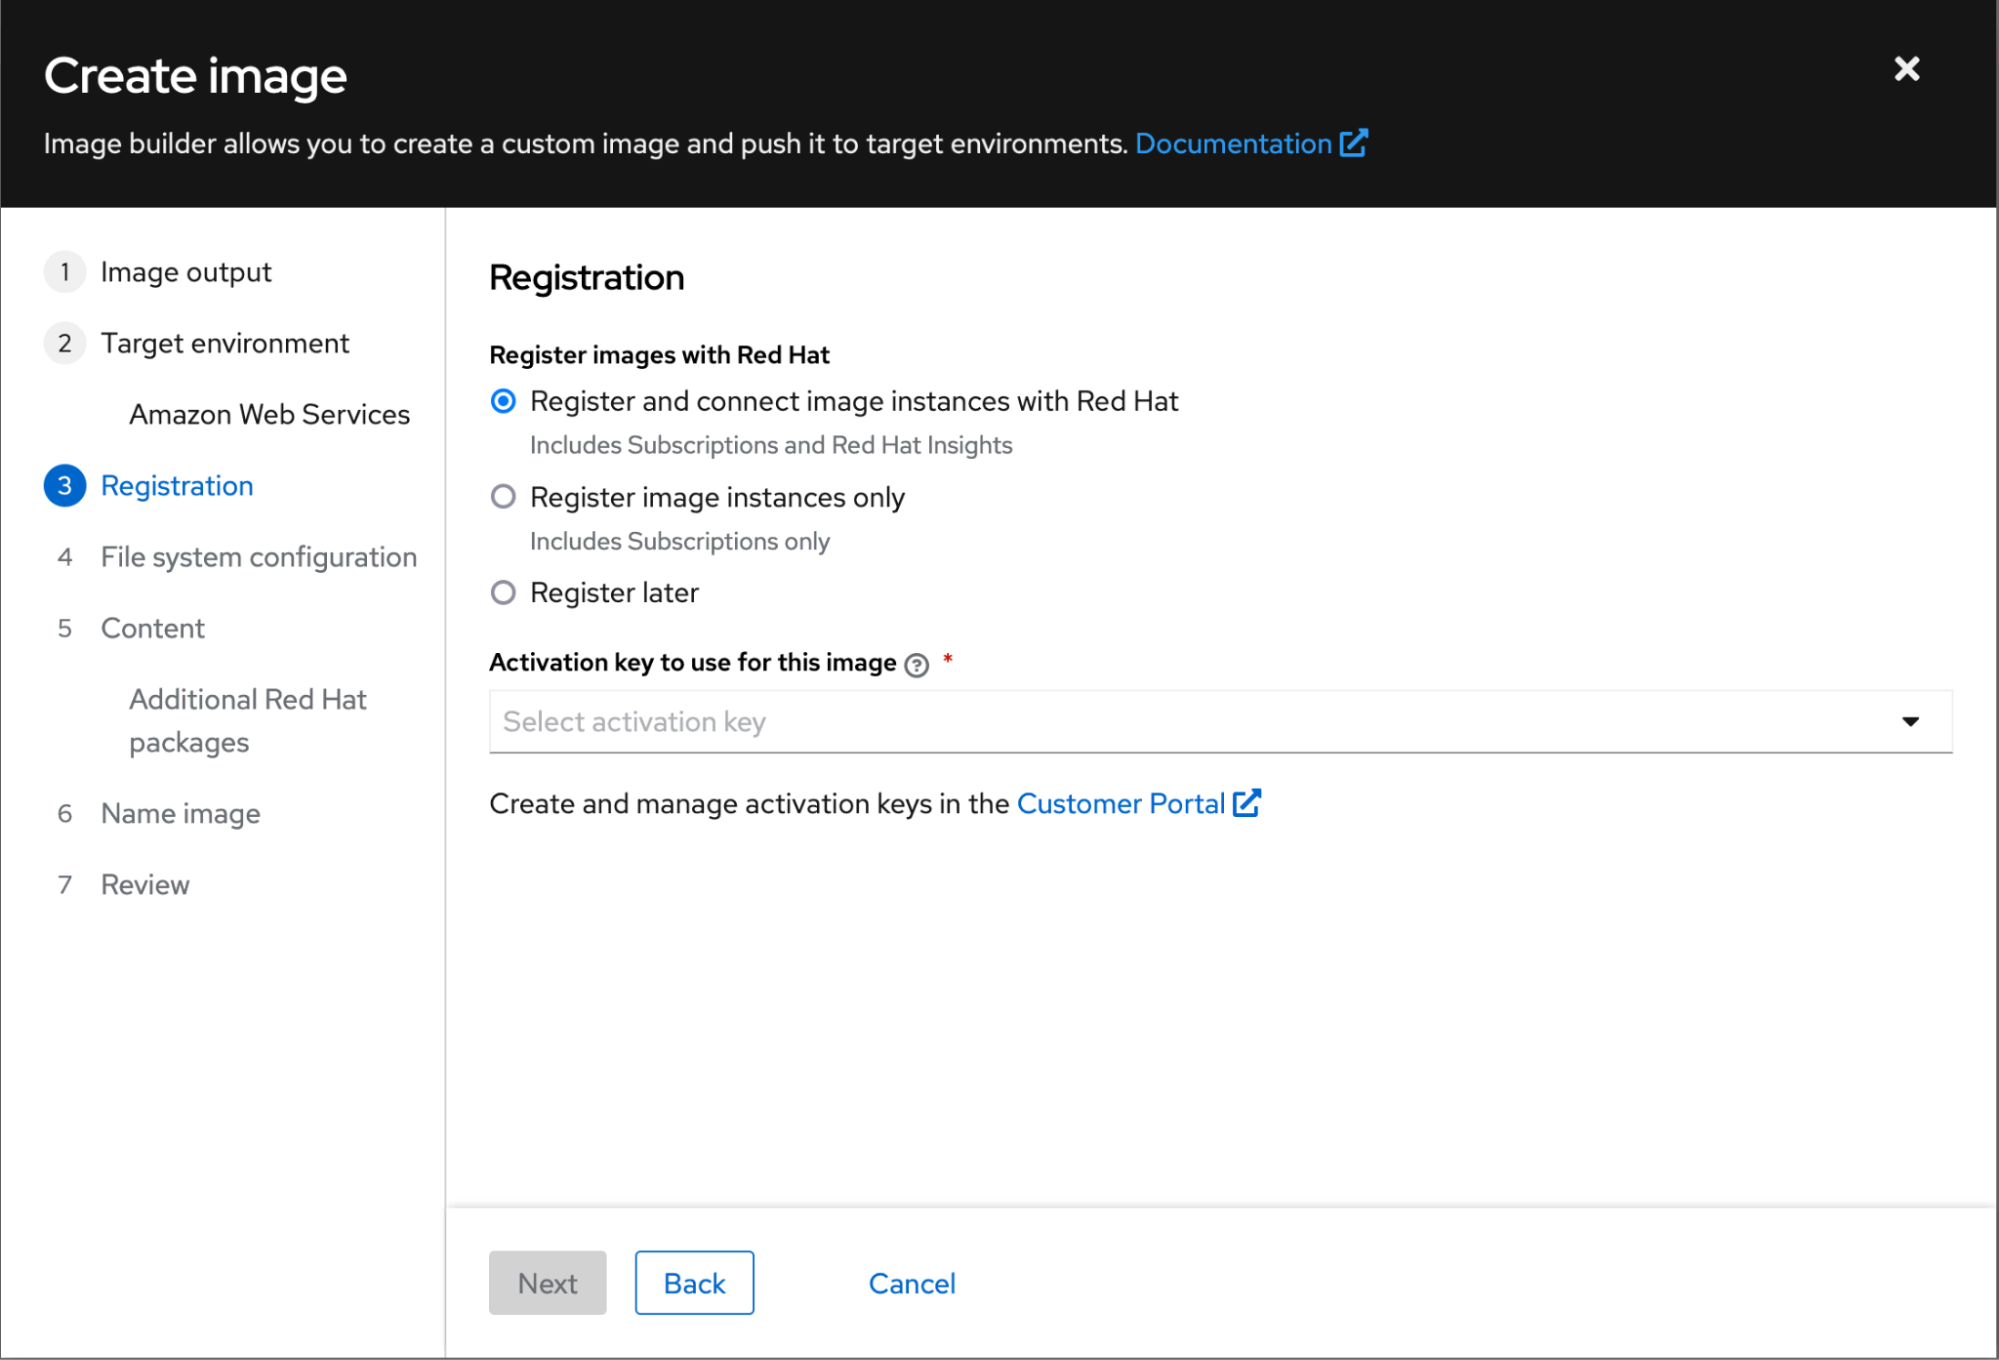
Second, configure your system registration and enable Red Hat Insights.
Next, define your file system layout.
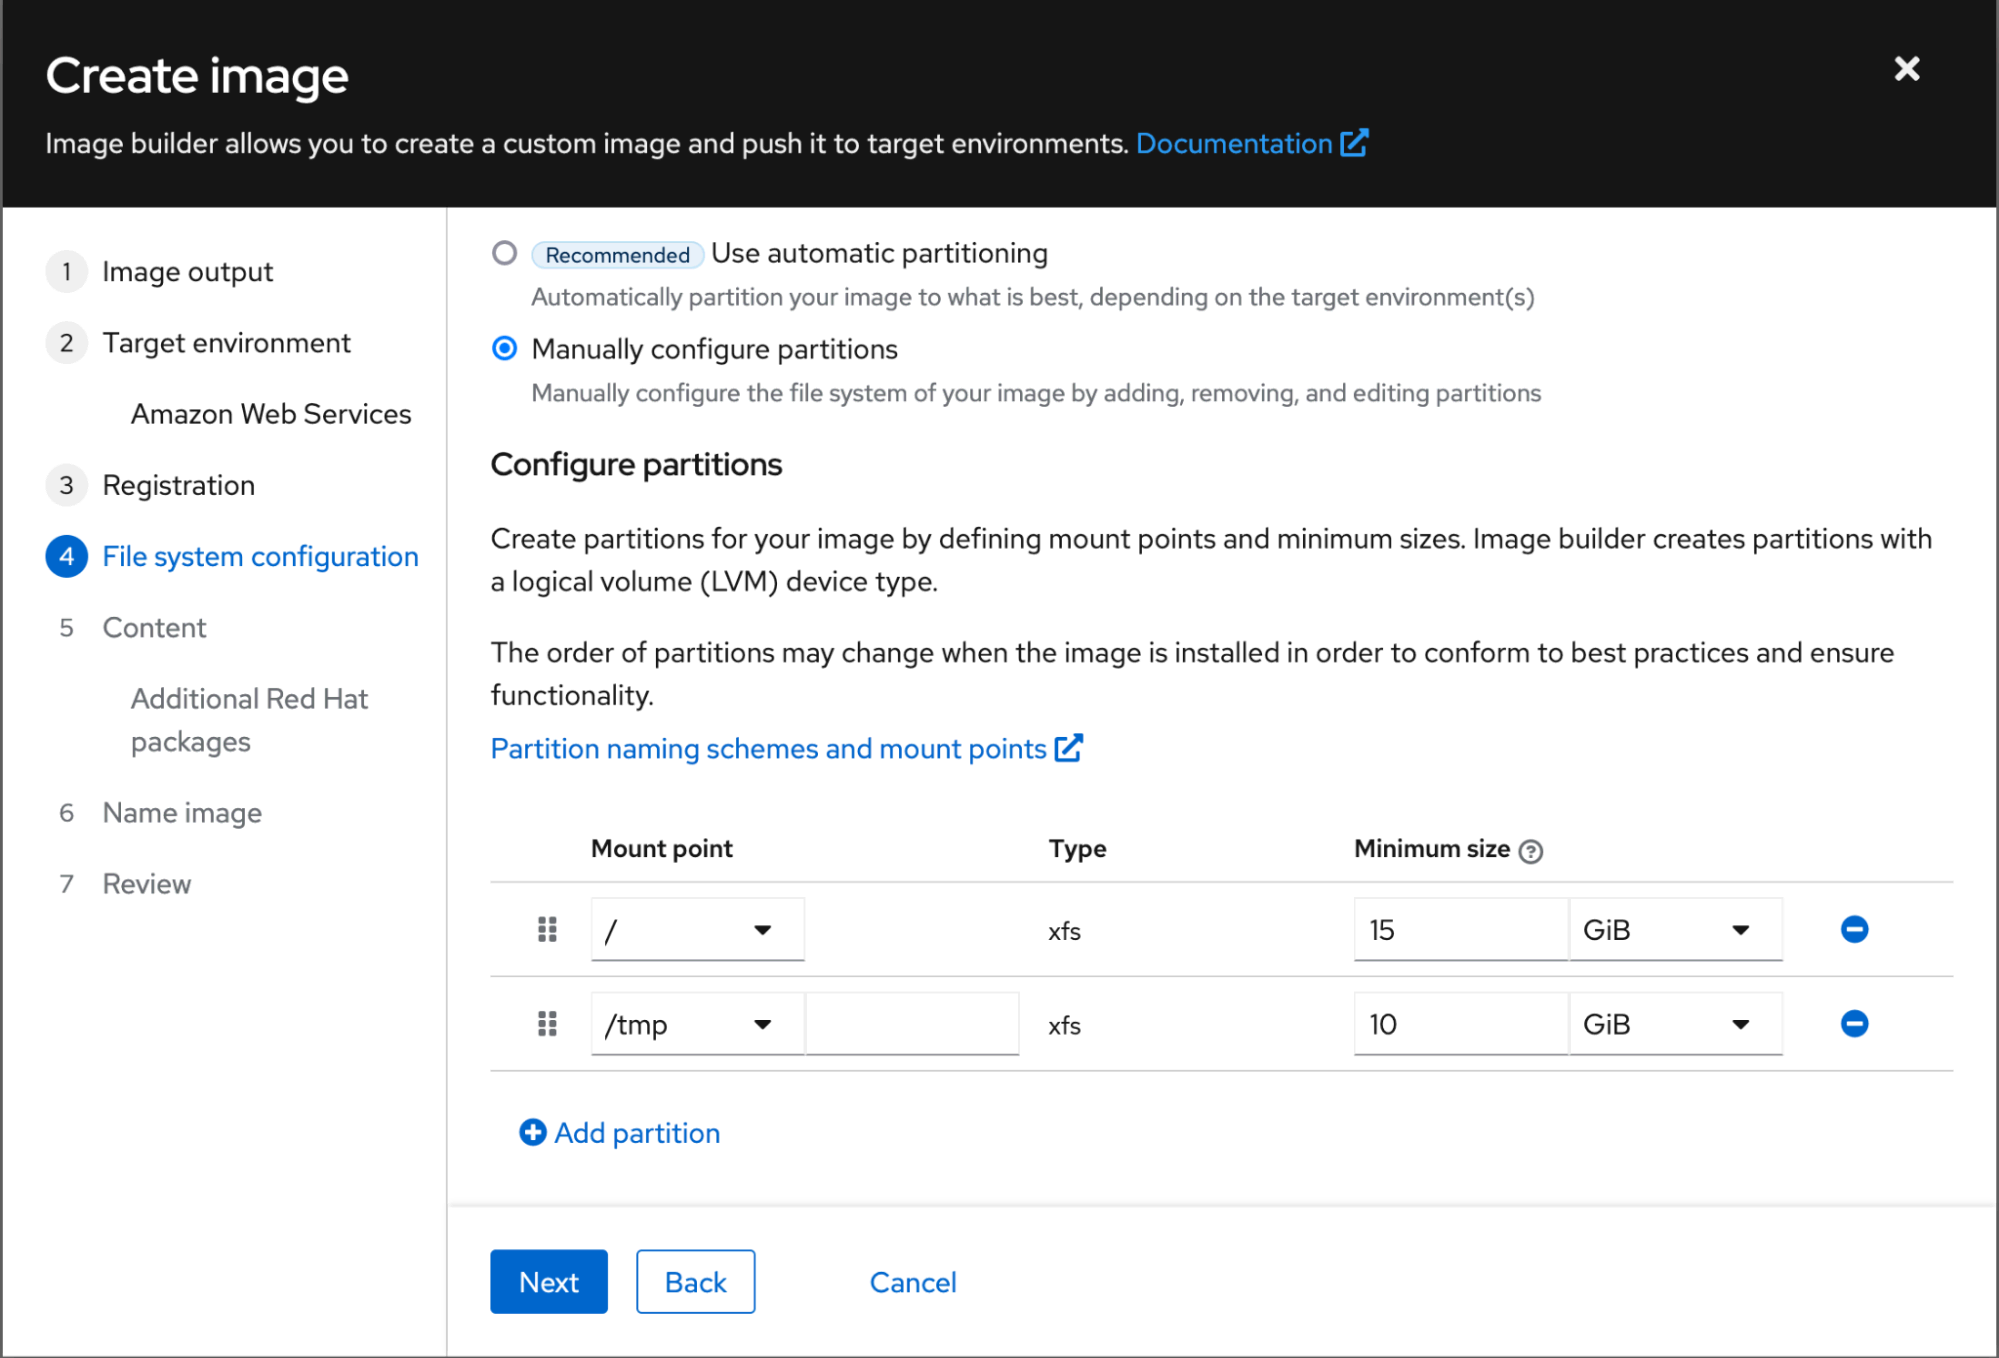
Then, select some packages.

Finally, give your template a name, and you’ll be ready to start building.

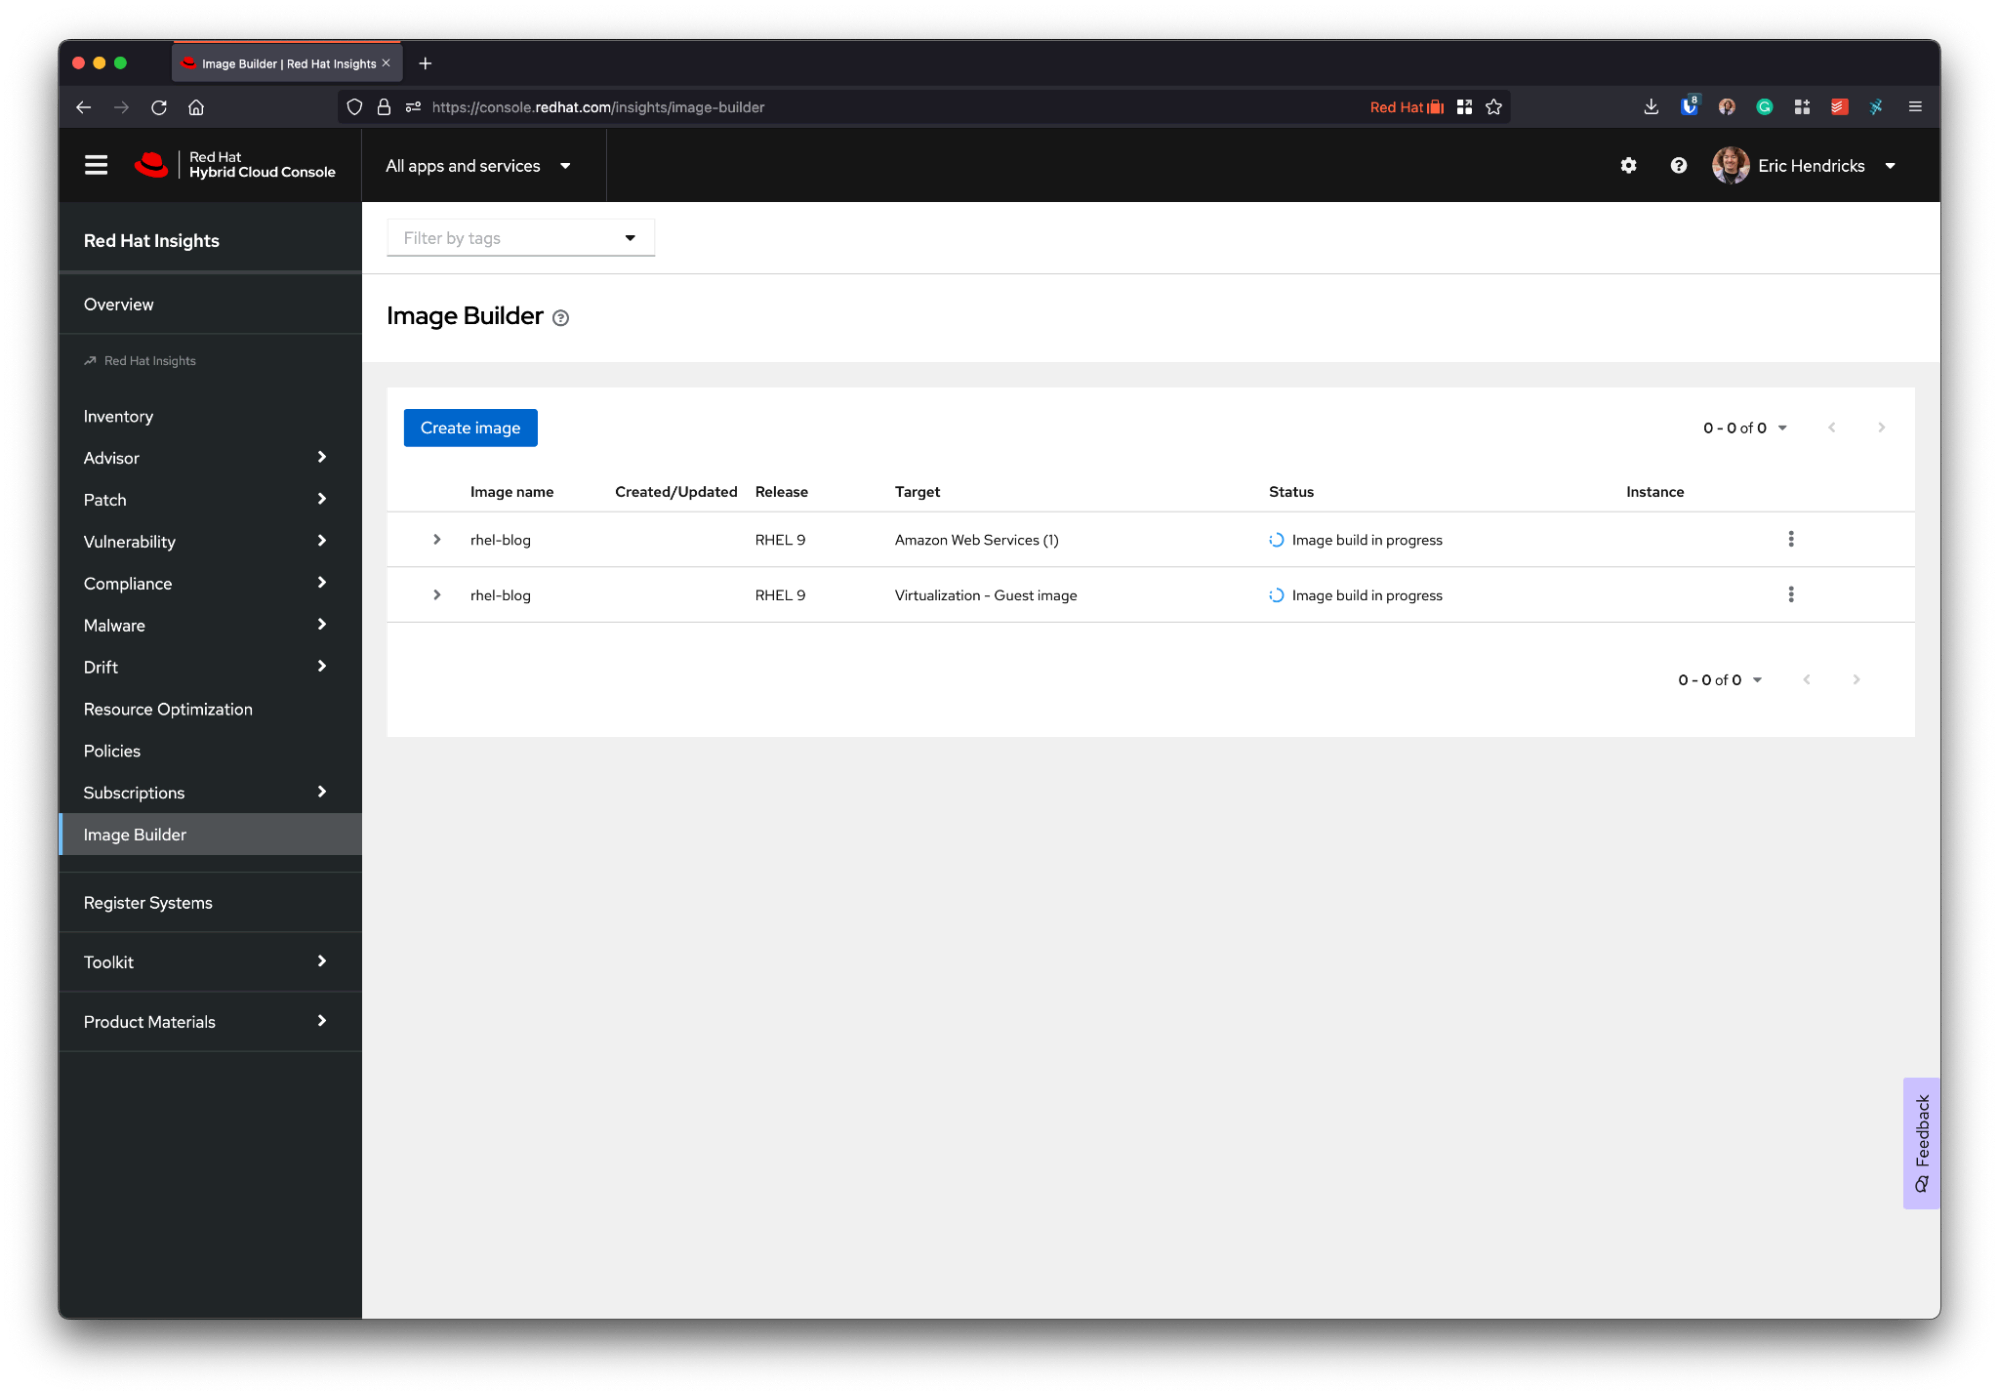
4) Build your image
Now that you have a blueprint defined, you can create images across various platforms. The best part is that these images will be virtually identical!
Image builder supports a variety of image types from cloud templates (for instance, AMIs on Amazon) to private clouds (like VMDKs for VMware), and Linux-specific formats (IE qcow2 or ISO installer).
You can schedule multiple formats to be built in parallel, ensuring that all your golden images are identical.
5) Deploy your instance
You've got the blueprints and the destination—now it's time to deploy. This could mean uploading the vmdk file to your ESX host, the qcow2 file to a Linux file server for deployment as virtual machines, or copying over a GCP image into your organization on Google's cloud.
These templates can be used as one-offs or as the basis for thousands of identical servers!
Extra credit
Imagine taking this process to the next level: Automate the builds. The image builder service has an API that you could make scripted, scheduled calls on a daily, monthly or quarterly basis—whatever meets your needs. Like any other sysadmin tool, the command line can easily be scripted via cron or run regularly by an operations team.
Automating image builder tasks ensures that not only are your images identical across multiple platforms, but it also makes sure that they receive the latest updates and don't end up stale.
Wrap up
Following these five steps, you can tackle one of the most frustrating projects a systems administrator deals with: defining and maintaining images across disparate and disconnected environments.
Stay tuned for more content around golden images right here on the Red Hat Enterprise Linux blog. Interested in digging deeper? Check out the Enable SysAdmin blog for hands-on tutorials!
Über den Autor
Ähnliche Einträge
KI-Bedrohungen abwehren: Agile Security für Unternehmen
Der KI-Wendepunkt: Warum Souveränität nicht optional ist
Container Roundup | Compiler
Untangling Networks | Compiler
Nach Thema durchsuchen

Automatisierung
Das Neueste zum Thema IT-Automatisierung für Technologien, Teams und Umgebungen

Künstliche Intelligenz
Erfahren Sie das Neueste von den Plattformen, die es Kunden ermöglichen, KI-Workloads beliebig auszuführen

Open Hybrid Cloud
Erfahren Sie, wie wir eine flexiblere Zukunft mit Hybrid Clouds schaffen.

Sicherheit
Erfahren Sie, wie wir Risiken in verschiedenen Umgebungen und Technologien reduzieren

Edge Computing
Erfahren Sie das Neueste von den Plattformen, die die Operations am Edge vereinfachen

Infrastruktur
Erfahren Sie das Neueste von der weltweit führenden Linux-Plattform für Unternehmen

Anwendungen
Entdecken Sie unsere Lösungen für komplexe Herausforderungen bei Anwendungen
Virtualisierung
Erfahren Sie das Neueste über die Virtualisierung von Workloads in Cloud- oder On-Premise-Umgebungen