
Creating a Windows image and making it ready for OpenShift Virtualization requires installing and configuring several services and drivers.. This should be repeated each time you have a new update from Microsoft or Red Hat, which may become error-prone and time consuming.
Lucky, there is a better way. Windows has a feature called unattended installation - similar to a kickstart file for RHEL - that is used as an answer file to the entire installation wizard. You could also add drivers and post scripts to complete the installation.
Windows Unattended XML
There is a windows tool called “Windows System Image Manager” (WSIM) that helps build the Unattended installation. You can find more information on how to use it in Microsoft’s documentation: (https://docs.microsoft.com/en-us/windows-hardware/customize/desktop/wsim/windows-system-image-manager-overview-topics )
Note: Windows Unattended installation may vary between different versions of Windows such as Windows Server 2019 , Windows Server Core 2019 etc. If you are supporting multiple Windows versions, we recommend creating a version of the Unattended XML for each version.
Post Installation Script
After installing the operating system, we need to add a few more services to support the Openshift Virtualization platform. During the Unattended installation we will add auto-login for the Administrator and a Powershell script for the first time logon.
In the post installation script, we will install the Qemu Guest Agent and some additional Drivers, you can also add your own Service / application if needed.
At the end of the script we are disabling the Auto-Login feature and running sysprep with the shutdown option to complete the installation.
Running the Installation
Prerequisites
- Red Hat Enterprise Linux
Download the Windows image
In this guide we are using Microsoft Windows 2019 evaluation Server image which can be downloaded from the Microsoft website
https://www.microsoft.com/en-US/evalcenter/evaluate-windows-server-2019?filetype=ISO
-
Get an answer file and a post-installation script
Using the unattended installation XML and post script to complete the installation, drivers and Services.
Install required packages
In some cases you would like to see the installation running, for that you will need to install the ”virt-viewer” package.
For a CI pipeline the UI is not needed.
|
yum install -y libvirt virt-install virtio-win systemctl start libvirtd # for console access yum install -y virt-viewer |
Prepare Windows Image
In order to run the installation we need to add the unattended file and the postscript to the windows image.
Mount windows ISO
|
sudo mkdir -p /mnt/windows /mnt/windows2019-unattended sudo mount WindowsServer2019_en-us.iso /mnt/windows |
Copy ISO and files to a temp directory
|
sudo cp -rp /mnt/windows/* /mnt/windows2019-unattended sudo cp autounattend.xml /mnt/windows2019-unattended sudo cp post-install.ps1 /mnt/windows2019-unattended |
Create a new bootable ISO from the temp directory
|
genisoimage -allow-limited-size -no-emul-boot \ -b boot/etfsboot.com -boot-load-seg 0x07C0 \ -boot-load-size 8 -lJR -o ~/windows2019-unattended.iso \ /mnt/windows2019-unattended |
Run the Installation process
First, we need to create a disk image file
|
qemu-img create -f qcow2 windows2019.qcow2 12G |
Don't forget to add the “qemu” user permission to the working directory
|
sudo setfacl -m u:qemu:rx $(pwd) |
Next, we will run the installation script
|
NAME=windows2019 VIRTIO_ISO=/usr/share/virtio-win/virtio-win.iso IMAGE_PATH=~/windows2019-unattended.iso
virt-install --connect qemu:///system \ --name $NAME --ram 2048 --vcpus 2 \ --network model=virtio \ --disk path=$NAME.qcow2,format=qcow2,device=disk,bus=virtio \ --cdrom $IMAGE_PATH \ --disk path=$VIRTIO_ISO,device=cdrom \ --vnc --os-type windows --os-variant win2k19 |
If you’re running as a non-root user you should add the user to the libvirt group
|
sudo usermod --append --groups libvirt “username” |
Depending on the host, the installation will take about 5 - 20 minutes and the command will exit.
If you are running in a CI pipeline / remote server you can remove the “--connect qemu:///system” option from the command line
Finally we have a disk Image ready to be uploaded to the OpenShift Virtualization. First we will switch to the “openshift-virtualization-os-images” project and then push the image with the “virtctl” command.
|
virtctl image-upload pvc win2k19 \ --image-path=windows2019.qcow2 --size=13Gi \ --namespace openshift-virtualization-os-images |
In this command, we are using the “win2k19” as the image name. This name is taken from the image templates mentioned in https://github.com/kubevirt/common-templates.
If you’re running the cluster with self-sign certificate / untrusted certificate you should add the “--insecure” option to ignore the certificate verification.
To use the newly added image just create a new VM from wizard and select the windows2019 image. This will correlate to the image name with used “win2k19”
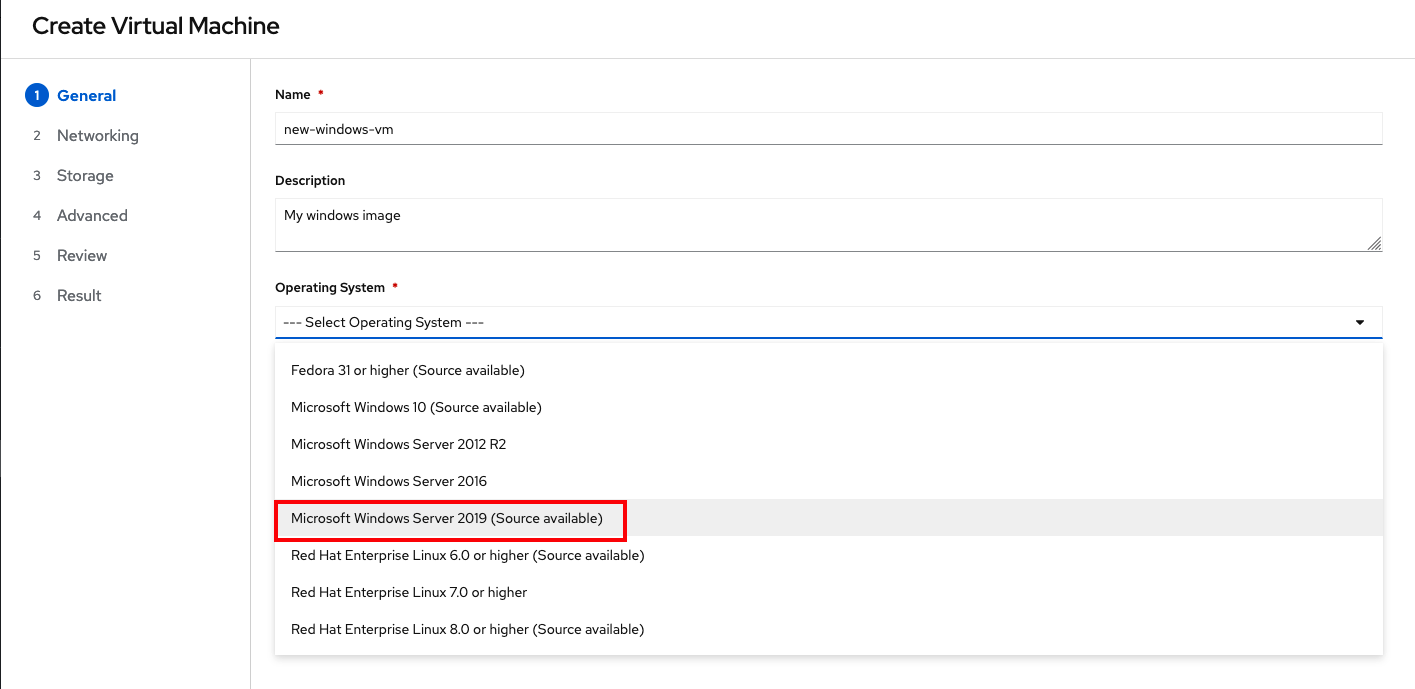
That’s it! We have a Windows Server 2019 image ready to be used. You can also add your own custom script and installation to the “post-install.ps1” if you want to install Anti-virus or some other application.
About the author
More like this
How Red Hat OpenShift 4.22 impacts enterprise AI’s bottom line
Can't patch fast enough? Zero trust as a last line of defense
Get into GitOps | Technically Speaking
Air-gapped Networks | Compiler
Browse by channel

Automation
The latest on IT automation for tech, teams, and environments

Artificial intelligence
Updates on the platforms that free customers to run AI workloads anywhere

Open hybrid cloud
Explore how we build a more flexible future with hybrid cloud

Security
The latest on how we reduce risks across environments and technologies

Edge computing
Updates on the platforms that simplify operations at the edge

Infrastructure
The latest on the world’s leading enterprise Linux platform

Applications
Inside our solutions to the toughest application challenges
Virtualization
The future of enterprise virtualization for your workloads on-premise or across clouds