
In our previous posts, we’ve explored the Red Hat container ecosystem, the Red Hat Container Development Kit (CDK), OpenShift as a local deployment and OpenShift in production. In this final post of the series, we’re going to take a look at how a team can take advantage of the advanced features of OpenShift in order to automatically move new versions of applications from development to production -- a process known as Continuous Delivery (or Continuous Deployment, depending on the level of automation).
OpenShift supports
different setups depending on organizational requirements. Some organizations may run a completely separate cluster for each environment (e.g. dev, staging, production) and others may use a single cluster for several environments. If you run a separate OpenShift PaaS for each environment, they will each have their own dedicated and isolated resources, which is costly but ensures isolation (a problem with the development cluster cannot affect production). However, multiple environments can safely run on one OpenShift cluster through the platform’s support for resource isolation, which allows nodes to be dedicated to specific environments. This means you will have one OpenShift cluster with common masters for all environments, but dedicated nodes assigned to specific environments. This allows for scenarios such as only allowing production projects to run on the more powerful / expensive nodes.
OpenShift integrates well with existing Continuous Integration / Continuous Delivery tools. Jenkins, for example, is available for use inside the platform and can be easily added to any projects you’re planning to deploy. For this demo however, we will stick to out-of-the-box OpenShift features, to show workflows can be constructed out of the OpenShift fundamentals.
A Continuous Delivery Pipeline with CDK and OpenShift Enterprise
The workflow of our continuous delivery pipeline is illustrated below:
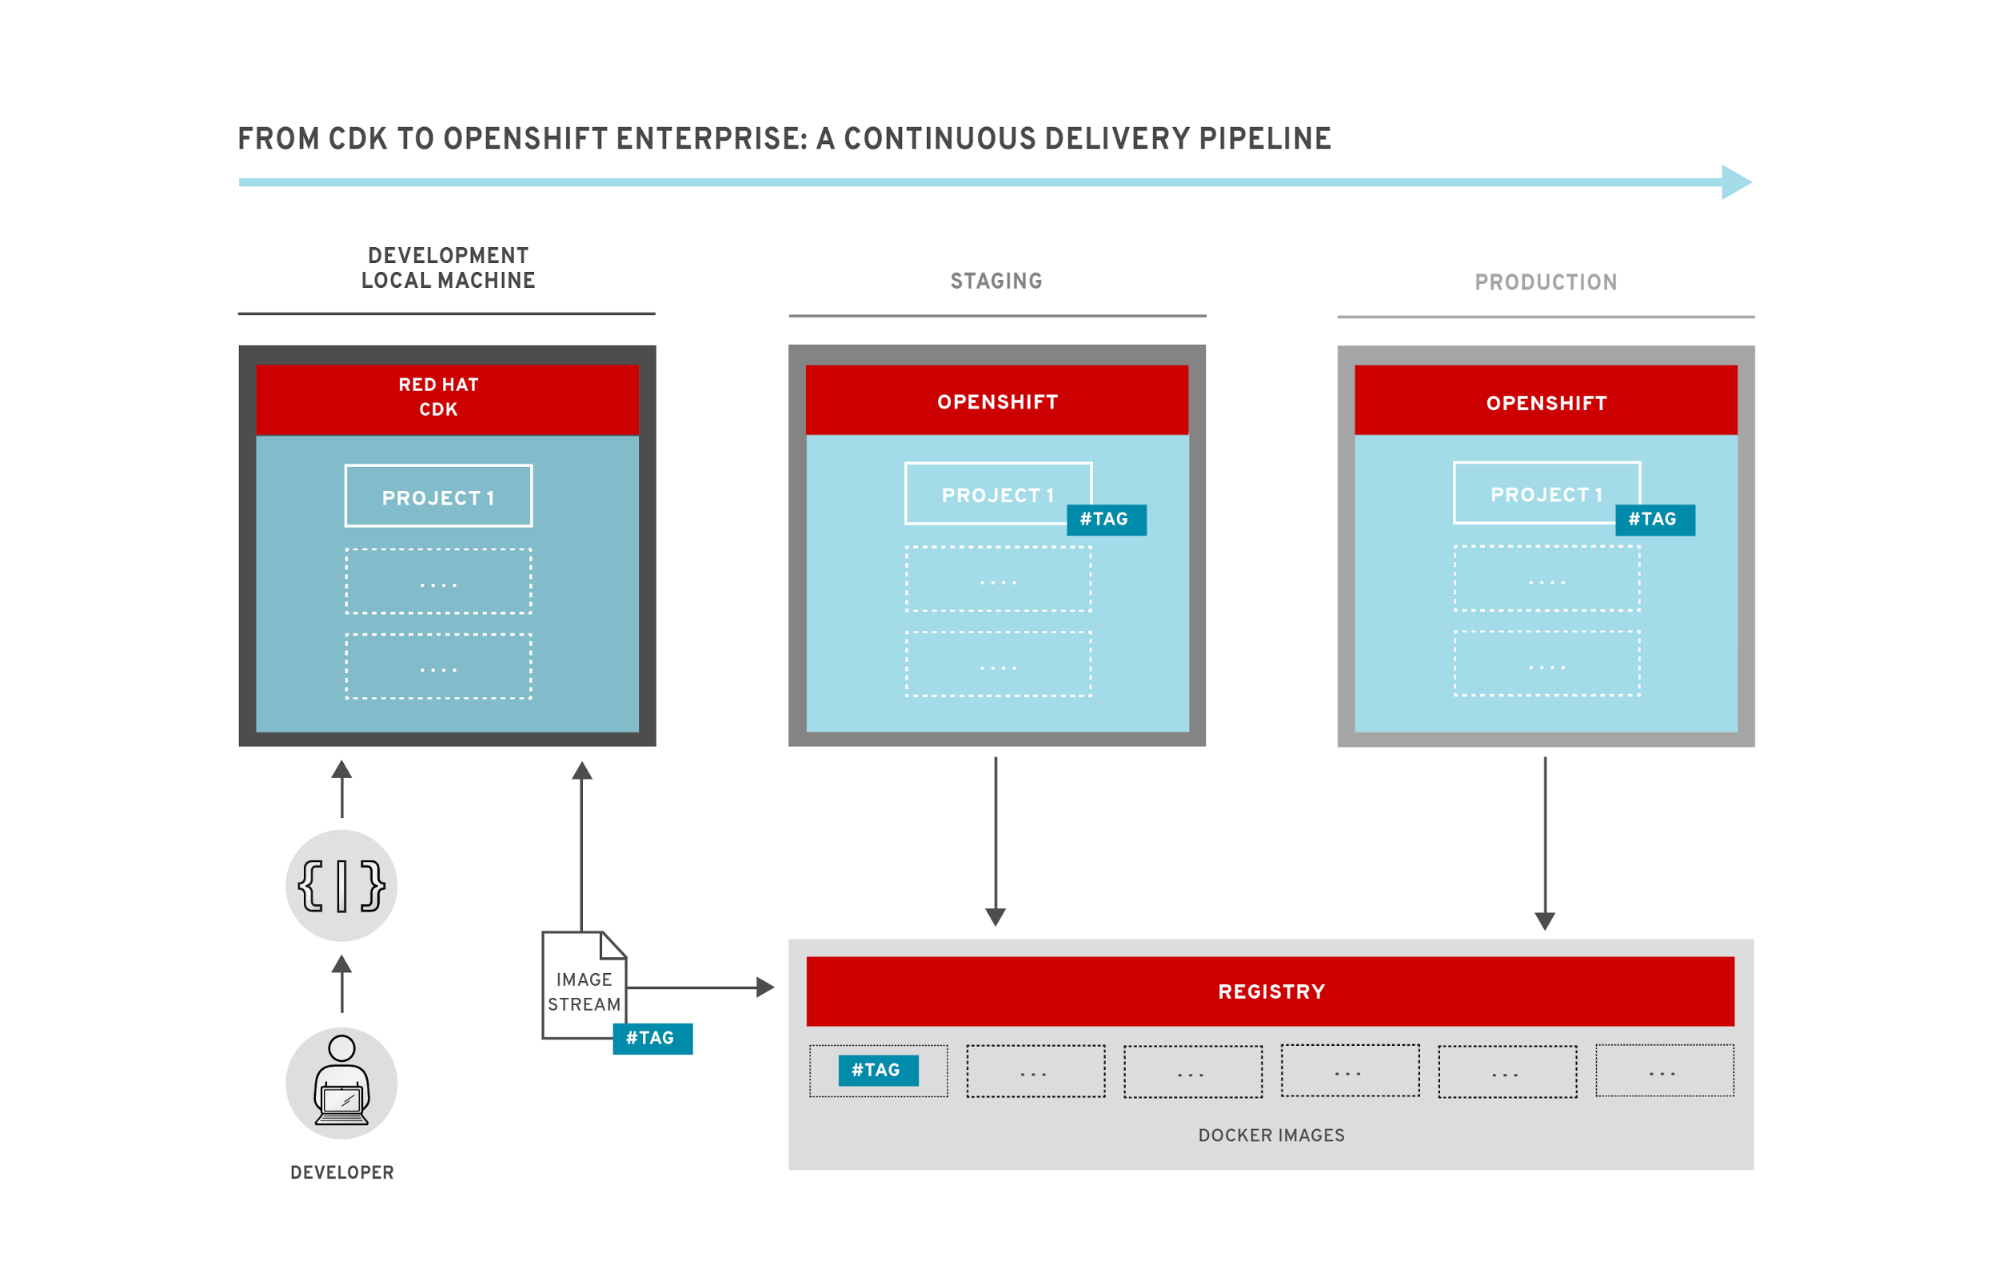
The diagram shows the developer on the left, who is working on the project in their own environment. In this case, the developer is using Red Hat's CDK running on their local-machine, but they could equally be using a development environment provisioned in a remote OpenShift cluster.
To move code between environments, we can take advantage of the image streams concept in OpenShift. An image stream is superficially similar to an image repository such as those found on Docker Hub - it is a collection of related images with identifying names or “tags”. An image stream can refer to images in Docker repositories (both local and remote) or other image streams. However, the killer feature is that OpenShift will generate notifications whenever an image stream changes, which we can easily configure projects to listen and react to. We can see this in the diagram above - when the developer is ready for their changes to be picked up by the next environment in line, they simply tag the image appropriately, which will generate an image stream notification that will be picked up by the staging environment. The staging environment will then automatically rebuild and redeploy any containers using this image (or images who have the changed image as a base layer). This can be fully automated by the use of Jenkins or a similar CI tool; on a check-in to the source control repository it can run a test-suite and automatically tag the image if it passes.
To move between staging and production we can do exactly the same thing - Jenkins or a similar tool could run a more thorough set of system tests and if they pass tag the image so the production environment picks up the changes and deploys the new versions. This would be true Continuous Deployment -- where a change made in dev will propagate automatically to production without any manual intervention. Many organizations may instead opt for Continuous Delivery -- where there is still a manual “ok” required before changes hit production. In OpenShift this can be easily done by requiring the images in staging to be tagged manually before they are deployed to production.
Deployment of an OpenShift Application
Now that we’ve reviewed the workflow, let’s look at a real example of pushing an application from development to production. We will use the simple Node.js application from a previous blogpost that connects to MongoDB for storage of persistent data. The application simply adds images to the screen wherever you click. The source code is available in this GitHub repository . The example assumes that both environments are hosted on the same OpenShift cluster, but it can be easily adapted to allow promotion to another OpenShift instance by using a common registry.
If you don’t already have a working OpenShift instance, you can quickly get started by using the CDK, which we also covered in an earlier blogpost. Start by logging in to OpenShift using your credentials:
$ oc login -u my_user_name
Now we’ll create two new projects. The first one represents the production environment (node-mongo-intro-production):
$ oc new-project node-mongo-intro-production
Now using project "node-mongo-intro-production" on server "https://localhost:8443".
And the second one will be our development environment (node-mongo-intro):
$ oc new-project node-mongo-intro
Now using project "node-mongo-intro" on server "https://localhost:8443".
After you run this command you should be in the context of the development project (node-mongo-intro). We’ll start by creating a MongoDB database using a built-in template from OpenShift:
$ oc new-app --template=mongodb-ephemeral
--> Deploying template mongodb-ephemeral in project openshift for "mongodb-ephemeral"
    With parameters:
     Memory limit=512Mi
     Database service name=mongodb
     MongoDB user=userT2X # generated
     MongoDB password=mPH45cWQs6nmSM72 # generated
     MongoDB database name=sampledb
     MongoDB admin password=U5oyeFA6ieYgfK6N # generated
--> Creating resources ...
    Service "mongodb" created
    DeploymentConfig "mongodb" created
--> Success
    Run 'oc status' to view your app.
And now the Node.js part. We will use the source code from our demo github repo and the s2i build strategy which will create a container for our source code (note this repository has no Dockerfile in the branch we use). We need to add environment variables which provide the MongoDB credentials that were output from the last command (note: the values will be different for you):
$ oc new-app https://github.com/ContainerSolutions/node-openshift-sample \
     -e MONGODB_USER=userT2X -e MONGODB_PASSWORD=mPH45cWQs6nmSM72 \
     -e MONGODB_DATABASE=sampledb
--> Found image 92eee82 (2 days old) in image stream "nodejs in project openshift" under tag :latest for "nodejs"
   * The source repository appears to match: nodejs
   * A source build using source code from https://github.com/ContainerSolutions/node-openshift-sample will be created
     * The resulting image will be pushed to image stream "node-openshift-sample:latest"
   * This image will be deployed in deployment config "node-openshift-sample"
   * Port 8080/tcp will be load balanced by service "node-openshift-sample"
--> Creating resources with label app=node-openshift-sample ...
   ImageStream "node-openshift-sample" created
   BuildConfig "node-openshift-sample" created
   DeploymentConfig "node-openshift-sample" created
   Service "node-openshift-sample" created
--> Success
   Build scheduled for "node-openshift-sample" - use the logs command to track its progress.
   Run 'oc status' to view your app.
As well as building the application, note that it has created an image stream called node-openshift-sample for us.
Now let’s expose a route for the Node.js application so we can access it. You will need to provide a different hostname if you’re not using the CDK or if your CDK has a different name:
$ oc expose service node-openshift-sample \
     --hostname=node-openshift-development.rhel-ose.vagrant.dev
Once the build has finished, you should have a Node.js application up and running (accessible at previous hostname) built from an image stream called node-openshift-sample.

We can get the name of the image created by the build with the help of the describe command:
$ oc describe imagestream node-openshift-sample
Name:            node-openshift-sample
Created:        10 minutes ago
Labels:            app=node-openshift-sample
Annotations:        openshift.io/generated-by=OpenShiftNewApp
            openshift.io/image.dockerRepositoryCheck=2016-03-03T16:43:16Z
Docker Pull Spec:    172.30.76.179:5000/node-mongo-intro/node-openshift-sample
Tag    Spec        Created        PullSpec                                                                Image
latest    <pushed>    7 minutes ago    172.30.76.179:5000/node-mongo-intro/node-openshift-sample@sha256:5f50e1ffbc5f4ff1c25b083e1698c156ca0da3ba207c619781efcfa5097995ec
So OpenShift has built the image node-mongo-intro/node-openshift-sample@sha256:5f50e1ffbc5f4ff1c25b083e1698c156ca0da3ba207c619781efcfa5097995ec, added it to the local repository at 172.30.76.179:5000 and tagged it as latest in the node-openshift-sample image stream.
Now we know the image ID, we can create a tag that marks it as ready for use in production (use the SHA of your image here, but remove the IP address of the registry):
$ oc tag node-mongo-intro/node-openshift-sample\
@sha256:5f50e1ffbc5f4ff1c25b083e1698c156ca0da3ba207c619781efcfa5097995ec \
   node-mongo-intro/node-openshift-sample:production
Tag node-openshift-sample:production set to node-mongo-intro/node-openshift-sample@sha256:5f50e1ffbc5f4ff1c25b083e1698c156ca0da3ba207c619781efcfa5097995ec.
We’ve intentionally used the unique SHA hash of the image rather than the tag latest to identify our image. This is because we want the production tag to be tied to this particular version. If we hadn’t done this, production would automatically track changes to latest, which would include untested code.
To allow the production project to pull the image from the development repository, we need to grant pull rights to the service account associated with production environment. Note that node-mongo-intro-production is the name of the production project:
$ oc policy add-role-to-group system:image-puller \
     system:serviceaccounts:node-mongo-intro-production \
     --namespace=node-mongo-intro
To verify that the new policy is in place, we can check the rolebindings:
$ oc get rolebindings
NAME                    ROLE                    USERS     GROUPS                                                                                        SERVICE ACCOUNTS   SUBJECTS
admins                  /admin                  catalin
system:deployers        /system:deployer                                                                                                                deployer
system:image-builders   /system:image-builder                                                                                                           builder
system:image-pullers    /system:image-puller              system:serviceaccounts:node-mongo-intro, system:serviceaccounts:node-mongo-intro-production
OK, so now we have an image that can be deployed to the production environment. Let’s switch the current project to the production one:
$ oc project node-mongo-intro-production
Now using project "node-mongo-intro-production" on server "https://localhost:8443".
To start the database we’ll use the same command as in the development box:
$ oc new-app --template=mongodb-ephemeral
--> Deploying template mongodb-ephemeral in project openshift for "mongodb-ephemeral"
    With parameters:
     DATABASE_SERVICE_NAME=mongodb
     MONGODB_USER=user65Y # generated
     MONGODB_PASSWORD=SFateUQVK43Wb0Eh # generated
     MONGODB_DATABASE=sampledb
     MONGODB_ADMIN_PASSWORD=IxsfXSdpDpxGRVWQ # generated
--> Creating resources ...
   Service "mongodb" created
   DeploymentConfig "mongodb" created
--> Success
   Run 'oc status' to view your app.
For the Node.js part we’ll be using the image stream created in the development project that was tagged “production”:
$ oc new-app node-mongo-intro/node-openshift-sample:production \
     -e MONGODB_USER=user65Y -e MONGODB_PASSWORD=SFateUQVK43Wb0Eh \
     -e MONGODB_DATABASE=sampledb
--> Found image 5621fed (11 minutes old) in image stream "node-openshift-sample in project node-mongo-intro" under tag :production for "node-mongo-intro/node-openshift-sample:production"
   * This image will be deployed in deployment config "node-openshift-sample"
   * Port 8080/tcp will be load balanced by service "node-openshift-sample"
--> Creating resources with label app=node-openshift-sample ...
   DeploymentConfig "node-openshift-sample" created
   Service "node-openshift-sample" created
--> Success
   Run 'oc status' to view your app.
This will create a NodeJS application from the same image generated in the previous environment. To make the application accessible from the browser we’ll need to expose the new Node.js service:
$ oc expose service node-openshift-sample \
     --hostname=node-openshift-production.rhel-ose.vagrant.dev
route "node-openshift-sample" exposed
You should now find the production app is running at the provided hostname.
We can now deploy new versions of the code to production by simply updating the image tagged “production” in the image stream. The node-mongo-intro-production project will automatically pick up the change and deploy the new version. Let’s see an example of this in action.
Start by going back to the development project:
$ oc project node-mongo-intro
Now using project "node-mongo-intro" on server "https://10.1.2.2:8443".
And start a new build based on the commit “ded8f41”:
$ oc start-build node-openshift-sample \
 --git-repository=https://github.com/ContainerSolutions/node-openshift-sample\
 --commit='ded8f41'
Once the build finishes running, a deployment task will start that will replace the running container. Once the new version is deployed, the Container Solutions logo should be replaced with the Red Hat logo:
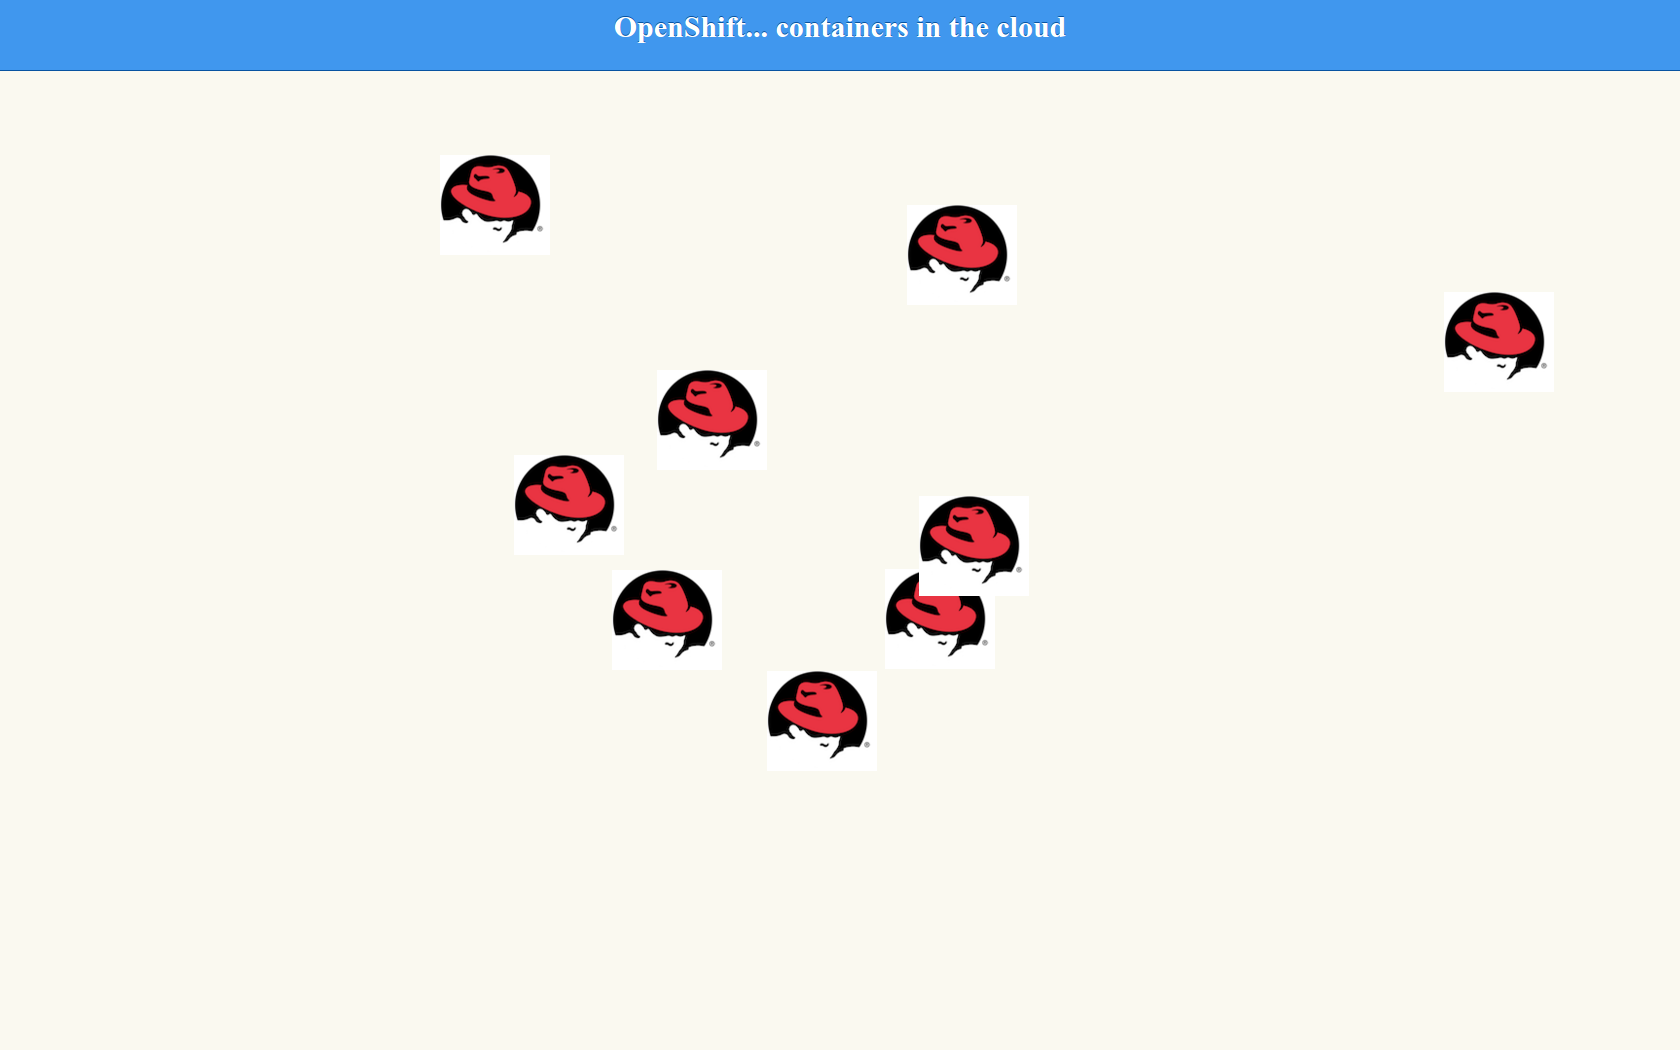
If you check the production version, you should find it is still running the previous version of the code.
OK, we’re happy with the change, let’s tag it as ready for production. Again, run oc describe is to get the ID of the image tagged latest, which we can then tag it as production:
$ oc tag node-mongo-intro/node-openshift-sample@\
sha256:ceed25d3fb099169ae404a52f50004074954d970384fef80f46f51dadc59c95d \
     node-mongo-intro/node-openshift-sample:production
Tag node-openshift-sample:production set to node-mongo-intro/node-openshift-sample@sha256:ceed25d3fb099169ae404a52f50004074954d970384fef80f46f51dadc59c95d.
This tag will trigger an automatic deployment of the new image to the production environment.
Rolling back can be done in different ways. For this example, we will roll back the production environment by tagging production with the old image ID. Find the right id by running the oc describe is command again, and then tag it:
$ oc tag node-mongo-intro/node-openshift-sample@\
sha256:5f50e1ffbc5f4ff1c25b083e1698c156ca0da3ba207c619781efcfa5097995ec \
  node-mongo-intro/node-openshift-sample:production
Tag node-openshift-sample:production set to node-mongo-intro/node-openshift-sample@sha256:5f50e1ffbc5f4ff1c25b083e1698c156ca0da3ba207c619781efcfa5097995ec.
Check this video for a walkthrough over the deploy and roll-back:
http://www.youtube.com/watch?v=j5sm235iA14
Conclusions
Over the course of this series of posts, we’ve investigated the Red Hat container ecosystem and OpenShift Enterprise in particular. OpenShift Enterprise builds on the advanced orchestration capabilities of Kubernetes and the reliability and stability of the Red Hat Enterprise :Linux operating system to provide a powerful PaaS for the enterprise. OpenShift adds several ideas of its own that provide important features for organizations, including source-to-image tooling, image streams, project and user isolation and a web UI. This post showed how these features work together to provide a complete CD workflow where code can be automatically pushed from development through to production.
If you’d like to see more articles by us please get in touch using the comments section (below)!
執筆者紹介
類似検索
お使いのアプリケーション・プラットフォームは、今後の展開に対応できる準備ができていますか?
対象となる専門知識の検証:Red Hat 認定資格における主要アップデート
At Your Serverless | Command Line Heroes
Testing, PDFs, And Donkeys | Compiler: Stack/Unstuck
チャンネル別に見る

自動化
テクノロジー、チームおよび環境に関する IT 自動化の最新情報

AI (人工知能)
お客様が AI ワークロードをどこでも自由に実行することを可能にするプラットフォームについてのアップデート

オープン・ハイブリッドクラウド
ハイブリッドクラウドで柔軟に未来を築く方法をご確認ください。

セキュリティ
環境やテクノロジー全体に及ぶリスクを軽減する方法に関する最新情報

エッジコンピューティング
エッジでの運用を単純化するプラットフォームのアップデート

インフラストラクチャ
世界有数のエンタープライズ向け Linux プラットフォームの最新情報

アプリケーション
アプリケーションの最も困難な課題に対する Red Hat ソリューションの詳細
仮想化
オンプレミスまたは複数クラウドでのワークロードに対応するエンタープライズ仮想化の将来についてご覧ください