
Have no doubt, OpenShift is a great platform for running microservices-architectured applications! However, when it comes to Application Performance Management (APM) some may think there's an issue because no components are off-the-shelf in the platform. Indeed this makes sense because APM is a tricky problem and may be addressed in many ways depending on application technology - and after all, microservices architecture is also about picking the right technology for the right problem! ;-) However, this article introduces a quite non-intrusive solution for Spring Boot (and more generally servlet-based) microservices by using Hawkular APM.
Hawkular APM?
![]()
OpenShift provides a built-in monitoring tool called Hawkular. That tool is in charge of collecting metrics from Docker containers through the Kubernetes interface and storing, aggregating, and visualizing them. The metrics collected are CPU, Memory, Disk, and Network usage. Hawkular offers a "black-box" view of container performance but does not deal with application metrics like service performance or distribution of response time through application layers. For this specific case, the Hawkular community is working on another module called Hawkular APM that provides insight into the way an application executes across multiple (micro) services in a distributed (e.g. cloud) environment. Hawkular APM supports agent-based instrumentation for Java or API based metrics collection for other languages. It also supports distributed tracing frameworks like ZipKin or OpenTracing. It is not provided as a built-in module in OpenShift but it's really easy to set up on OpenShift and have a Java application being monitored without touching the source code.
OpenShift part setup
First of all, we assume you already have an OpenShift cluster running (through a complete installation, a local oc cluster up, the Red Hat Container Development Kit or something like Minishift). The first step is to install the Hawkular APM server that will be responsible for storing, aggregating and visualizing the application metrics.
The following commands can be issued in any OpenShift project/namespace of your choice.
# oc create -f https://raw.githubusercontent.com/jboss-dockerfiles/hawkular-apm/master/openshift-templates/hawkular-apm-server-deployment.yml

secret "hawkular-apm-admin-account" created

route "hawkular-apm" created

deploymentconfig "hawkular-apm" created

deploymentconfig "hawkular-apm-es" created

serviceaccount "hawkular-apm" created

serviceaccount "hawkular-apm-es" created

service "hawkular-apm" created

service "hawkular-apm-es" created

#
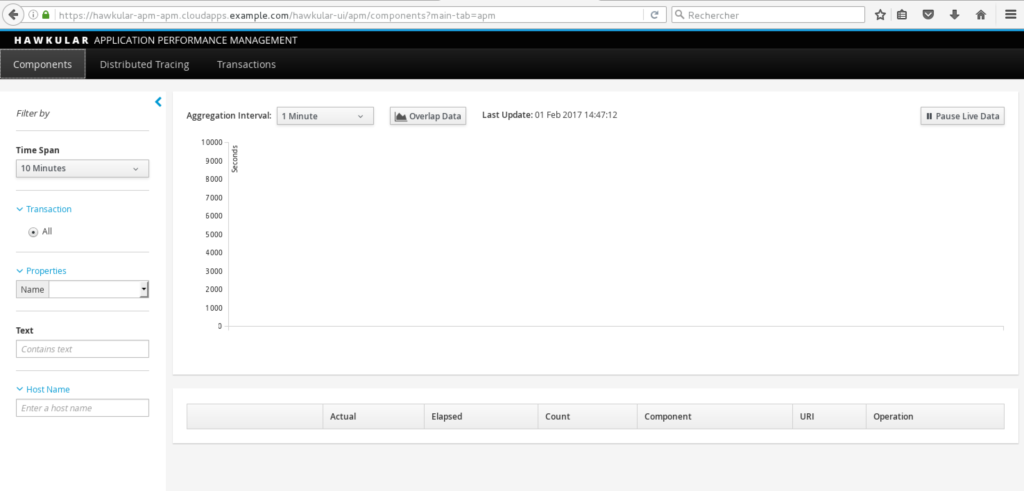
It's just as easy as this! The OpenShift template for Hawkular APM creates deployments for the server and Elasticsearch backend, services, and a route for accessing the server. Just use the created route within a browser and access the UI after having authenticated with default admin/password created. Here is the result on the screenshot below:
Container part setup
The next part of the process is to prepare a base Docker image for OpenShift that will be used for containerizing our Spring Boot applications from source. In OpenShift, this process of directly using sources and handling the Dockerization is called Source-to-image. For our Spring Boot / APM purpose, we will start from a base image handling basic Java Dockerization.
The goal of customization is just to retrieve the Hawkular APM Java agent and to make it available as a lib within the base image that will later contain our Spring Boot fat jar application. A little trick here is to temporarily switch to root user to chmod the Jar file correctly. Otherwise, JVM that will execute with other users not be able to read Java agent Jar during the boot. Here's the DockerFile:
FROM docker.io/fabric8/s2i-java:1.3.6ENV APM_VERSION=0.13.0.Final
ENV APM_AGENT=/libs/hawkular-apm-agent.jarADD https://repository.jboss.org/nexus/service/local/artifact/maven/redirect?r=releases&g=org.hawkular.apm&a=hawkular-apm-agent&v=$APM_VERSION&e=jar $APM_AGENT
# Temporary switch to root
USER rootRUN chmod 444 /libs/hawkular-apm-agent.jar
# S2I requires a numeric, non-0 UID. This is the UID for the jboss user in the base image
USER 185
Now that you've got this file, you can produce your own base Docker image and store it into a Docker registry for a later use from OpenShift. You can use for example the Docker Hub registry.
# docker build -t lbroudoux/s2i-java-apm .

# ...

# docker push lbroudoux/s2i-java-apm

# ...
Finally, in order to use this newly-built image on OpenShift and to use it conveniently, we may want to create some ImageStreams and Templates. We're are not going in details on how to create those files. The one I have used for testing and demonstrating are available in my GitHub sample repository in the /openshift directory.
Just use these 2 files to declare resources in your OpenShift installation like this:
# oc create -f https://raw.githubusercontent.com/lbroudoux/spring-boot-hello/master/openshift/spring-boot-apm-is.json -n openshift

imagestream "spring-boot-apm" created

# oc create -f https://raw.githubusercontent.com/lbroudoux/spring-boot-hello/master/openshift/spring-boot-apm-template.json -n openshift

template "spring-boot-apm" created
Bring it all together!
It's now time to create a Spring Boot application to check everything is ok. For that, go to the project/namespace of your choice and use the spring-boot-apm template that is now available. The default for this template uses the sample Spring Boot microservices of my GitHub repository: https://github.com/lbroudoux/spring-boot-hello. You have nothing to change to have something running. After having pressed the Create button, the build starts (checking out sources, invoking maven build and so on...) and deployment should finish in a few minutes.
At that time, the application is up and you should have a microservice running at http://spring-boot-app-project-domain.com/api/hello?name=World. Check your exact route configuration through OpenShift console. However, if you check the Hawkular APM console again, you'll not notice anything new... That's because application performance management has not been turned on - it is disabled by default. In order to turn it on, go to your application deployment configuration and manage to add the environment variables like below:

In order to get APM up, you have to add these 4 variables:
- HAWKULAR_APM_URI: the HTTP URI for accessing your hawkular server (make sure to not use the HTTPS URL, I did not manage to got it working for now),
- HAWKULAR_APM_USERNAME: the username for connecting APM server, use default admin user,
- HAWKULAR_APM_PASSWORD: the password for connecting APM server, use default admin password,
- JAVA_OPTIONS: the JVM options for enabling Java agent, use -javaagent:/libs/hawkular-apm-agent.jar=boot:/libs/hawkular-apm-agent.jar that refers to the Hawkular agent previously added to image libs.
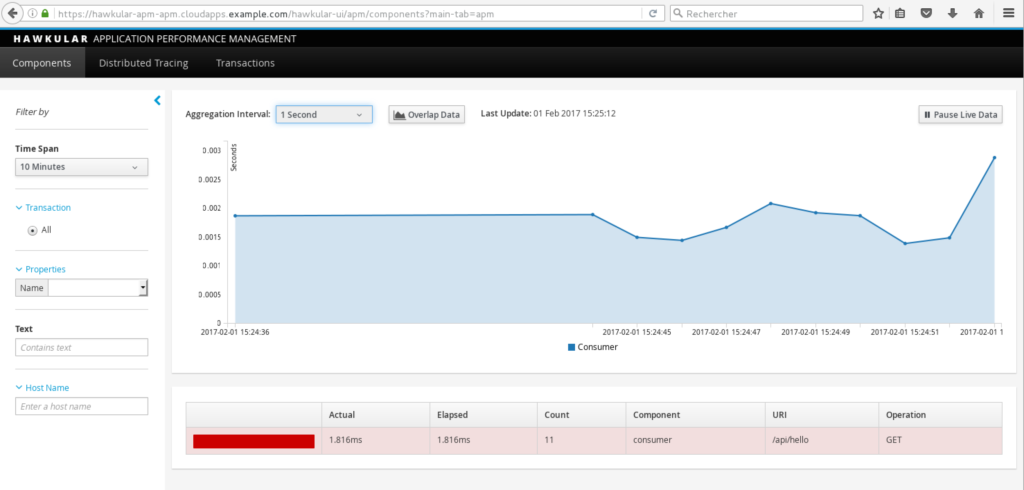
Once you've hit the Save button, the deployment is updated, a new container is deployed, and the Spring Boot application is now instrumented by a Hawkular Java agent. Make few calls to the previous "Hello World" microservice and go check the results in Hawkular APM... TADAM !
As a result, you now have these nice performance metrics and charts available for all the services in your app. Most noteworthy this was done without a code change and can be enabled or disabled simply through environment variables.
執筆者紹介
類似検索
エージェント型のパラドックスとハイブリッド AI の事例
過去を管理するのをやめて、IT の未来を構築しましょう
Diving for Perl | Command Line Heroes
The Web Developer And The Presence | Compiler: Re:Role
チャンネル別に見る

自動化
テクノロジー、チームおよび環境に関する IT 自動化の最新情報

AI (人工知能)
お客様が AI ワークロードをどこでも自由に実行することを可能にするプラットフォームについてのアップデート

オープン・ハイブリッドクラウド
ハイブリッドクラウドで柔軟に未来を築く方法をご確認ください。

セキュリティ
環境やテクノロジー全体に及ぶリスクを軽減する方法に関する最新情報

エッジコンピューティング
エッジでの運用を単純化するプラットフォームのアップデート

インフラストラクチャ
世界有数のエンタープライズ向け Linux プラットフォームの最新情報

アプリケーション
アプリケーションの最も困難な課題に対する Red Hat ソリューションの詳細
仮想化
オンプレミスまたは複数クラウドでのワークロードに対応するエンタープライズ仮想化の将来についてご覧ください