
You’ve just installed Red Hat OpenShift Container Platform 3 - now what?
Red Hat OpenShift Container Platform 3 is a complex product with a lot of components. This article is going to go over steps to validate your installation was successful, that your applications are responsive, and what to look for if things aren’t working as expected.
Step 1: Authenticate
Depending on what installation method you used, you may or may not already have some form of external authentication enabled. If you don’t, you’ll want to set one up, with HTPasswd being the fastest and easiest method to install and configure.
Logging from the command line is as simple as running “oc login”, and supplying the name of the master (single master environment) or master cluster name.
# oc login https://ocp.paas.home.lab:8443

Authentication required for https://ocp.paas.home.lab:8443 (openshift)

Username: jritenour

Password:

Login successful.


You have access to the following projects and can switch between them with 'oc project <projectname>':


* default

  kube-system

  management-infra

  openshift

  openshift-infra


Using project "default".
Authentication issues against an external provider can be challenging to troubleshoot. First, you need to verify you can actually authenticate against the provider outside the context of Red Hat OpenShift Container Platform. For example, if you’re using IdM/FreeIPA as an LDAP source, verify you can login with your credentials on a host joined to the IdM domain. If so, verify you are using the correct parameters in your master-config.yaml for all OpenShift masters - the most common issue I tend to see is trying to use secure LDAP, but without a trusted certificate.
If everything looks correct in the config, then you need to verify your authentication request is actually reaching the external provider. Check to see if there any failed authentication attempts on the provider’s logs. If the attempt isn’t even getting to the provider, then you might have roll up your sleeves and do some network troubleshooting with utilities such as tcpdump, nmap, and traceroute. That’s a bit outside the scope of this article, however.
Validate nodes
Running “oc get nodes” will return information about the nodes in an OpenShift cluster.
# oc get nodes

NAME                 STATUS                     AGE

jr-ose001.home.lab   Ready,SchedulingDisabled   19m

jr-ose002.home.lab   Ready,SchedulingDisabled   2m

jr-ose003.home.lab   Ready,SchedulingDisabled   19m

jr-ose004.home.lab   Ready                      19m

jr-ose005.home.lab   Ready                      19m

jr-ose006.home.lab   Ready                      19m

jr-ose007.home.lab   Ready                      19m

jr-ose008.home.lab   Ready                      19m
All nodes should be listed as “Ready”, and masters should also have “SchedulingDisabled” in their status. If any nodes are in any state other than “Ready”, verify the host is up and responsive. Some quick checks you can perform are:
-
Is the host responding on the correct IP address? Does it match up with the hostname configured in DNS?
-
Is the atomic-openshift-node service running?
-
Is the firewall properly configured? Sample output:
Chain OS_FIREWALL_ALLOW (1 references)

target     prot opt source               destination

ACCEPT     tcp  --  anywhere             anywhere             state NEW tcp dpt:10250

ACCEPT     tcp  --  anywhere             anywhere             state NEW tcp dpt:http

ACCEPT     tcp  --  anywhere             anywhere             state NEW tcp dpt:https

ACCEPT     tcp  --  anywhere             anywhere             state NEW tcp dpt:10255

ACCEPT     udp  --  anywhere             anywhere             state NEW udp dpt:10255

ACCEPT     udp  --  anywhere             anywhere             state NEW udp dpt:4789
Validate default project status
The “default” project is where all the essential containerized OpenShift services run, specifically the router and registry. Verifying this namespace is in a healthy state is essential. Run ‘oc status’ while in the default project (oc project default). You should have:
-
A Kubernetes service
-
A Docker registry service with at least one pod
-
A router service with at least one pod.
#oc status

In project default on server https://ocp.paas.home.lab:8443


svc/docker-registry - 172.30.24.180:5000

dc/docker-registry deploys registry.access.redhat.com/openshift3/ose-docker-registry:v3.3.0.35

  deployment #1 deployed 25 minutes ago - 1 pod


svc/kubernetes - 172.30.0.1 ports 443, 53->8053, 53->8053


svc/router - 172.30.253.41 ports 80, 443, 1936

dc/router deploys docker.io/openshift3/ose-haproxy-router:v3.3.0.35

  deployment #1 deployed 2 minutes ago - 2 pods


View details with 'oc describe <resource>/<name>' or list everything with 'oc get all'.
You can also run “oc get all” to show the current state of the deployment configs, replication configs, services, and pods in this project.
# oc get all

NAME                         REVISION        DESIRED       CURRENT   TRIGGERED BY

dc/docker-registry           1               1             1         config

dc/router                    1               2             2         config

NAME                         DESIRED         CURRENT       AGE

rc/docker-registry-1         1               1             29m

rc/router-1                  2               2             5m

NAME                         CLUSTER-IP      EXTERNAL-IP   PORT(S)                   AGE

svc/docker-registry          172.30.24.180   <none>        5000/TCP                  29m

svc/kubernetes               172.30.0.1      <none>        443/TCP,53/UDP,53/TCP     1h

svc/router                   172.30.253.41   <none>        80/TCP,443/TCP,1936/TCP   5m

NAME                         READY           STATUS        RESTARTS                  AGE

po/docker-registry-1-on709   1/1             Running       0                         28m

po/router-1-baety            1/1             Running       0                         4m

po/router-1-bmdy2            1/1             Running       0                         5m
Validate registry
Now that we’ve verified the overall state of the default project, we’ll want to verify the registry is working, and allows pushes and pulls with an authenticated user. You’ll need to login to test the registry, and for that you need to know what the registry’s service IP is, and the value of your authentication token.
# oc get svc docker-registry

NAME              CLUSTER-IP      EXTERNAL-IP   PORT(S)    AGE

docker-registry   172.30.24.180   <none>        5000/TCP   35m

# oc whoami -t

*redacted token string*
With that info, I can now login to my registry service.
# docker login -u jritenour -e jritenour@redhat.com -p *redacted token string* 172.30.24.180:5000

WARNING: login credentials saved in /root/.docker/config.json

Login Succeeded
Now I can try to push an image. Pull the “busybox” image down from docker.io, as it’s small and easy to test with. Tag it with your registry ip/port and put it in the “openshift” namespace, then push.
# docker images

REPOSITORY          TAG                 IMAGE ID            CREATED             SIZE

docker.io/busybox   latest              e02e811dd08f        2 weeks ago         1.093 MB

# docker tag docker.io/busybox 172.30.24.180:5000/openshift/busybox

# docker push 172.30.24.180:5000/openshift/busybox

The push refers to a repository [172.30.24.180:5000/openshift/busybox]

e88b3f82283b: Pushed

latest: digest: sha256:b321c7c9c643778fbe22de13a01fdfbac0f21c6c5452d8164de9367d96235d0c size: 2099

# docker images

REPOSITORY                             TAG                 IMAGE ID            CREATED             SIZE

172.30.24.180:5000/openshift/busybox   latest              e02e811dd08f        2 weeks ago         1.093 MB

docker.io/busybox                      latest              e02e811dd08f        2 weeks ago         1.093 MB
A successful push means all is well. If it fails, then you likely have a problem with whatever storage your registry is using on the backend. Verify the storage is accessible, writable, and mounted by the docker registry pods.
Create an application
To continue, we’ll next create application. First, let’s create a project/namespace to run this app in:
oc new-project jr-test

Now using project "jr-test" on server "https://ocp.paas.home.lab:8443".


You can add applications to this project with the 'new-app' command. For example, try:


  oc new-app centos/ruby-22-centos7~https://github.com/openshift/ruby-ex.git


to build a new example application in Ruby.
And to keep it simple, we’ll deploy the Ruby application that the “new-project” command suggested.
#     oc new-app centos/ruby-22-centos7~https://github.com/openshift/ruby-ex.git

--> Found Docker image 0449712 (3 days old) from Docker Hub for "centos/ruby-22-centos7"


  Ruby 2.2

  --------

  Platform for building and running Ruby 2.2 applications


  Tags: builder, ruby, ruby22


  * An image stream will be created as "ruby-22-centos7:latest" that will track the source image

  * A source build using source code from https://github.com/openshift/ruby-ex.git will be created

    * The resulting image will be pushed to image stream "ruby-ex:latest"

    * Every time "ruby-22-centos7:latest" changes a new build will be triggered

  * This image will be deployed in deployment config "ruby-ex"

  * Port 8080/tcp will be load balanced by service "ruby-ex"

    * Other containers can access this service through the hostname "ruby-ex"

--> Creating resources with label app=ruby-ex ...

  imagestream "ruby-22-centos7" created

  imagestream "ruby-ex" created

  buildconfig "ruby-ex" created

  deploymentconfig "ruby-ex" created

  service "ruby-ex" created

--> Success

  Build scheduled, use 'oc logs -f bc/ruby-ex' to track its progress.

  Run 'oc status' to view your app
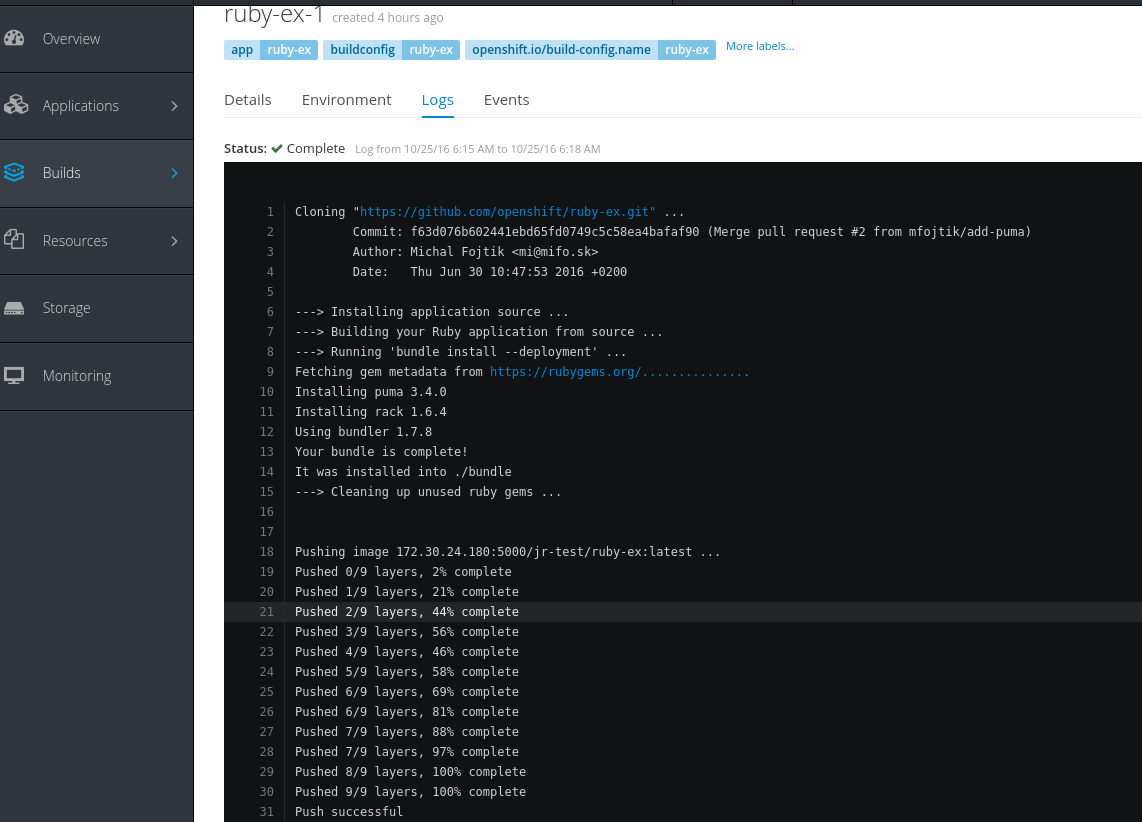
I can run “oc status” to see what stage the deployment is in, or log into the Web UI to actually watch the console output of the build process.
When the build is complete, I can then run “oc get service” to obtain the service IP, and verify I can connect to it using the curl command.
# oc get service

NAME      CLUSTER-IP       EXTERNAL-IP   PORT(S)    AGE

ruby-ex   172.30.138.103   <none>        8080/TCP   5m

# curl 172.30.138.103:8080 -I

HTTP/1.1 200 OK

Content-Type: text/html

Content-Length: 39590
Validate router
Now I know that I can connect to the application by the service IP, but in the real world, we need to route hostnames to applications, and that’s where our router comes in. In most cases, you’re going to have a wildcard DNS record for your OpenShift/PaaS subdomain pointed at your infrastructure node(s) that your router pod(s) live on. For example, I have “*.paas.home.lab” pointing at jr-ose005, and jr-ose006, with router pods running on poth. So any name that lives in the .paas.home.lab domain that isn’t explicitly defined in DNS will get directed to these nodes. From there, the OpenShift router checks its exposed services, and send traffic to the appropriate pod/node.
Let’s expose the ruby-ex service we just created:
#oc expose svc/ruby-ex --hostname ruby.paas.home.lab
Now, we can curl against that hostname, just as we did with the IP.
curl ruby.paas.home.lab -I

HTTP/1.1 200 OK

Content-Type: text/html

Content-Length: 39590

Set-Cookie: 46835afb0f3cb981bcb9d80703f10156=8a5b6b851a46307c10c5a52a2859aad5; path=/; HttpOnly

Cache-control: private
Another “200 OK” status response - this application is healthy, and we can get traffic to it.
Run diagnostics
Finally, you can run “oadm diagnostics” on the cluster. This is more or less the “kitchen sink” as far as Red Hat OpenShift Container Platform health checks go, and will examine the running environment, along with your master/node config files. It’s verbose, so I won’t include the full output here, but here is a small sample in which I’m warning about the fact that I haven’t configured metrics or aggregated logging.
WARN:  [DH0005 from diagnostic MasterConfigCheck@openshift/origin/pkg/diagnostics/host/check_master_config.go:52]

     Validation of master config file '/etc/origin/master/master-config.yaml' warned:

     assetConfig.loggingPublicURL: Invalid value: "": required to view aggregated container logs in the console

     assetConfig.metricsPublicURL: Invalid value: "": required to view cluster metrics in the console
In this post, we went through several steps to validate that a Red Hat OpenShift Container Platform environment has been deployed correctly, and verify basic operation.
執筆者紹介
類似検索
さらに強化され、すぐに使用でき、コストがかからない:コンテナセキュリティの進化
Red Hat Universal Base Image の (再) 紹介
The Containers_Derby | Command Line Heroes
Can Kubernetes Help People Find Love? | Compiler
チャンネル別に見る

自動化
テクノロジー、チームおよび環境に関する IT 自動化の最新情報

AI (人工知能)
お客様が AI ワークロードをどこでも自由に実行することを可能にするプラットフォームについてのアップデート

オープン・ハイブリッドクラウド
ハイブリッドクラウドで柔軟に未来を築く方法をご確認ください。

セキュリティ
環境やテクノロジー全体に及ぶリスクを軽減する方法に関する最新情報

エッジコンピューティング
エッジでの運用を単純化するプラットフォームのアップデート

インフラストラクチャ
世界有数のエンタープライズ向け Linux プラットフォームの最新情報

アプリケーション
アプリケーションの最も困難な課題に対する Red Hat ソリューションの詳細
仮想化
オンプレミスまたは複数クラウドでのワークロードに対応するエンタープライズ仮想化の将来についてご覧ください