
Cockpit is a server administration tool sponsored by Red Hat, focused on providing a modern-looking and user-friendly interface to manage and administer servers. Fedora 21 included Cockpit by default, and since then, it has continued to grow and mature. Red Hat Enterprise Linux 7 included Cockpit in the optional and extras repositories, and it’s included in Red Hat Enterprise Linux 8 by default.
Cockpit is not the first of its class (many old-time system administrators may remember Webmin), but the alternatives are usually clunky, bloated, and their underlying APIs may be a security risk. That’s where Cockpit is different and shines. With Cockpit, unnecessary services or APIs don’t get in the way of doing things.
Cockpit features
Here are some of the more important features of Cockpit:
- Graphical and interface designers are involved in the project.
Cockpitis modular and can be extended by installing extra modules. You can even develop modules of your own.- It can support multiple servers from a single dashboard.
- It is not intrusive. This means
Cockpitworks alongside other management tools without causing issues. Cockpituses asystemdsocket, and it doesn’t use any memory when it is not in use.Cockpitbuilds upon existing functionality; it doesn’t require a configuration by default.Cockpitdoesn’t store the state or data of servers anywhere. It utilizes the same API command-line tools use.Cockpithas no special privileges and doesn’t run as root. It creates a session as the logged in user and has the same permissions as that user. So, to perform administrative tasks, the user needs permission to usesudoorPolicyKitto escalate privileges.- It’s free!
Installing Cockpit
Cockpit is available and supported in most major distributions.
To install in Fedora/CentOS 8/RHEL 8, execute:
sudo dnf install cockpitTo install in Ubuntu/Debian 10, execute the following command:
sudo apt install cockpitTo enable the socket, execute the following command:
sudo systemctl enable --now cockpit.socketTo open the firewall ports (if needed), execute the following commands:
sudo firewall-cmd --add-service=cockpit --permanent
sudo firewall-cmd --reload
Cockpit modules
As mentioned before, Cockpit can be extended using existing plugins or by writing your own. Cockpit offers the Starter Kit to use as a starting point to develop your own modules.
Multiple computers or servers can be managed from a single Cockpit instance by installing cockpit-dashboard. To manage containers using Podman, you can use cockpit-podman. With cockpit-machines, you can manage virtual machines using libvirt. This plugin allows users to create, delete, or update storage pools and networks, modify virtual machines, and gain access to a console viewer. This module deprecates the famous virt-manager tool. Using cockpit-networkmanager allows you to configure network interfaces, create bonds, bridges, VLANs, firewall rules, and more. Cockpit-packagekit can install, remove, or update packages.
Cockpit can manage a system’s storage devices, including creating and formatting partitions, managing LVM volumes, and connecting to iSCSI targets, by using cockpit-storaged.
To install any of these modules on your system, run the following commands using the name of the module above.
Fedora/CentOS 8/RHEL 8:
sudo dnf install cockpit-dashboard cockpit-podman cockpit-machines cockpit-networkmanager cockpit-packagekit cockpit-storagedUbuntu/Debian 10:
sudo apt install cockpit-dashboard cockpit-podman cockpit-machines cockpit-networkmanager cockpit-packagekit cockpit-storagedRestart Cockpit:
systemctl restart cockpit.socketNavigating Cockpit
To access Cockpit, point the web browser to your computer or server IP on the port 9090: https://Computer IP:9090.
The Cockpit management interface uses selectable blocks for each configuration category.
Managing multiple servers
Multiple servers can be managed from a single Cockpit instance. To do so, click on Dashboard on the left pane.
On the Servers block, click on the Add button.
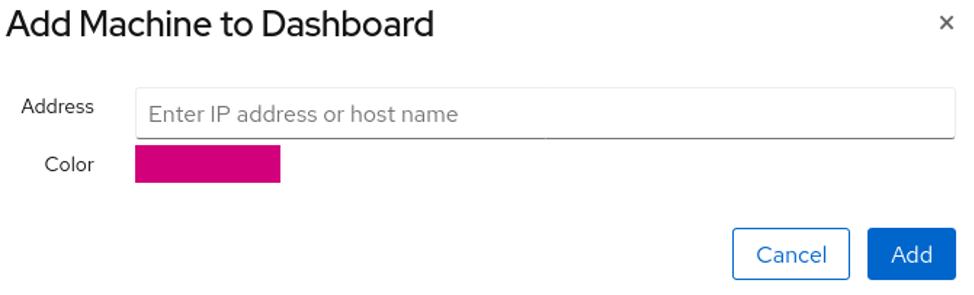
Cockpit tries to use the same credentials used to login to the current session. If not, it prompts for them.
The Dashboard also shows unified graphs for CPU, Memory, Network, and Disk I/O.
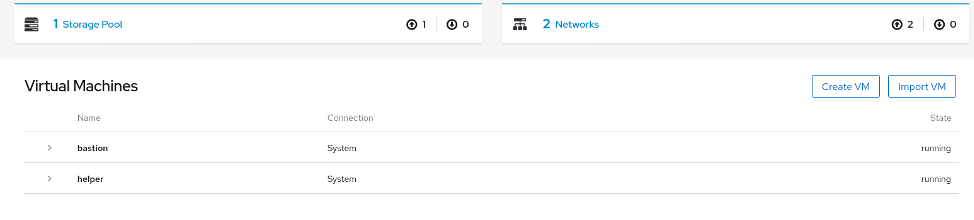
Create VMs with Cockpit
Navigate to Host -> Virtual Machines
To create a new storage pool, click Storage Pool -> Create Storage Pool
To create a new libvirt network, click Networks -> Create Virtual Network
To create a new virtual machine, click on Create VM.
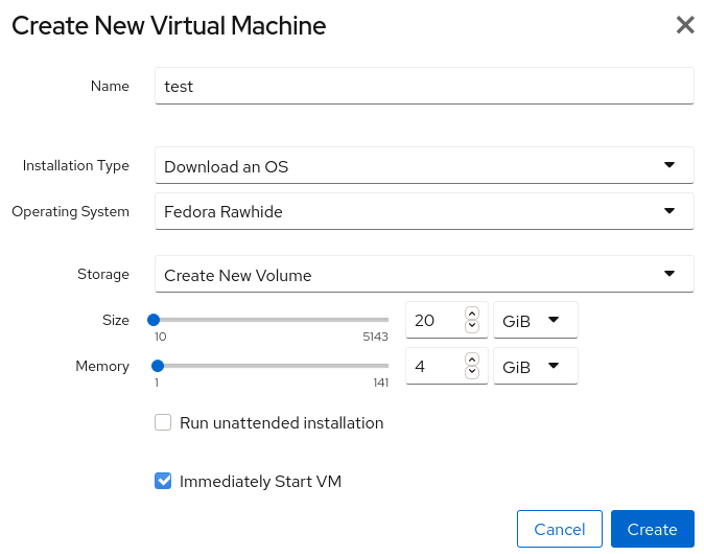
The Installation Type field allows users to install a Linux distribution from the Internet, use a local install media like an ISO, or use PXE to boot the virtual machine.
For this feature to work, a network and storage pool called default should exist.
To create a virtual machine from an existing virtual disk image, use the Import VM button. It is similar to Create VM.
Managing storage devices
Navigate to Host -> Storage

The screen is divided into blocks. The first one shows a graph that shows the overall Read and Write performance of the storage.
- The Filesystems block shows the mounted filesystems.
- The NFS Mounts block shows any mounted NFS connections.
- The Storage Logs block shows relevant logs related to the storage devices on the system. It can be particularly useful when a disk starts failing.
- The Drives block shows all the currently attached physical devices on the system, mounted or not. To create a new table partition, click on the drive, then click Create Partition Table. To create partitions, click on the drive, then click on Create Partition.
- The Devices block shows volume groups, DM RAID, and VDO groups. To create a logical volume, select the Volume Group under Devices, and click on Create New Logical Volume.
- The iSCSI Target block allows users to connect or disconnect from iSCSI targets. LUNs appear under Drives.
Managing network devices
Navigate to Host -> Networking.

Existing network interfaces can be modified under the Interfaces block. To create a VLAN interface, click on Add VLAN. Likewise, to create a bridge, click on Add Bridge. To create a bonded NIC, click on Add Bond.
To create firewall rules, click on the Active Zone in the Firewall block.
Conclusion
Cockpit is a powerful and lightweight tool that can help users to configure their systems faster. It is not meant to replace configuration management tools like Ansible, but it helps to simplify trivial tasks. It doesn’t get in the way, break configuration files, impose any opinion, and it has security in mind.
Also, cockpit-machines will replace virt-manager in future releases, and getting familiar will be necessary.
[ Want to test your sysadmin skills? Take a skills assessment today. ]
About the author
Michael Zamot is an open source enthusiast whose passion began in 2004, when he discovered Linux. Ever since then he has worked and played with various open source projects, including Linux, OpenStack, OpenShift/Kubernetes and many more, and participated in community events by teaching, conducting workshops, and providing technical support and mentorship. He currently works for Red Hat as a Cloud Consultant, designing, deploying, and supporting complex cloud solutions.
More like this
Debunking IT automation myths: A strategic blueprint for healthcare payers
Introducing Red Hat build of Karpenter
Untangling Networks | Compiler
Infrastructure At The Edge | Compiler
Browse by channel

Automation
The latest on IT automation for tech, teams, and environments

Artificial intelligence
Updates on the platforms that free customers to run AI workloads anywhere

Open hybrid cloud
Explore how we build a more flexible future with hybrid cloud

Security
The latest on how we reduce risks across environments and technologies

Edge computing
Updates on the platforms that simplify operations at the edge

Infrastructure
The latest on the world’s leading enterprise Linux platform

Applications
Inside our solutions to the toughest application challenges
Virtualization
The future of enterprise virtualization for your workloads on-premise or across clouds