
The OpenAPI Specification, formerly known as Swagger Specification, is a community-driven open standard and programming language-neutral interface description for HTTP APIs. It allows humans and computers to discover and understand the capabilities of a service without requiring access to the source code.
[ Become a Red Hat Certified Architect and boost your career. ]
AppMap is an open source tool used by tens of thousands of developers to visualize their application's runtime behavior. Unlike static analyzers, AppMap records the details of how an application runs and uses that information to find design flaws, security holes, and performance issues.
Because AppMap records how an application executes at runtime, it can see and record all of the API calls processed, including the schema of each request and response. Using the AppMap command-line interface (CLI) (or the VS Code or JetBrains extension), a developer can automatically output OpenAPI Specifications for an app.
While it's often recommended to create your OpenAPI docs first and then build out the corresponding API endpoints from the spec, modern software development is usually messier. Developers are frequently tossed into old projects with limited documentation. Creating these docs by hand is error-prone and annoying to keep current as the code changes.
AppMap currently supports Ruby, Java, Python, and JavaScript projects, and the libraries are MIT licensed with a Commons Clause.
Install AppMap
The easiest way to get started with AppMap is by installing the VS Code or JetBrains extension, which walks users through the entire process. But if you are not already using one of those code editors or just love to live on the command line, you can install the AppMap client locally.
The AppMap client is written in JavaScript, making it easy to run across various platforms. You'll need Node.js installed, or you can grab prebuilt binaries for @appland/appmap on GitHub. I'll use a sample Rails application from the Ruby on Rails Tutorial, 6th Edition book.
Since this is a Ruby project, add one line to the top of the Gemfile to include AppMap recording in development and testing:
gem 'appmap', :groups => [:development, :test]
Then run bundle install to download and install AppMap into your project.
It's important to add the AppMap gem before any other gems, so it can observe the other gems in the application.
[ Learn how to build a flexible foundation for your organization. Download An architect's guide to multicloud infrastructure. ]
You can also run the @appland/appmap project installer command via npx, which lets you easily execute Node package binaries. The installer will identify the language of your project and set up the libraries for you if you don't want to do it manually.
$ npx @appland/appmap install -d /Users/dev_user/repos/sample_app_6th_ed
? Multiple project types were found in /Users/dev_user/repos/sample_app_6th_ed. Select one to continue. (Use arrow keys)
❯ Bundler
  yarn
Because this Ruby on Rails project has both a Gemfile and a package.json file, the installer just needs to know whether to install the Ruby or JavaScript library. This is a Ruby project, so select bundler to automate adding the gem to your Gemfile and validate its setup.
? Multiple project types were found in /Users/dev_user/repos/sample_app_6th_ed. Select one to continue. Bundler
Installing AppMap agent for ....
? AppMap is about to be installed. Confirm the details below.
  Project type: Bundler
  Project directory: /Users/dev_user/repos/sample_app_6th_ed
  Git remote: origin    git@github.com:land-of-apps/sample_app_6th_ed.git (fetch)
  Ruby version: 3.0.2p107
  Gem home: /Users/dev_user/.asdf/installs/ruby/3.0.2/lib/ruby/gems/3.0.0

  Is this correct? Yes
✔ Installing AppMap...
✔ Validating the AppMap agent...
Create AppMaps
Now with AppMap installed, you need to record the application. There are a few ways to do that so that AppMap can see all of the API requests used to populate the OpenAPI specification file.
1. Record a test case
AppMap integrates with many popular testing frameworks, so you can run your tests to interact with all your API endpoints. This sample Ruby application has extensive test coverage, so you can simply run tests, and AppMap will generate one AppMap per test.
$ bundle exec rails test
AppMap minitest recording is enabled because RAILS_ENV is 'test'
Running via Spring preloader in process 42539
Started with run options --seed 58694

  67/67: [=========================================================================================================================================================] 100% Time: 00:00:04, Time: 00:00:04

Finished in 4.21250s
67 tests, 282 assertions, 0 failures, 0 errors, 0 skips
2. Use remote recording
A remote recording is a great way to record your application if you don't have robust test case coverage or want to record a sequence of HTTP requests or other user interactions.
You can remotely record your application by running it locally, in a Docker container, or in a development environment. Since AppMap records everything in a request, including parameters and variables, it is not recommended to record production applications as you may inadvertently record sensitive data.
The first step in recording remotely is to run your application. In my example, I'll run the rails server command:
$ bundle exec rails server
=> Booting Puma
=> Rails 6.0.4.1 application starting in development
=> Run `rails server --help` for more startup options
AppMap remote recording is enabled because RAILS_ENV is 'development'
AppMap requests recording is enabled because RAILS_ENV is 'development'
Puma starting in single mode...
* Puma version: 5.3.2 (ruby 3.0.2-p107) ("Sweetnighter")
*  Min threads: 5
*  Max threads: 5
*  Environment: development
*          PID: 48707
* Listening on http://127.0.0.1:3000
* Listening on http://[::1]:3000
Use Ctrl-C to stop
The output indicates that remote recording is enabled. Next, run the record command on the command line to start the recording process:
$ npx @appland/appmap record remote
✔ Checking if the AppMap agent is available at http://localhost:3000/

   ╭─────────────────────────────────────────────────────────╮
   │                                                         │
   │   AppMap agent is available at http://localhost:3000/   │
   │                                                         │
   ╰─────────────────────────────────────────────────────────╯


? Press enter to start recording
When you are ready to start recording, press Enter, and then interact with your application by clicking around a web UI or issuing API calls to various endpoints. Try to keep recordings focused on a specific interaction to keep the AppMap from getting unnecessarily large.
Complete the recording by pressing Enter again, and your AppMap will open in your browser (or within VS Code or JetBrains if you use those editor extensions):
? Press enter to stop recording
╭────────────────────────────────────────────────────────╮
│ │
│ Recording has finished, with 908856 bytes of data. │
│ │
╰────────────────────────────────────────────────────────╯
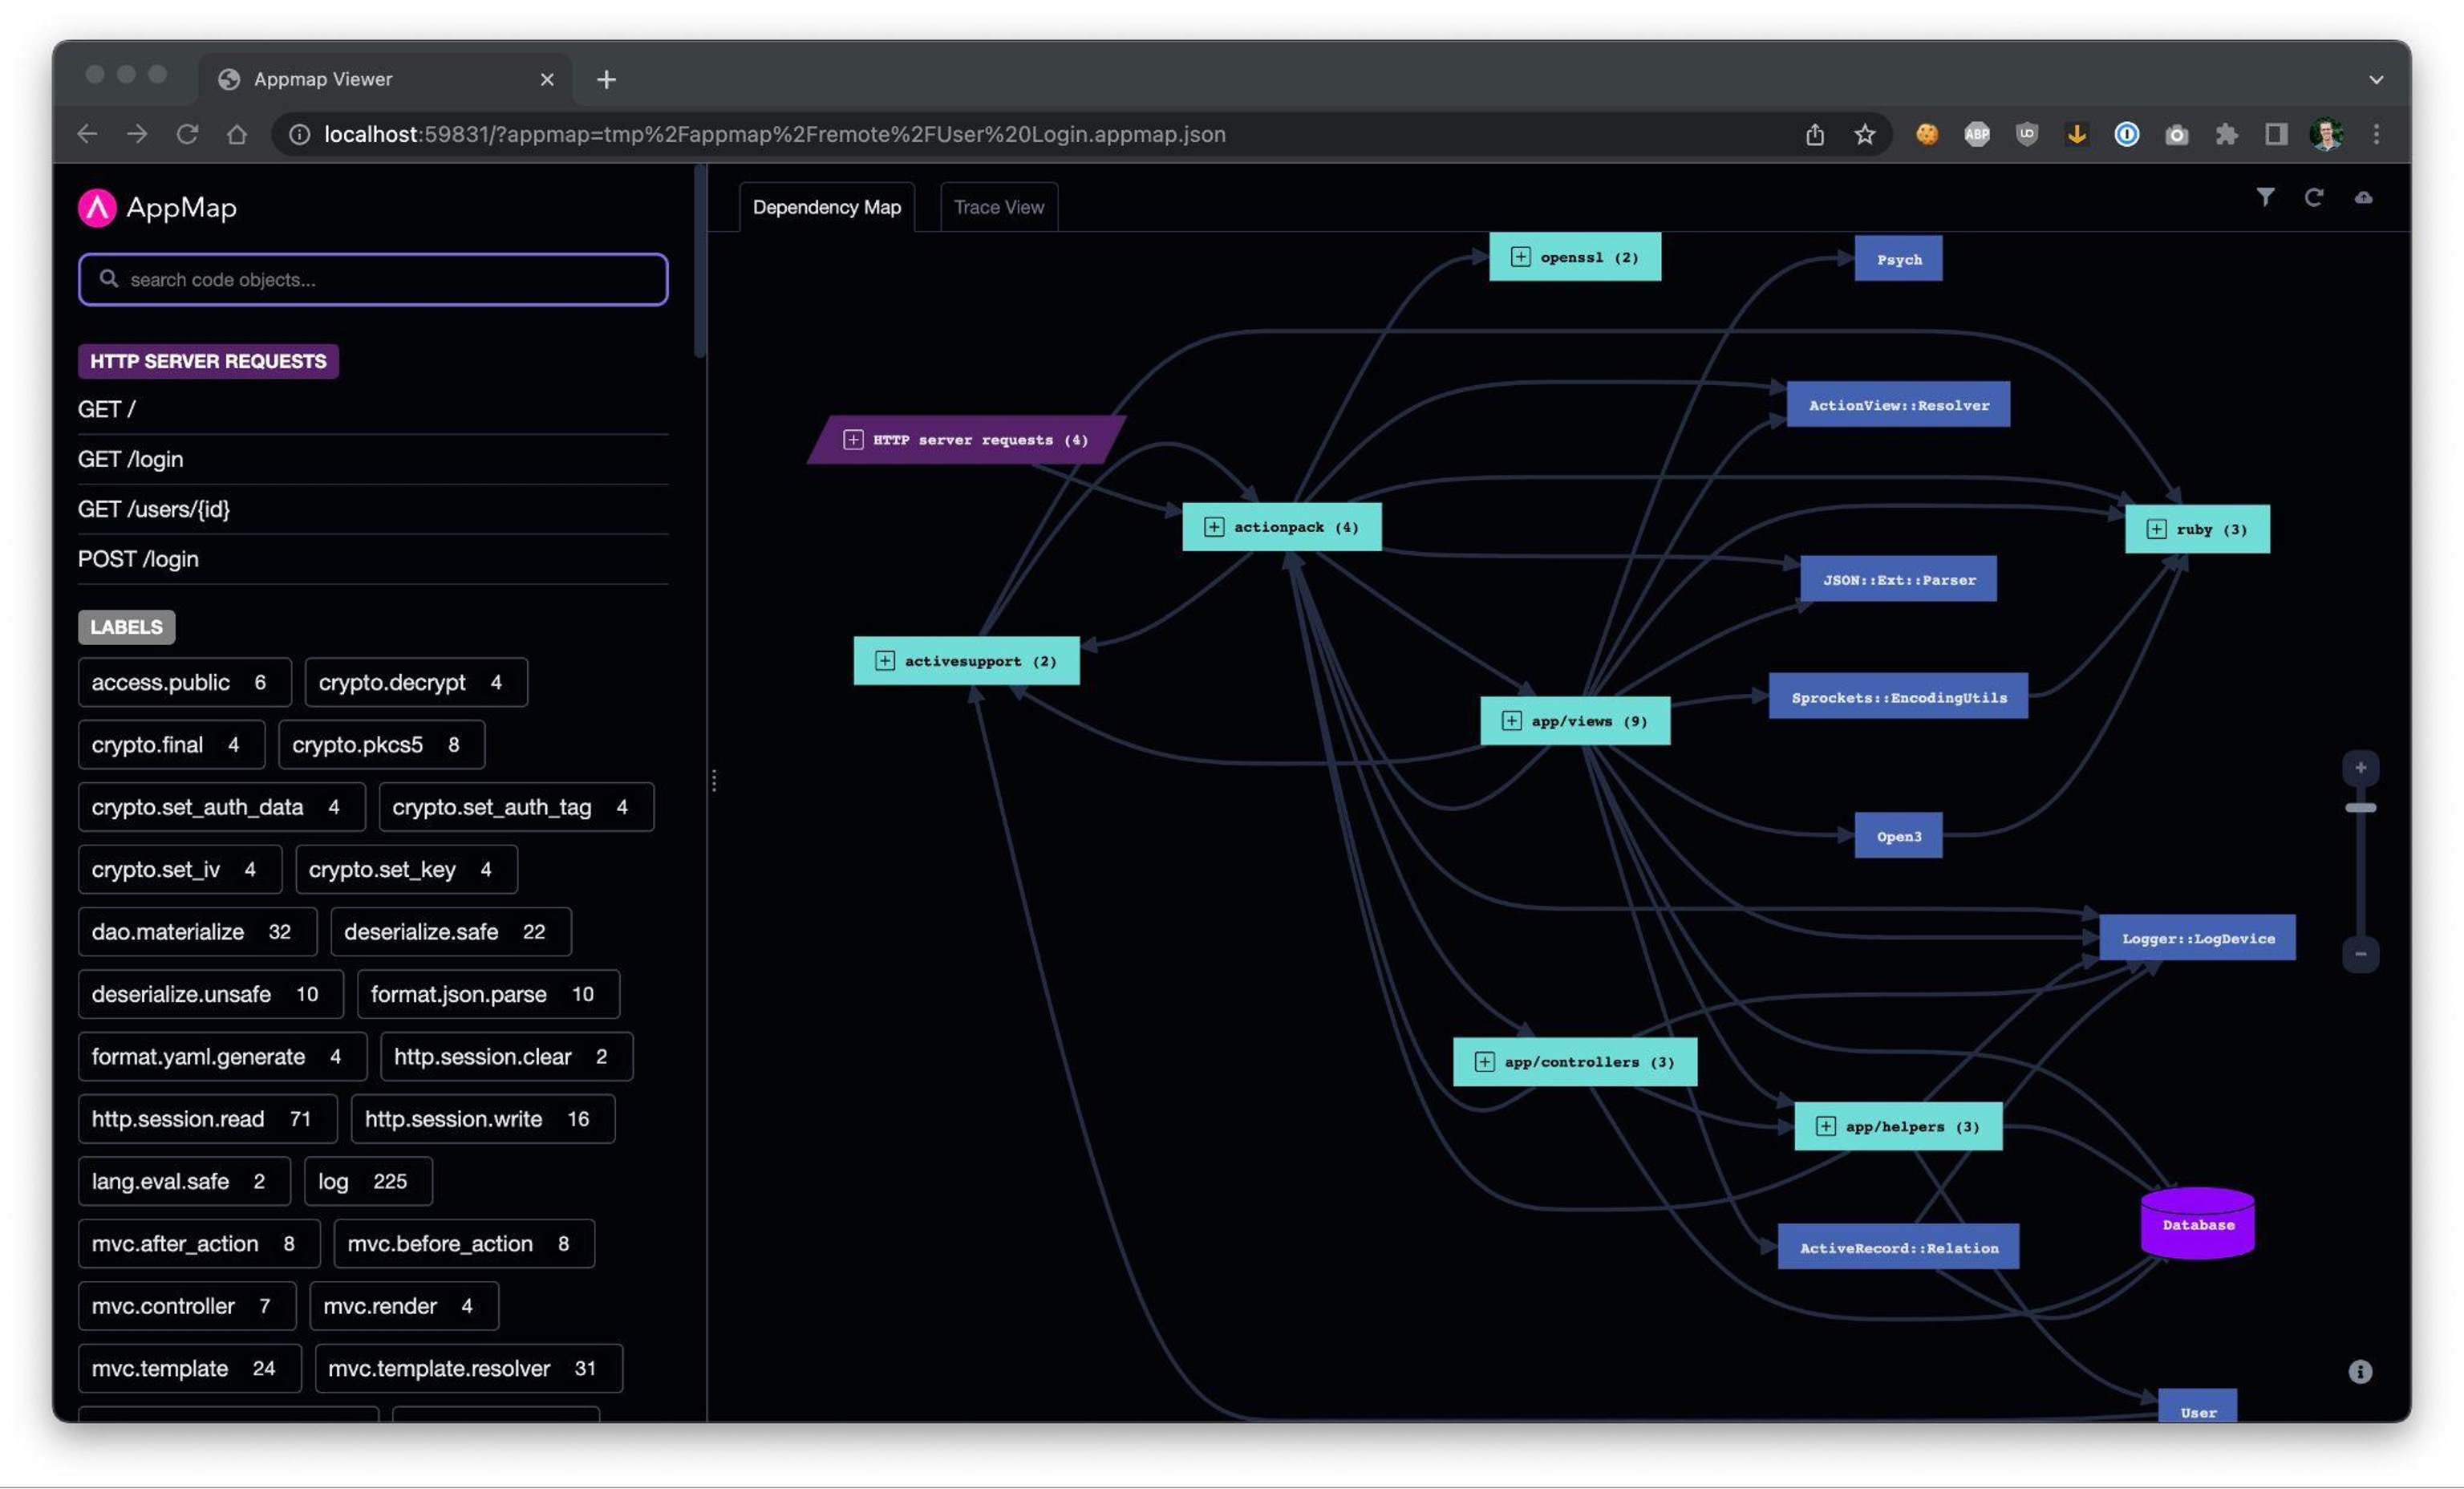
? Choose a name for your AppMap: User Login
✔ Saving recording to User Login.appmap.json in directory tmp/appmap/remote
╭──────────────────╮
│ │
│ AppMap saved │
│ │
╰──────────────────╯
Opening tmp/appmap/remote/User Login.appmap.json
? What would you like to do next: (Use arrow keys)
❯ Reopen tmp/appmap/remote/User Login.appmap.json
Exit
[ Download Event-driven architecture for a hybrid cloud blueprint. ]
3. Request recording
Another way to generate AppMaps is by recording each individual request. This is currently supported for Ruby on Rails applications, with support planned for Python Django applications.
For this method, run your application, and AppMap request recording will be enabled by default and interact with your application. AppMap will generate a single AppMap per request and open each:
$ ls -lt tmp/appmap/requests/ | head
total 6800
drwxr-xr-x  19 dev_user  staff     608 Oct  5 14:22 1664994122_863181_http_localhost_3000_users_1
-rw-r--r--   1 dev_user  staff  478242 Oct  5 14:22 1664994122_863181_http_localhost_3000_users_1.appmap.json
drwxr-xr-x  19 dev_user  staff     608 Oct  5 14:22 1664994122_821723_http_localhost_3000_microposts_295
-rw-r--r--   1 dev_user  staff  125491 Oct  5 14:22 1664994122_821723_http_localhost_3000_microposts_295.appmap.json
drwxr-xr-x  19 dev_user  staff     608 Oct  5 14:22 1664994120_190062_http_localhost_3000_users_1
-rw-r--r--   1 dev_user  staff  473555 Oct  5 14:22 1664994120_190062_http_localhost_3000_users_1.appmap.json
drwxr-xr-x  19 dev_user  staff     608 Oct  5 14:21 1664994118_6177652_http_localhost_3000_users
-rw-r--r--   1 dev_user  staff  316685 Oct  5 14:21 1664994118_6177652_http_localhost_3000_users.appmap.json
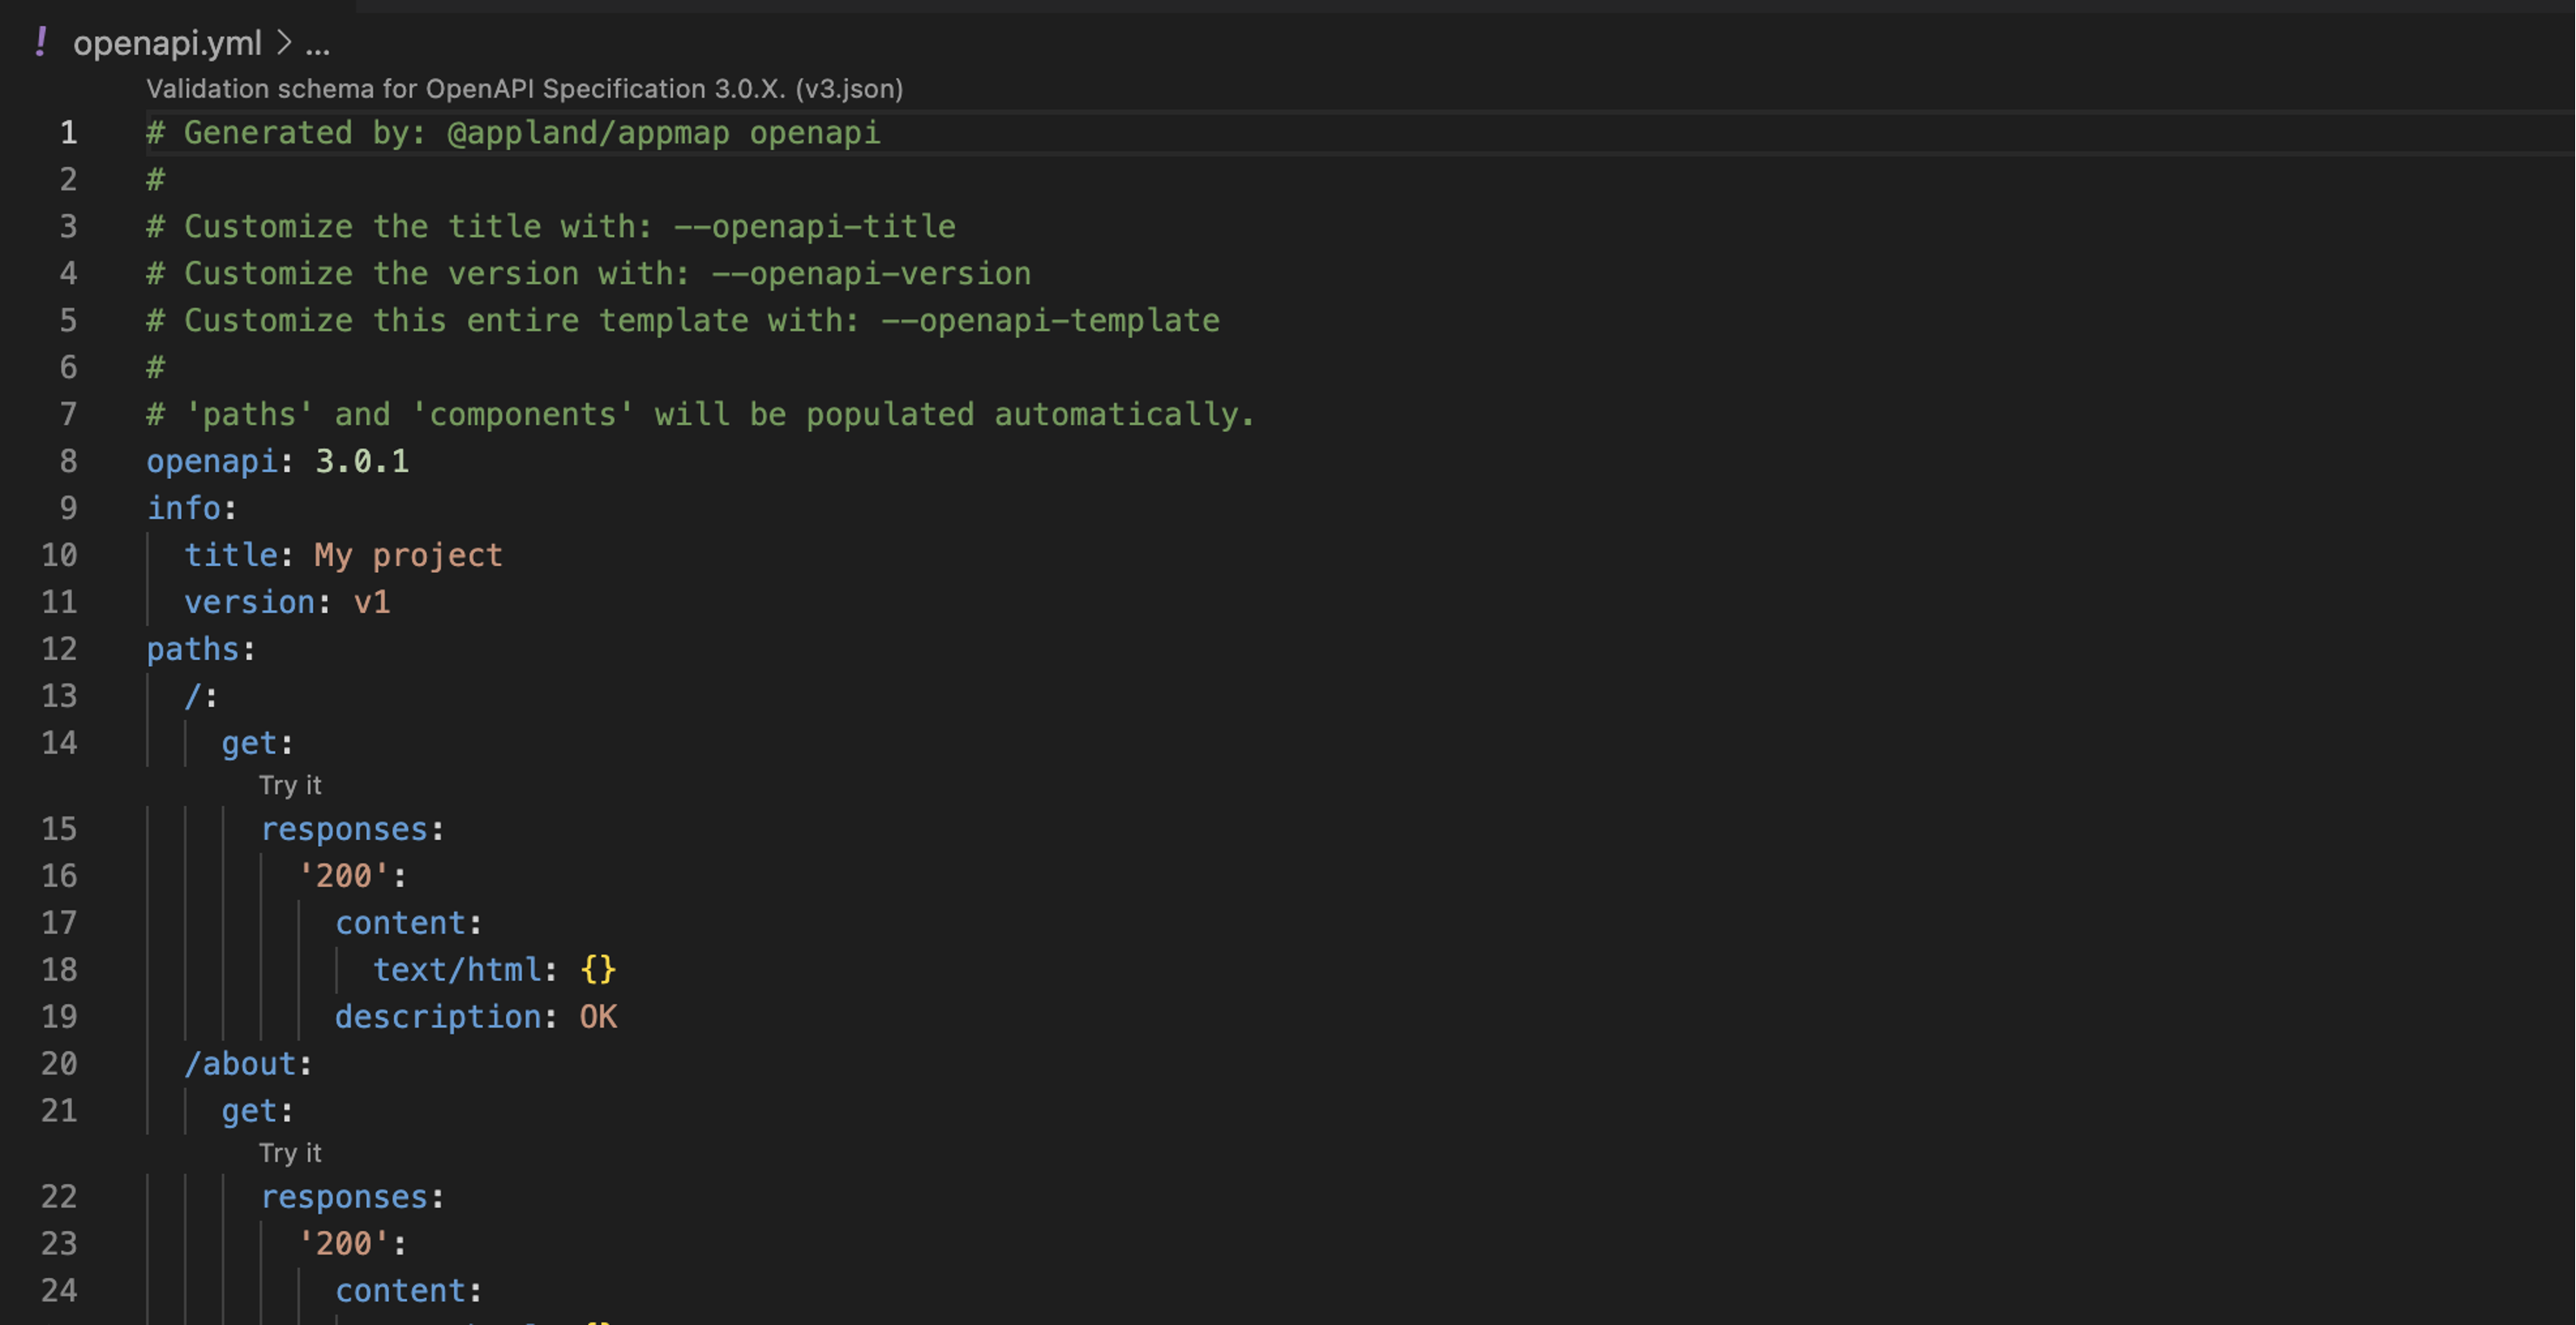
Generate an OpenAPI spec
Once you have AppMaps of your API requests, you can run a single command to output the OpenAPI v3-supported specification file. Use the results with other tools, including Hoppscotch, an open source API development ecosystem, or Postman, another popular commercially available API tool:
npx @appland/appmap openapi --output-file openapi.yml
You can now import this file into Hoppscotch as a new collection by navigating to the Collections button on the right-hand side.

Select the Import/Export icon.
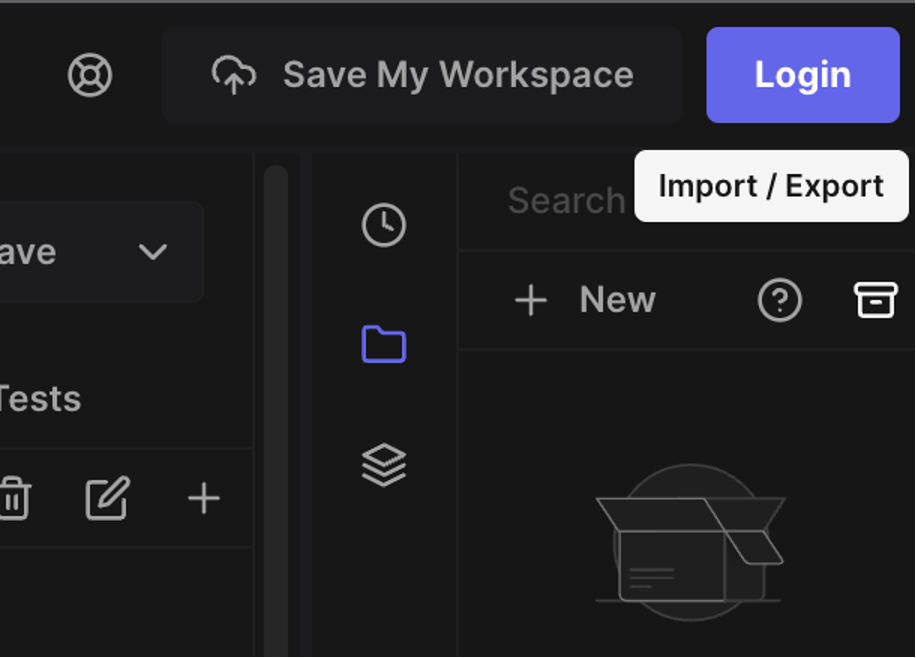
Choose Import from OpenAPI.

Finally, select the OpenAPI file you created in the previous step.

You can use these tools to interact more easily with your APIs, test new or updated features, and export the OpenAPI Specifications to your users, so they know how to interact with your application.
Wrap up
You can learn more about other features of AppMap by reviewing the developer documentation or by joining the developers in the community Slack group.
About the author
Pete is currently the Head of Growth and Community for AppMap, an open source dynamic runtime code analysis tool. Prior to AppMap, Pete spent the last 20 years in product management and technical operations roles at large-scale SaaS infrastructure companies like ChaosSearch, Dyn, Threat Stack, and Sonian. When Pete's not working, he's checking the status of his briskets and ribs using his IoT-powered smoker.
More like this
Red Hat Enterprise Linux CoreOS 10 is coming to Red Hat OpenShift
Why Operational Resilience and Digital Sovereignty Top the CIO Agenda
Do We Want A World Without Technical Debt? | Compiler
Avoiding Failure In Distributed Databases | Code Comments
Browse by channel

Automation
The latest on IT automation for tech, teams, and environments

Artificial intelligence
Updates on the platforms that free customers to run AI workloads anywhere

Open hybrid cloud
Explore how we build a more flexible future with hybrid cloud

Security
The latest on how we reduce risks across environments and technologies

Edge computing
Updates on the platforms that simplify operations at the edge

Infrastructure
The latest on the world’s leading enterprise Linux platform

Applications
Inside our solutions to the toughest application challenges
Virtualization
The future of enterprise virtualization for your workloads on-premise or across clouds