
This article describes how to create Jenkins agent images that can build Open Container Initiative (OCI)-compliant images when run with a rootless user on OpenShift Container Platform (OCP) or OKD. You can extrapolate many of these details and use them with other continuous integration (CI) tools and Kubernetes distributions.
This article shows you how to use OpenShift to create a specific, working example with practical applications. It applies to using Buildah, too.
The biggest driver for implementing image builds this way is to incorporate an image scan into your CI build process while maintaining good security practices within the build pod. Even though image registries typically implement image scans for what's already stored there, best practices dictate that these vulnerabilities be caught early, and, depending on the severity of the vulnerability, prevent anyone from pushing that image to the registry. Regardless, your developers need to be aware of any issues in their dependencies as early as possible, and the ideal time is right when the image is built and collected with the rest of the build logs. Running pods as a rootless user is considered a best practice for maintaining security on your cluster.
About the solution
This article assumes you're familiar with building images and deploying pods on Kubernetes, OpenShift or OKD and its security context model, and using Jenkins for pipeline development.
The solution presented here has the following goals:
- Provide the outline of a practical example for conducting automated, rootless CI image builds on OpenShift.
- Use a standard CI solution most administrators are familiar with.
- Keep the solution flexible and extensible.
- Provide an example image build in a CI process demonstrating where to insert an image scan into the CI process before pushing the image to the image registry.
- Maintain the most restrictive security necessary.
- Provide enough information for developers to adapt the solution to other Kubernetes distributions or CI tools.
I tested this solution with the most recent version of Red Hat OpenShift Local (previously known as CodeReady Containers), based on OpenShift 4.9. You must be running as the cluster administrator to follow this tutorial because it requires adding a custom security context constraints (SCC) resource.
All code documented in this tutorial is available on GitHub. Clone the code with this command:
git clone git@github.com:hippyod-labs/openshift-jenkins-non-root-image-build.gitStep 1: Define the base agent image
First, create an agent image to base all your other agent images on. You can use either Podman or Buildah to create an image, and this article applies equally to both. Begin with this base agent image:
FROM registry.redhat.io/openshift4/ose-jenkins-agent-base

ENV _BUILDAH_STARTED_IN_USERNS="" \
    BUILDAH_ISOLATION=chroot \
    STORAGE_DRIVER=vfs

USER root

RUN adduser -g 0 -u 1001 jenkins && \
    yum -y update && \
    yum install -y --setopt=tsflags=nodocs podman skopeo buildah --exclude container-selinux && \
    yum clean all && \
    chown -R jenkins:0 /home/jenkins && \
    chmod -R 775 /home/jenkins && \
    chmod -R 775 /etc/alternatives && \
    chmod -R 775 /var/lib/alternatives && \
    chmod -R 775 /usr/lib/jvm && \
    chmod -R 775 /usr/bin && \
    chmod 775 /usr/share/man/man1 && \
    mkdir -p /var/lib/origin && \
    chmod 775 /var/lib/origin && \
    chmod u-s /usr/bin/new[gu]idmap && \
    setcap cap_setuid+eip /usr/bin/newuidmap && \
    setcap cap_setgid+eip /usr/bin/newgidmap && \
    rm -f /var/logs/*

USER 1001- The
FROMimage is the base Jenkins agent distributed by OpenShift. - The
ENVstatement makes sure Podman or Buildah starts under no user namespace, chroot isolation, and the storage driver is vfs (virtual). The latter is less critical than other options, but according to the official, rootless Buildah tutorial, it's the only one that works. - A single
RUNstatement is considered best practice when defining Dockerfiles, even if Podman helps reduce the number of layers with the--squashflag. The statement does the following:- Creates a rootless user named
jenkinsto run the pod - Updates the packages currently installed on the image
- Installs Podman, Buildah, and Skopeo
- Cleans up yum after installation
- Loosens the permissions of several directories possibly needed by different build libraries (for instance, Java and R)
- Removes the sticky bit, if set, on
newuidmapandnewgidmap- This is one of the most difficult problems to get around for rootless builds to work inside a container. It isn't known why the bit gets set, but a quick search of "podman buildah newuidmap newgidmap" brings up many examples of permissions issues around these two files causing rootless builds to fail. This is the solution found to most easily and consistently fix this problem.
- Removes unneeded logs from the resulting image
- Creates a rootless user named
- Set the rootless user by user ID (UID). The SCCs you will set later will cause an error when creating the pod if you attempt to use the username because Kubernetes can't tell whether the user has root privileges or not when identified only by name.
Save this file as Dockerfile.base and place it in the directory where you intend to run your agent image builds.
Note that this image is not only used to create specific builder images but can also be used for image promotion using skopeo copy anywhere from a development deployment all the way to downstream testing deployment environments in a full CI/CD process.
[ Get a hands-on introduction to daily life as a developer crafting code on OpenShift in the eBook OpenShift for Developers. ]
Step 2: Define a specific builder agent
Create a file called Dockerfile.python with the contents specified above and place it in the directory where you intend to run your agent image builds:
FROM default-route-openshift-image-registry.apps-crc.testing/non-root-image-builds/non-root-jenkins-agent-base

USER root

RUN yum install -y --setopt=tsflags=nodocs gcc python3-devel python3-setuptools python3-pip python3-wheel && \
    yum clean all && \
    python3 -m pip install --upgrade pip && \
    python3 -m pip install bzt virtualenv && \
    rm -f /var/logs/*

USER 1001- The
FROMstatement refers to the base image you just created for the specific builder agents and pushed to the internal OCP image registry. The URL referenced is the image registry URL from my installation of Red Hat OpenShift Local, so you'll need to adjust it to your cluster's identity. - The
RUNstatement installs the basics for a Python builder agent for your example:- Python and support tools for testing the Python application are installed.
- Unneeded logs from the resulting image are removed.
- Set the rootless user by UID.
Step 3: Build and push the agent images
This tutorial aims to test rootless Podman image builds on OpenShift with Jenkins. In case you're using a personal machine that doesn't have access to Red Hat subscriptions, I'll use OpenShift's s2i binary builds to bootstrap the Jenkins agent builds.
The following shell script creates the OCP agent images in the new OCP project non-root-image-builds:
#!/usr/bin/bash
# execute script in this directory
cd "$(dirname ${0})"

# create a new project for testing
oc new-project non-root-image-builds

# create the builds for each agent image
oc new-build --name non-root-jenkins-agent-base  --binary=true --strategy=docker
oc new-build --name non-root-jenkins-agent-python --binary=true --strategy=docker

# build the base jenkins agent
cp Dockerfile.base Dockerfile
oc start-build non-root-jenkins-agent-base --from-file=/tmp/Dockerfile --wait --follow
rm -f /tmp/Dockerfile

# build the python jenkins agent
cp Dockerfile.python Dockerfile
oc start-build non-root-jenkins-agent-python --from-file=/tmp/Dockerfile --wait --follow
rm -f /tmp/Dockerfile- Save this file as
agent-image-build.sh - Make it executable with
chmod +x agent-image-build.sh - Run the script with
./agent-image-build.sh
When the script completes, you're in the project non-root-image-builds that has two ImageStreams pointing to images in the internal registry for your rootless Jenkins agents:
$oc project
Using project "non-root-image-builds" on server "https://api.crc.testing:6443".

$oc get is --no-headers -o custom-columns=:.metadata.name
non-root-jenkins-agent-base
non-root-jenkins-agent-python
Step 4: Deploy Jenkins
Run this command to deploy Jenkins:
$ oc new-app jenkins-ephemeralWait for Jenkins to finish deploying:
$ watch oc get podsNote that you should be in the project non-root-image-builds. Jenkins should start and be ready within a moment or two.
[ Wondering about Red Hat OpenShift and Kubernetes ... what's the difference? Download the eBook. ]
Step 5: Create an SCC for the Jenkins ServiceAccount
There are three default SCCs in OpenShift that you should be aware of: restricted, nonroot, and anyuid. You can see them, as well as many others, by running:
$ oc get sccThe restricted SCC is the default assigned to running pods, and it sets a pseudo-random UID user to run in the container. Attempting to run the container with a named user or root causes the pod to fail. To see this for yourself, run the following to rsh into the jenkins pod and check the user:
$ oc get pods
NAME               READY   STATUS      RESTARTS   AGE
jenkins-1-8r8hz    1/1     Running     0          4m1s
jenkins-1-deploy   0/1     Completed   0          4m4s

$ oc rsh jenkins-1-8r8hz
sh-4.4$ id
uid=1000670000(1000670000) gid=0(root) groups=0(root),1000670000
sh-4.4$ exit
exit
In the above, Jenkins runs in its pod under UID 1000670000. Execute the following command and look for the resulting annotation, confirming the jenkins pod started under the default restricted SCC:
$ oc edit pod jenkins-1-8r8hzLook for the following annotation in the pod:
openshift.io/scc: restrictedExit the editor without changing anything.
The annotation above is in every pod deployed on OpenShift and informs you what SCC the pod was started on. It is inherited from the SCC of the ServiceAccount that created the pod, usually the default ServiceAccount (oc get sa shows the default ServiceAccount for the OCP project).
Handle SETUID and SETGID
The other two SCC to address are nonroot and anyuid. The nonroot constraint allows a pod to run as a particular rootless UID, and anyuid is even more permissive, allowing your pod to run with root as the user. The anyuid is too permissive, in that you shouldn't need to expose a security hole by running as root in the build container. However, nonroot by itself is too restrictive. This is because it requires dropping the SETUID and SETGID Linux capabilities (use oc edit scc anyuid or nonroot for details). Buildah and Podman need more than a single user namespace to run properly.
For that reason, you must create a new SCC named nonroot-builder.
Create and assign the nonroot-builder SCC to the Jenkins ServiceAccount
Create the file nonroot-builder.yml in your work directory, and copy this YAML into it:
allowHostPorts: false
allowPrivilegeEscalation: true
allowPrivilegedContainer: false
allowedCapabilities: null
apiVersion: security.openshift.io/v1
defaultAddCapabilities: null
fsGroup:
  type: RunAsAny
groups: []
kind: SecurityContextConstraints
metadata:
  annotations:
    kubernetes.io/description: nonroot-builder provides all features of the nonroot
      SCC but allows users to run with any non-root UID and multiple namespaces for
      nonroot building of images with podman and buildah
  name: nonroot-builder
priority: 5
readOnlyRootFilesystem: false
requiredDropCapabilities:
- KILL
- MKNOD
runAsUser:
  type: MustRunAs
  uid: 1001
seLinuxContext:
  type: MustRunAs
supplementalGroups:
  type: RunAsAny
users: []
volumes:
- configMap
- downwardAPI
- emptyDir
- persistentVolumeClaim
- projected
- secret
Save the file, and then apply it and add the policy:
$ oc apply -f nonroot-builder-scc.yml

$ oc adm policy add-scc-to-user nonroot-builder -z jenkins
Jenkins agents are launched using the jenkins ServiceAccount, so now all Jenkins agents have the proper permissions. Note that this SCC prohibits running as root and only runs as the specific UID you built the agent with (runAsUser.type: MustRunAs, runAsUser.uid: 1001). This allows only as much privilege as needed to do a nonroot user build of an image on OCP while still prohibiting running as root. Also, note the priority of 5. This is necessary so that this SCC gets priority over restricted ones when the jenkins ServiceAccount creates the agent pod.
Tie it all together with agents
If you look at the base Jenkins agent Dockerfile (Dockerfile.base), there are three lines to note, some of which I have already pointed to:
adduser -g 0 -u 1001 jenkinsThis adds the user jenkins (no relation to the ServiceAccount) with UID 1001.
Next, note the following two lines:
chmod u-s /usr/bin/newuidmap

chmod u-s /usr/bin/newgidmap
Both of these executables are needed to use multiple user namespaces. For some reason, the sticky bit can be set in some images. These lines ensure it isn't set and the Jenkins agent user has the proper permissions to run them. If you see an error for newgidmap similar to this in your image builds:
newuidmap: write to uid_map failed: Operation not permittedodds are good that is the culprit if all other permissions look correct.
Last:
USER 1001is for OpenShift to confirm that the user running in the pod isn't root, as a UID (and not a username) is required.
All that's left now is to prove that you can successfully build application images using your new rootless Jenkins agents.
Step 6: Create a Jenkins pipeline that uses the rootless agent image
Copy and paste the output of the following command into your browser, and log in with your OCP credentials:
$ echo https://$(oc get routes jenkins \
--no-headers -o custom-columns=:.spec.host)
If you're running in Red Hat OpenShift Local, you can get your kubeadmin credentials with:
$ crc console --credentialsJenkins users don't need to be cluster administrators, but for the purposes of this tutorial, I assume you're running a local instance of your platform.
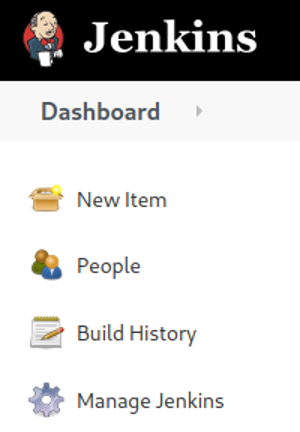
- Once in Jenkins, select the New Item menu item on the upper-left of the Jenkins browser window:
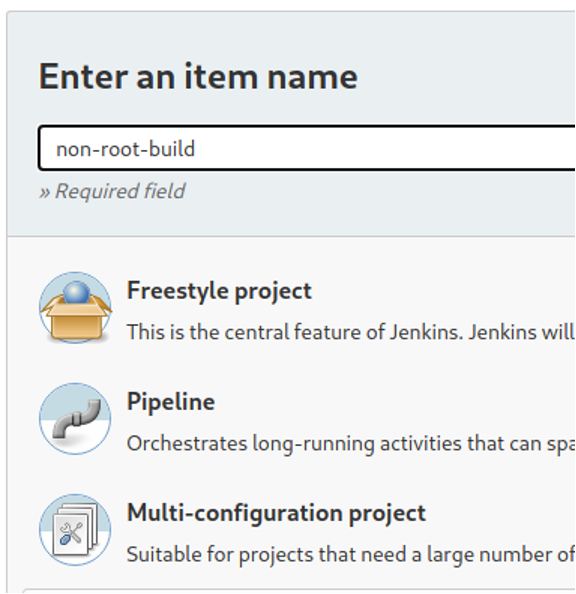
- Enter the item name non-root-build, click on Pipeline from the list below, and click on the OK button at the bottom of the screen:
At the bottom of the pipeline configuration page, copy and paste the following code into the Groovy sandbox:
def REGISTRY_URL='default-route-openshift-image-registry.apps-crc.testing'

podTemplate([
    label: 'non-root-jenkins-agent-python',
    cloud: 'openshift',
    serviceAccount: 'jenkins',
    podRetention: onFailure(),
    idleMinutes: '30',
    containers: [
        containerTemplate(
            name: 'jnlp',
            image: "${REGISTRY_URL}/non-root-image-builds/non-root-jenkins-agent-python:latest",
            alwaysPullImage: true,
            args: '${computer.jnlpmac} ${computer.name}'
        )
    ]
]) {
    node('non-root-jenkins-agent-python') {
        git url: 'https://github.com/elcicd/Test-CICD1.git',
            branch: 'development'

        echo ''
        echo '========================='
        echo ''
        echo 'Compiling, testing, and scanning of source would run here'
        echo ''
        echo '========================='
        echo ''

        echo '========== START podman login and build ==============='
        sh """
            podman login --tls-verify=false -u jenkins -p \$(oc whoami -t) ${REGISTRY_URL}

            podman build --tls-verify=false --squash -t ${REGISTRY_URL}/non-root-image-builds/test-cicd1 -f ./Dockerfile
        """
        echo '========== END podman login and build ==============='

        echo ''
        echo '========================='
        echo ''
        echo 'Image scan would run here'
        echo ''
        echo '========================='
        echo ''

        echo '========== START podman push and deploy image from registry; verify USER id is non-root 1001 ==============='
        sh """
            podman push --tls-verify=false ${REGISTRY_URL}/non-root-image-builds/test-cicd1:latest

            oc new-app --image='${REGISTRY_URL}/non-root-image-builds/test-cicd1'

            id
        """
        echo '========== END podman push and deploy image from registry; verify USER id is non-root 1001 ==============='
    }
}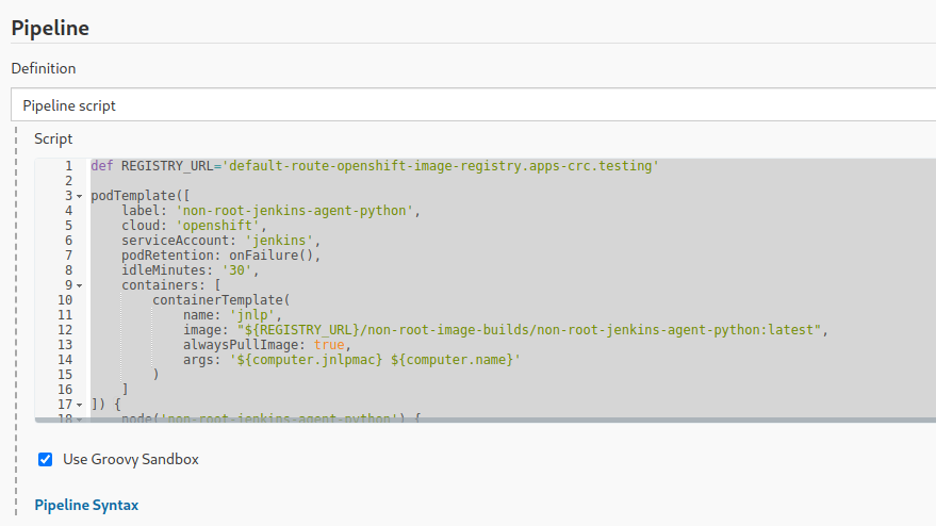
The pipeline builds Test-CICD1, a test project located on GitHub for an unrelated project that has a very simple Python application that repeatedly logs some basic info. Note that the
REGISTRY_URLvalue at the top of theJenkinsfileassumes the internal cluster registry for Red Hat OpenShift Local. It also assumes both the agents and your build image will be stored there, so adjust as necessary.- Select the Save button.
Step 7: Prove it
Now it's time to run the Jenkins pipeline to build and deploy your sample application with Jenkins.
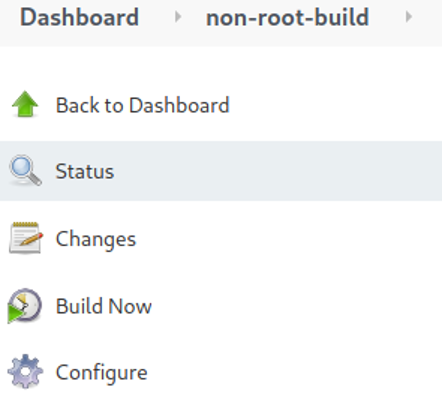
- Click on the Build Now menu item to run the pipeline:
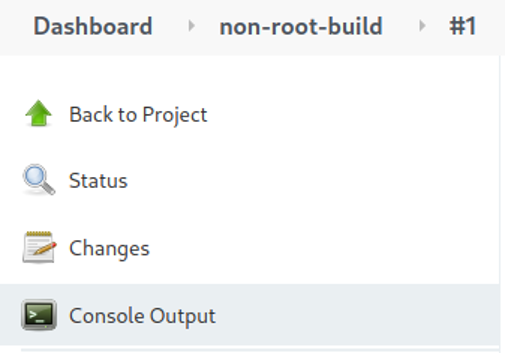
- When the build number appears, click on it, and then click on the Console Output menu item to follow the pipeline run:
The pipeline should only take a minute or so to run:
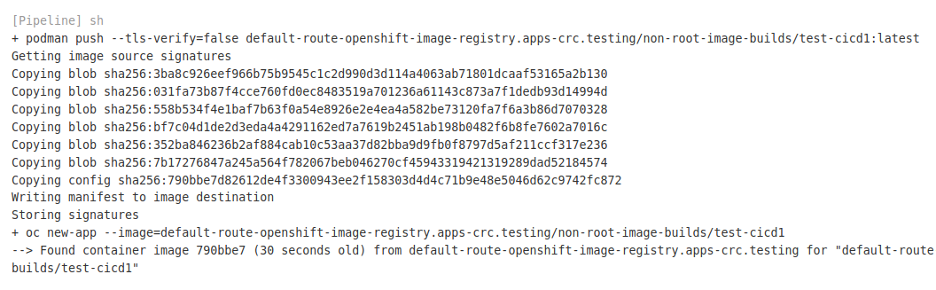
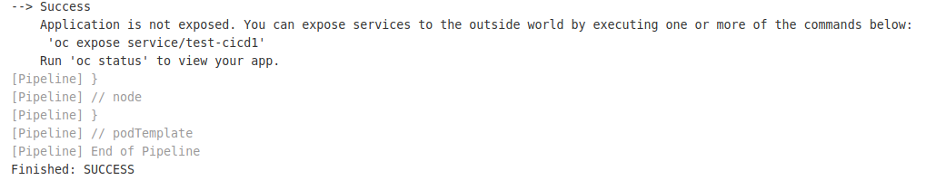
In the terminal, run
watch oc get podsif you want to watch the test-cicd1 pod come up.- Verify that the build and deployment was a success by listing the pods to see test-cicd1 pod running and run
oc logsto view the logs:
$ oc get pods --no-headers -o custom-columns=:.metadata.name
jenkins-1-deploy
jenkins-1-jjq8w
non-root-jenkins-agent-base-1-build
non-root-jenkins-agent-python-1-build
test-cicd1-7c6fd77c96-44hwc


$ oc logs test-cicd1-7c6fd77c96-44hwc --tail=10
cgroup value : None
topicname value : None
hostname : test-cicd1-7c6fd77c96-44hwc
cgroup value : None
topicname value : None
Step 8: Clean up
For cleanup, you may delete the non-root-image-builds OCP project and nonroot-builder SCC when done:
$ oc delete project non-root-image-builds

$ oc delete -f nonroot-builder-scc.yml
Success
It requires some configuration, but a rootless user can use Jenkins to create OCI-compliant images. With all the jargon and specialized terminology around containers, it can be easy to forget that containers are Linux. They're flexible and customizable, and they're at their best when you make them work for you.
About the author
I work for Red Hat services as a consultant, I specialize in application deployments and CI/CD on OpenShift, and I run my own OSS project, el-CICD, which is a complete CI/CD commercial off-the-shelf (COTS) solution for the OKD/OpenShift Container Platform. I'm a veteran of more than a few startups, and I've been a software developer/architect, mainly in Java, for almost 30 years now.
More like this
Can't patch fast enough? Zero trust as a last line of defense
What's new with image builder for Red Hat Enterprise Linux 10.2 and 9.8
The Containers_Derby | Command Line Heroes
Can Kubernetes Help People Find Love? | Compiler
Browse by channel

Automation
The latest on IT automation for tech, teams, and environments

Artificial intelligence
Updates on the platforms that free customers to run AI workloads anywhere

Open hybrid cloud
Explore how we build a more flexible future with hybrid cloud

Security
The latest on how we reduce risks across environments and technologies

Edge computing
Updates on the platforms that simplify operations at the edge

Infrastructure
The latest on the world’s leading enterprise Linux platform

Applications
Inside our solutions to the toughest application challenges
Virtualization
The future of enterprise virtualization for your workloads on-premise or across clouds