
[Want to try out Red Hat Enterprise Linux? Download it now for free.]
Depending on how long you've used Linux, you know that installation is easy but it hasn't always been. Remember the first thing you did right after installing? If you said, "Recompile the kernel," you're correct. It was a necessary part of the installation. Then, if you wanted a graphical user interface (GUI), you'd have to edit the XF86Config file and spend at least an hour tweaking video. Linux has come a long way since those dark days, but we're not quite to a forehead install yet. (A forehead install is one where if you fell asleep and your forehead hit the keyboard, the installation would begin, proceed, and finish without further interaction.) There are a few things you still need to know to optimize your installation.
One of those things is your filesystem configuration. How large do you want your base filesystem to be? How many partitions do you want? Do you want separate mount points for certain directories? Are you going to configure a swap space? Do you want to use LVM vs. a standard filesystem? Others are static vs. dynamic IP address, base environment, environment add-ons, and security policies.
Note: This article covers Red Hat Enterprise Linux (RHEL) 8.
Installing Red Hat Enterprise Linux 8
Start by downloading the latest RHEL 8 ISO from the customer portal or from Red Hat Developer, then begin the installation and follow along with the screenshots to explore your options.
As soon as you boot to the ISO, USB, or DVD containing RHEL 8, you'll see the following screen:
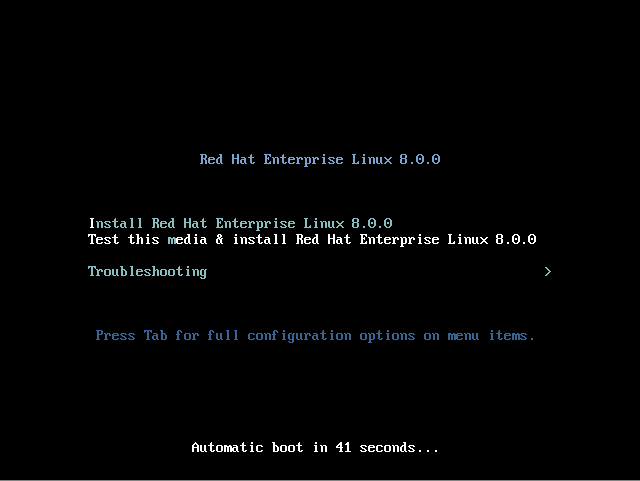
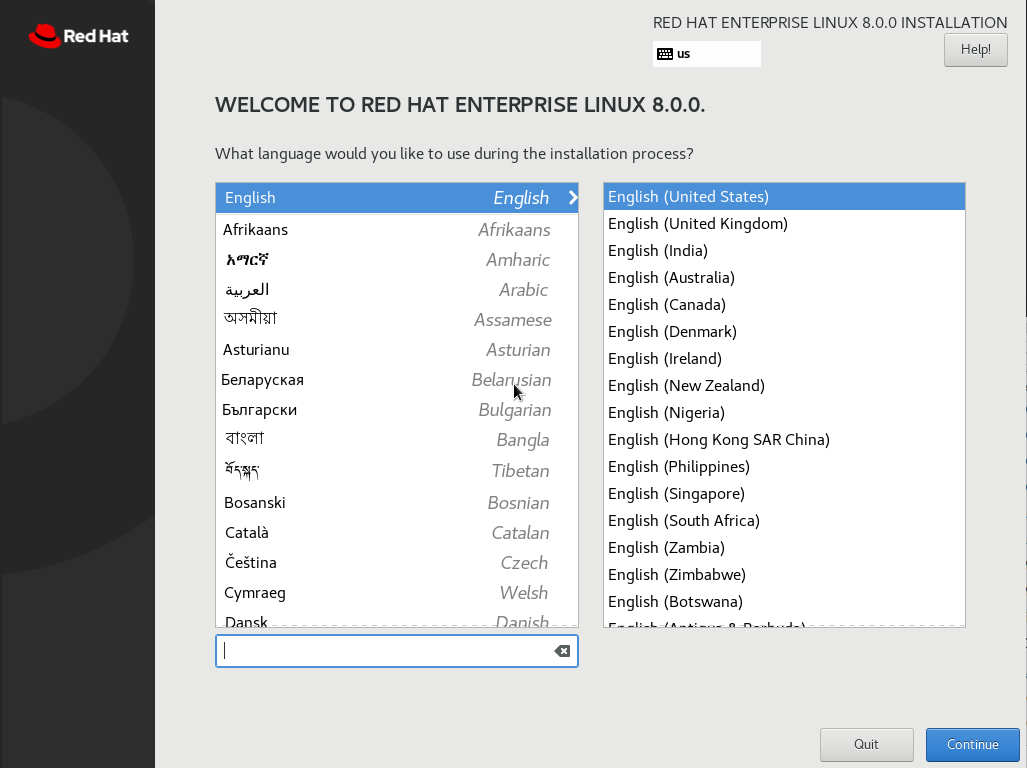
Select Install Red Hat Enterprise Linux 8.0.0 and press Enter. On the next screen, select your language and click Continue:
On the Installation Summary screen (below), you have your system customization options:
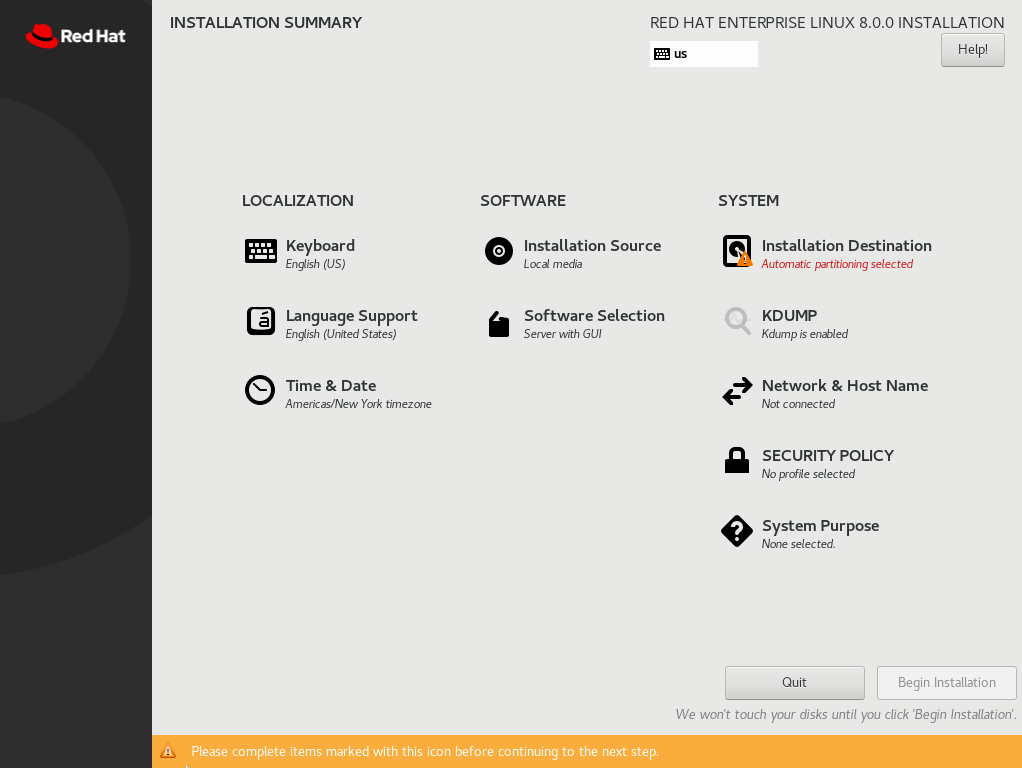
This screen gives you the opportunity to change any or all of the options shown. At a minimum, I suggest that you change the timezone to the one that matches your system's location.
Notice that the default for Software Selection is Server with a GUI, so you'll need to change that to Server, Workstation, Virtualization host, or Minimal installation. My standard choice for RHEL is Server—for CentOS, I choose a minimal install and then customize with individual packages later.
Note: I don't install a GUI on servers because the graphical interface and all of its components are not necessarily something I want on a server system. They take up a lot of space and introduce potential vulnerabilities associated with the extra software.
What you select in the right-hand window depends on your needs. I suggest that you install everything that you want now rather than waiting until the system is installed and online. The reason for this is that you can take a snapshot of your base installed system as a reference point before installing more packages for disaster recovery purposes. Typically, I select Hardware Monitoring Tools and Performance Tools as a baseline system. I prefer not to install some of the other tools here because I might not want all of the included tools and their dependencies on my system. Make all of your selections and then click the Done button in the upper left of the screen to complete this stage.
The next two screenshots show you all available options in this section:


Back on the Installation Summary image, the next setting to change is on the Installation Destination page:
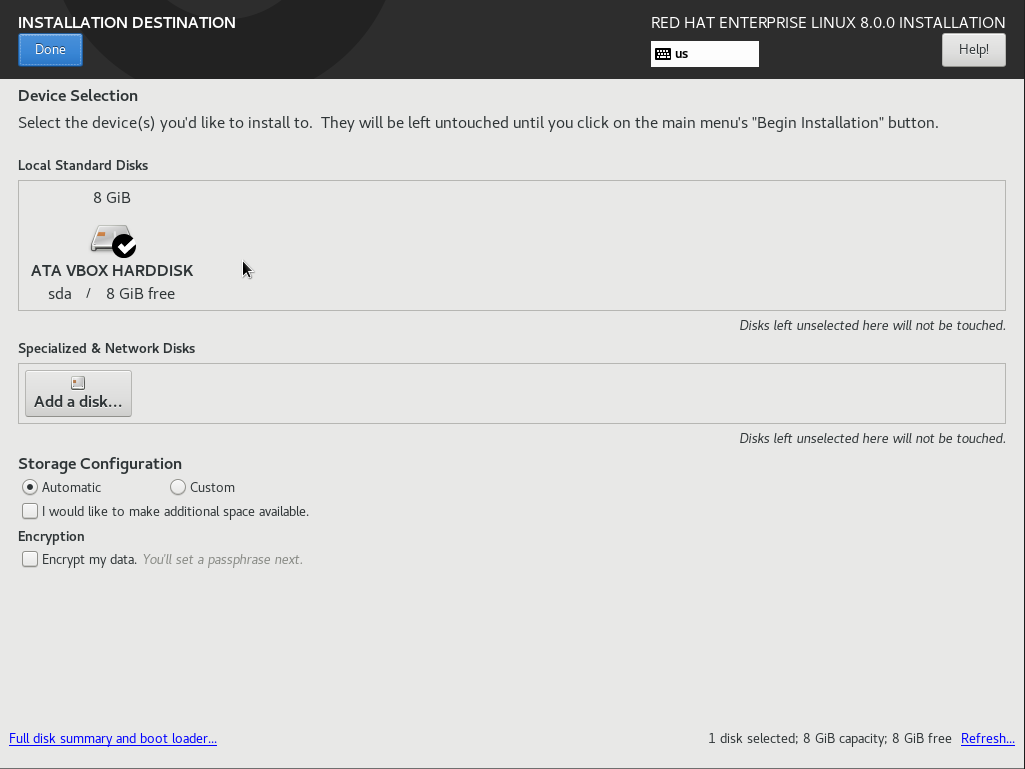
I'm installing this system into a VirtualBox virtual machine (VM) so the disk identification is 8GB ATA VBOX HARDDISK.
Automatic is the default choice for Storage Configuration. You can use that setting, but I suggest selecting Custom so that you can make your own layout and mounting choices, so select Custom and any other choices you like, and then click Done to proceed to the Manual Partitioning page:

For a server, I strongly suggest using LVM (Logical Volume Management) so that you have the most control over your storage. LVM is an enterprise-grade partitioning and storage management solution that allows you to dynamically resize partitions. LVM also lets you name your partitions with meaningful names like data, logs, database, etc. Other advantages include striping, mirroring, and snapshotting.
The next partitioning screen allows you to create filesystems:

On this screen, click the (+) to create a new mount point, assign a size in MB, select a filesystem type (BIOS Boot, ext2, ext3, ext4, swap, vfat, or xfs), and select your volume group. You can also optionally provide a label for the filesystem and choose to encrypt the filesystem.
I suggest using XFS because it has enterprise-level features such as journaling, which facilitates rapid crash recovery. Create all partitions here and click Done when complete. When you select Done, you're presented with a Summary of Changes screen that you can either accept or click to return to the partitioning screen for corrections and additions:

Once you accept the changes, you're returned to the Installation Summary page. It's time to configure your network and hostname:
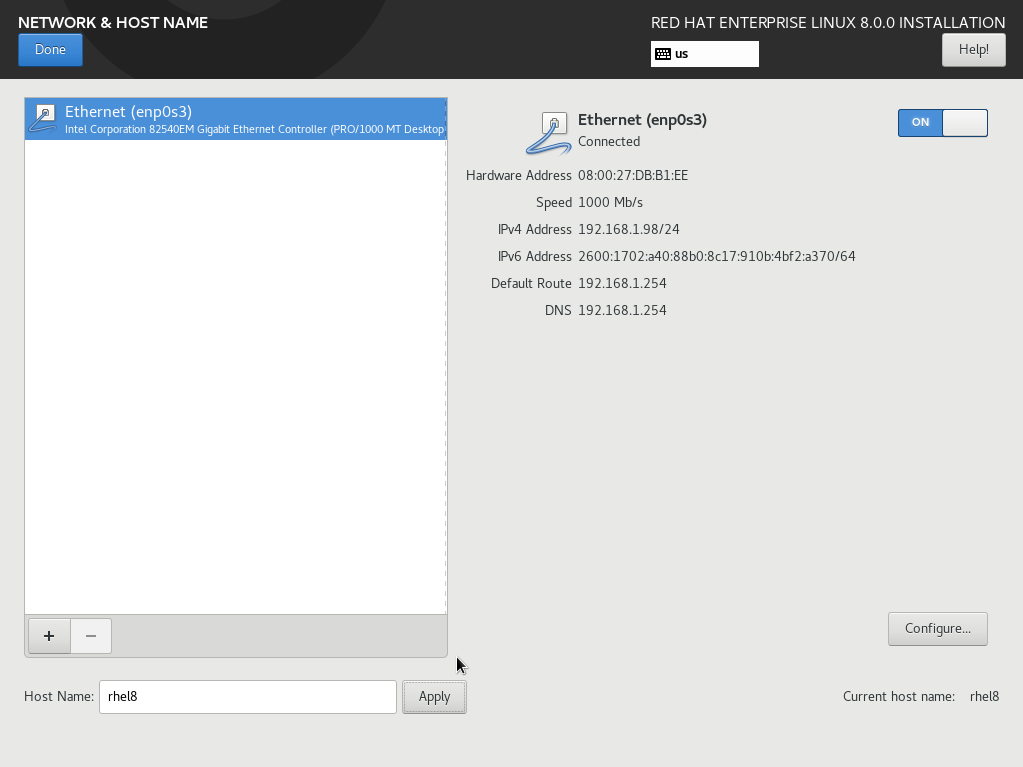
Turn on all of your wired Ethernet ports and give them static IP addresses (Servers) using the Configure button. Provide your system with a hostname followed by your full local domain name. Click Done when finished.
When you return to the Installation Summary page, you can now click Begin Installation, or you can specify your system's purpose and optionally install a higher level of security using the Security Policy option. The Security Policy page allows you to select PCI-DSS security integration or OSPP configuration controls. Click Done when complete.
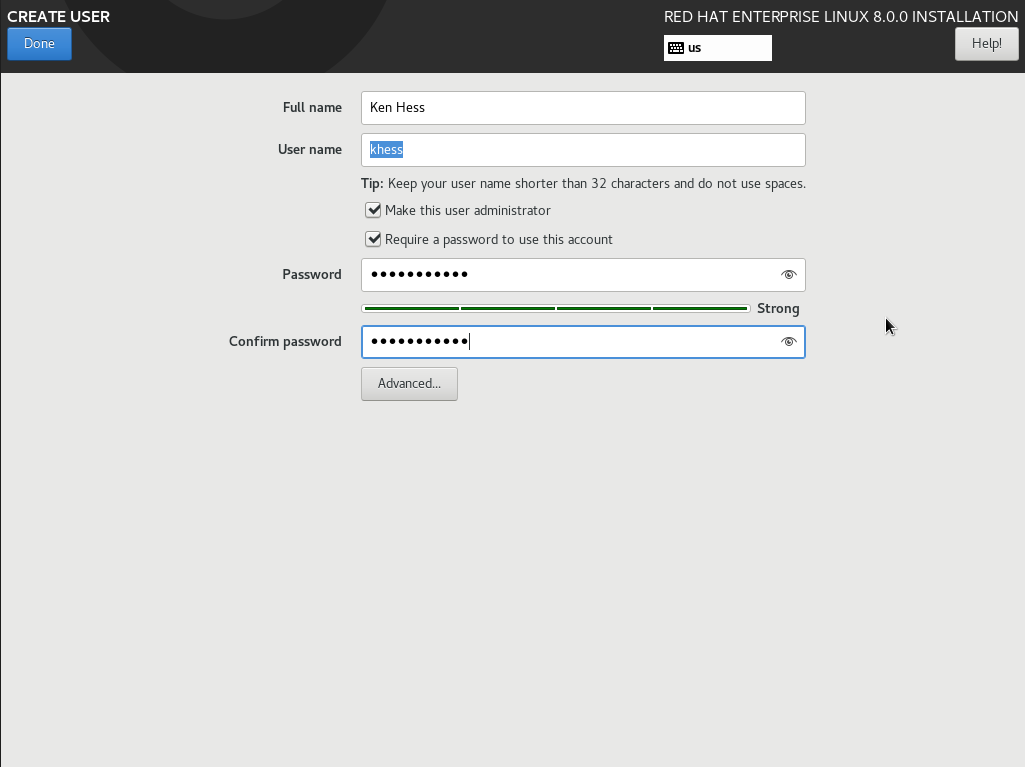
Once you select Begin Installation, you'll notice that the root user's password needs to be set. You can, and should, configure a regular user account on the system, even if you remove it later. The root user can only log in via the console. To log remotely into a new system, you'll need a user account set up as an administrator that can issue the sudo command or su to root:
Updating your new system
After installation is complete, you're prompted to reboot the system. Once that's finished, you can log in via the console, or across the network using the account you set up during installation. The first thing you need to do immediately after is to update the system. The yum command is the traditional method of updating, which is now a symlink to the dnf command.
To update, you'll need to register your system with Red Hat and then issue the update command:
$ sudo yum -y update
This final step is very important: You need the latest security patches and updates so that your new network-connected system is not vulnerable to exploits due to outdated software. Fortunately, SELinux, IPTables, and firewalld are all in place to help protect you upon first boot. The type of system, software, and security you select during installation is largely dependent on the system's purpose, line of business, and location within your network. Always use the most conservative settings for any installation to minimize possible attack vectors.
With this task complete, you can make your base image—if desired—and begin the rest of the configuration.
About the author
Ken has used Red Hat Linux since 1996 and has written ebooks, whitepapers, actual books, thousands of exam review questions, and hundreds of articles on open source and other topics. Ken also has 20+ years of experience as an enterprise sysadmin with Unix, Linux, Windows, and Virtualization.
Follow him on Twitter: @kenhess for a continuous feed of Sysadmin topics, film, and random rants.
In the evening after Ken replaces his red hat with his foil hat, he writes and makes films with varying degrees of success and acceptance. He is an award-winning filmmaker who constantly tries to convince everyone of his Renaissance Man status, also with varying degrees of success and acceptance.
More like this
Beyond the blind spots: Defeating frontier AI model threats in your application development process
Achieve high scalability using Red Hat Satellite Capsule Server
Container Roundup | Compiler
Untangling Networks | Compiler
Browse by channel

Automation
The latest on IT automation for tech, teams, and environments

Artificial intelligence
Updates on the platforms that free customers to run AI workloads anywhere

Open hybrid cloud
Explore how we build a more flexible future with hybrid cloud

Security
The latest on how we reduce risks across environments and technologies

Edge computing
Updates on the platforms that simplify operations at the edge

Infrastructure
The latest on the world’s leading enterprise Linux platform

Applications
Inside our solutions to the toughest application challenges
Virtualization
The future of enterprise virtualization for your workloads on-premise or across clouds